
Prompt Panel
Overview
The prompt panel facilitates authoring prompts without reliance on code.
Prompts can be built with a variety of dynamic content:
- Completions to prompts that executed earlier in the flow
- Conversation fields, session fields & config values
- Conversation history
- Formatted search results for RAG
- Multiple ChatML Messages when using a ChatCompletion style LLM
Furthermore, the Prompt Editor supports the concept of Library content, which allows you to create reusable snippets of prompt content that you can use across multiple prompts.
Opening the Editor
The prompt editor is opened by clicking the brain icon in the top-level navigation:

Note that the icon for the Prompt Editor matches the icon used by Prompt AI behaviors in the flow.
Managing Prompts
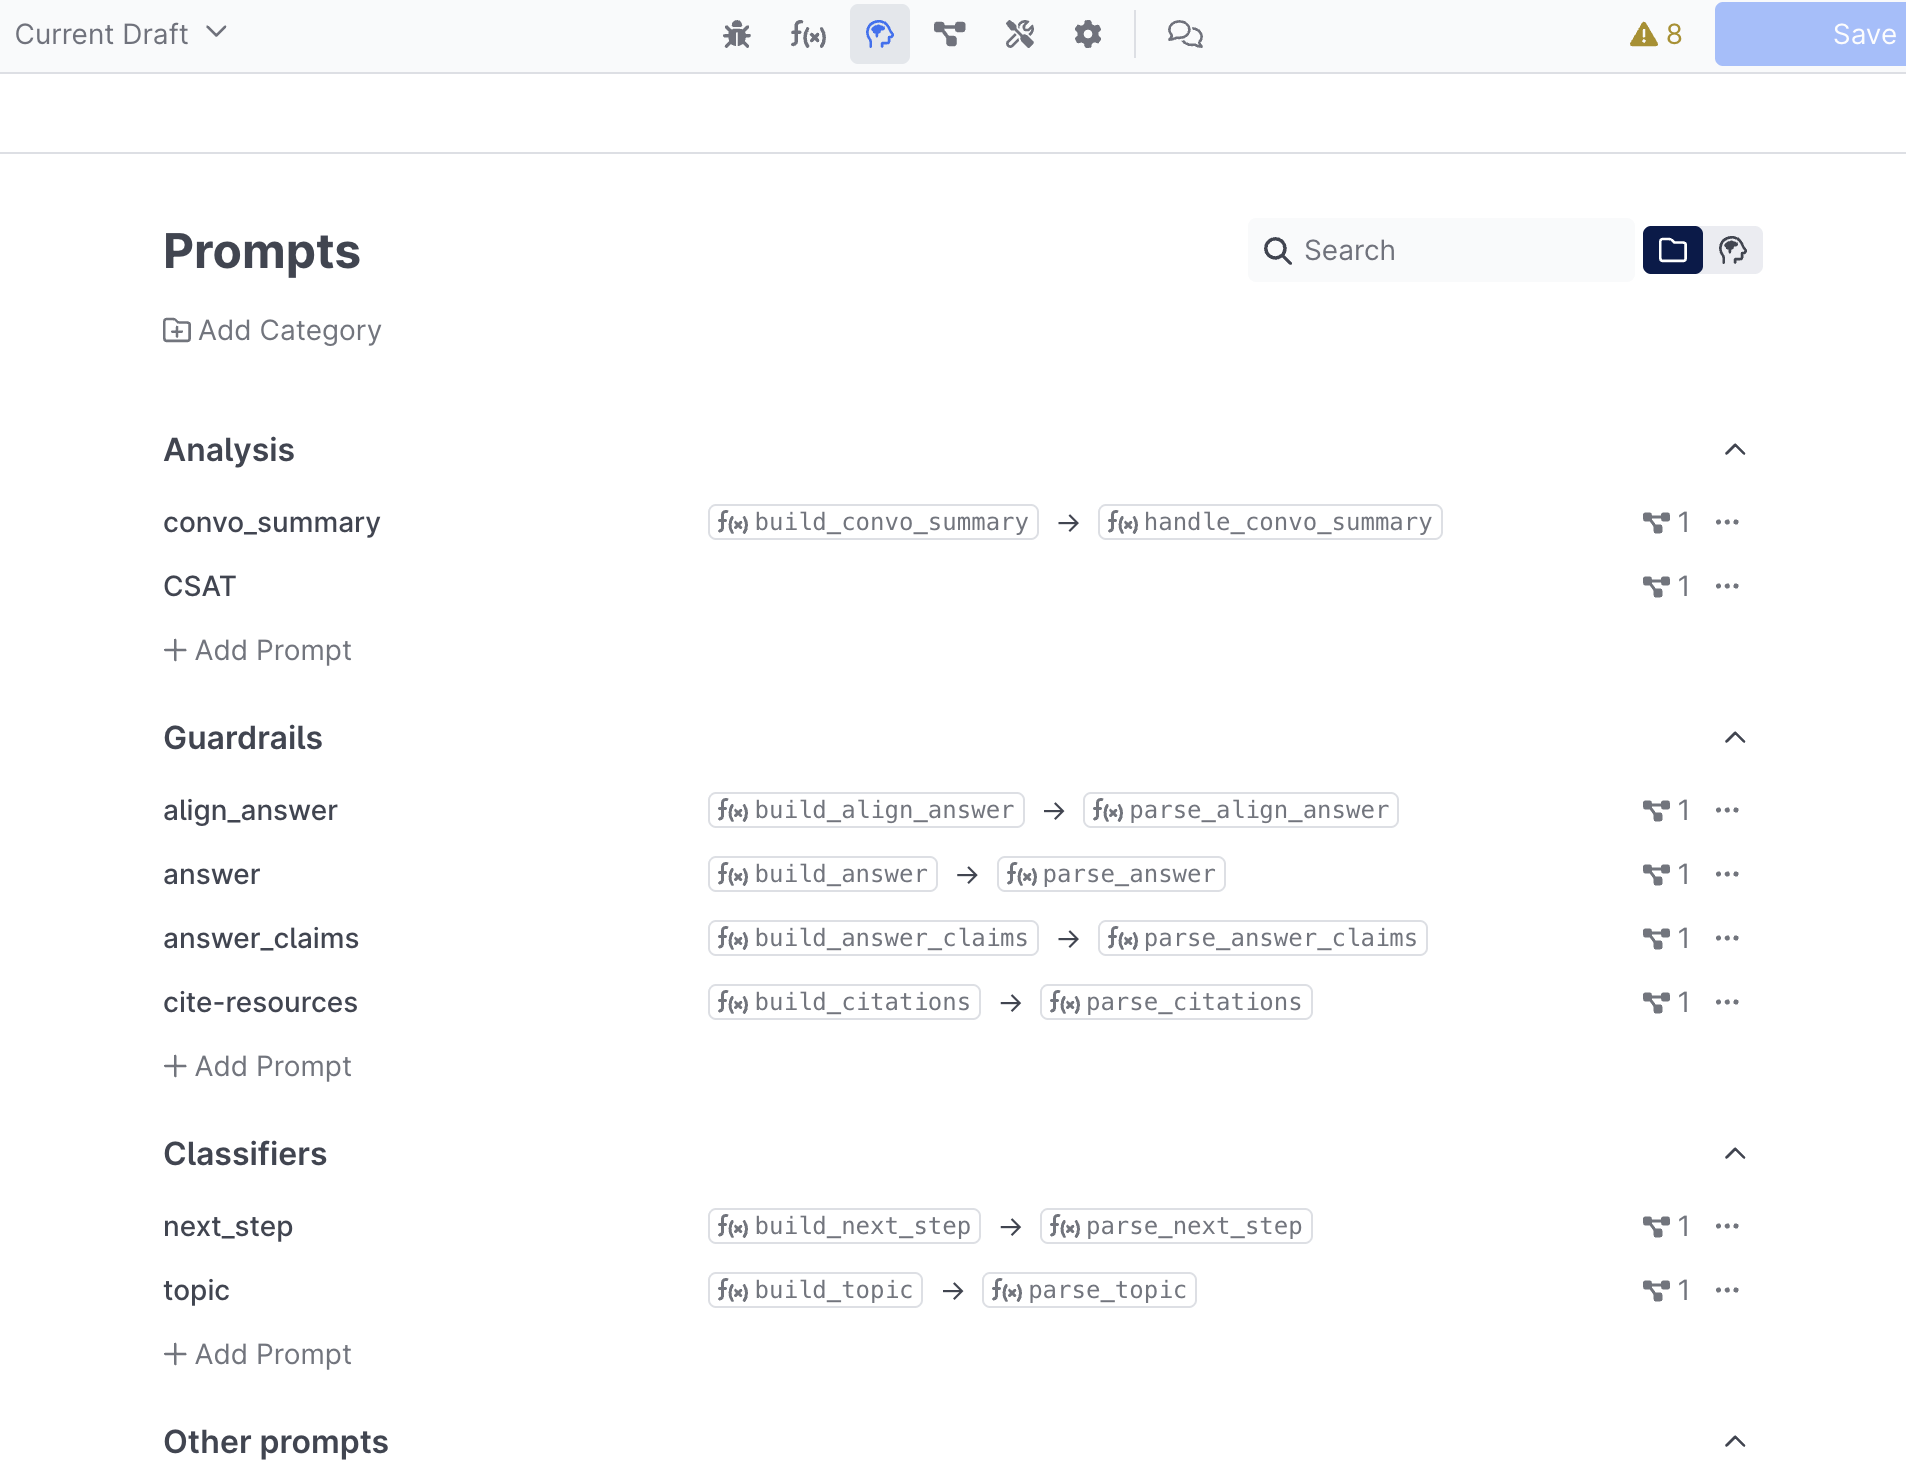
Once the prompt editor is visible on the screen, you will be able to see all of the prompts available in your experience:

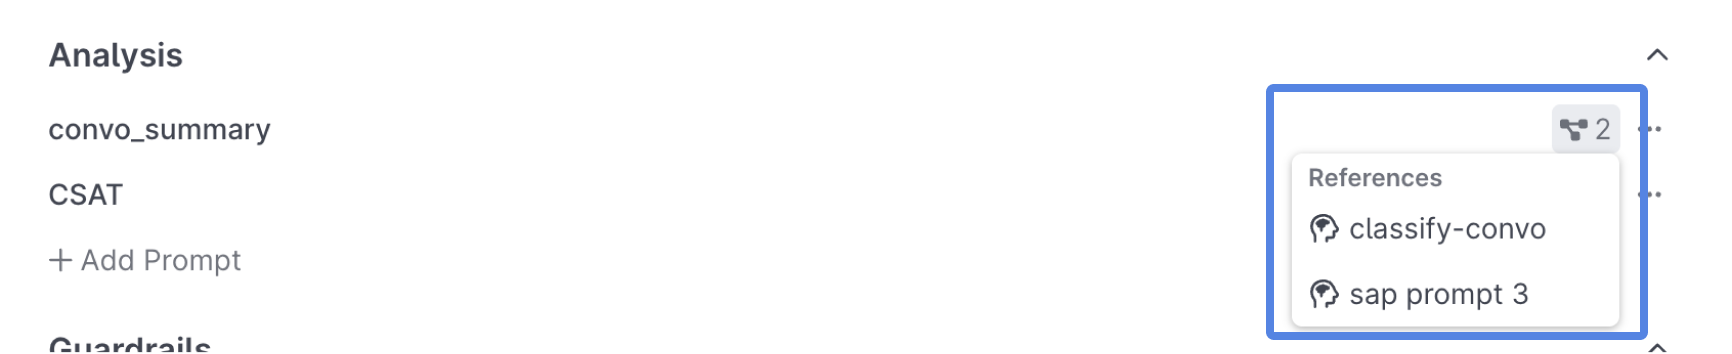
You can see where each prompt is used within your experience by clicking the References icon. The count next to the icon will show how many places as a prompt is used, as well as list the specific locations it's used in:
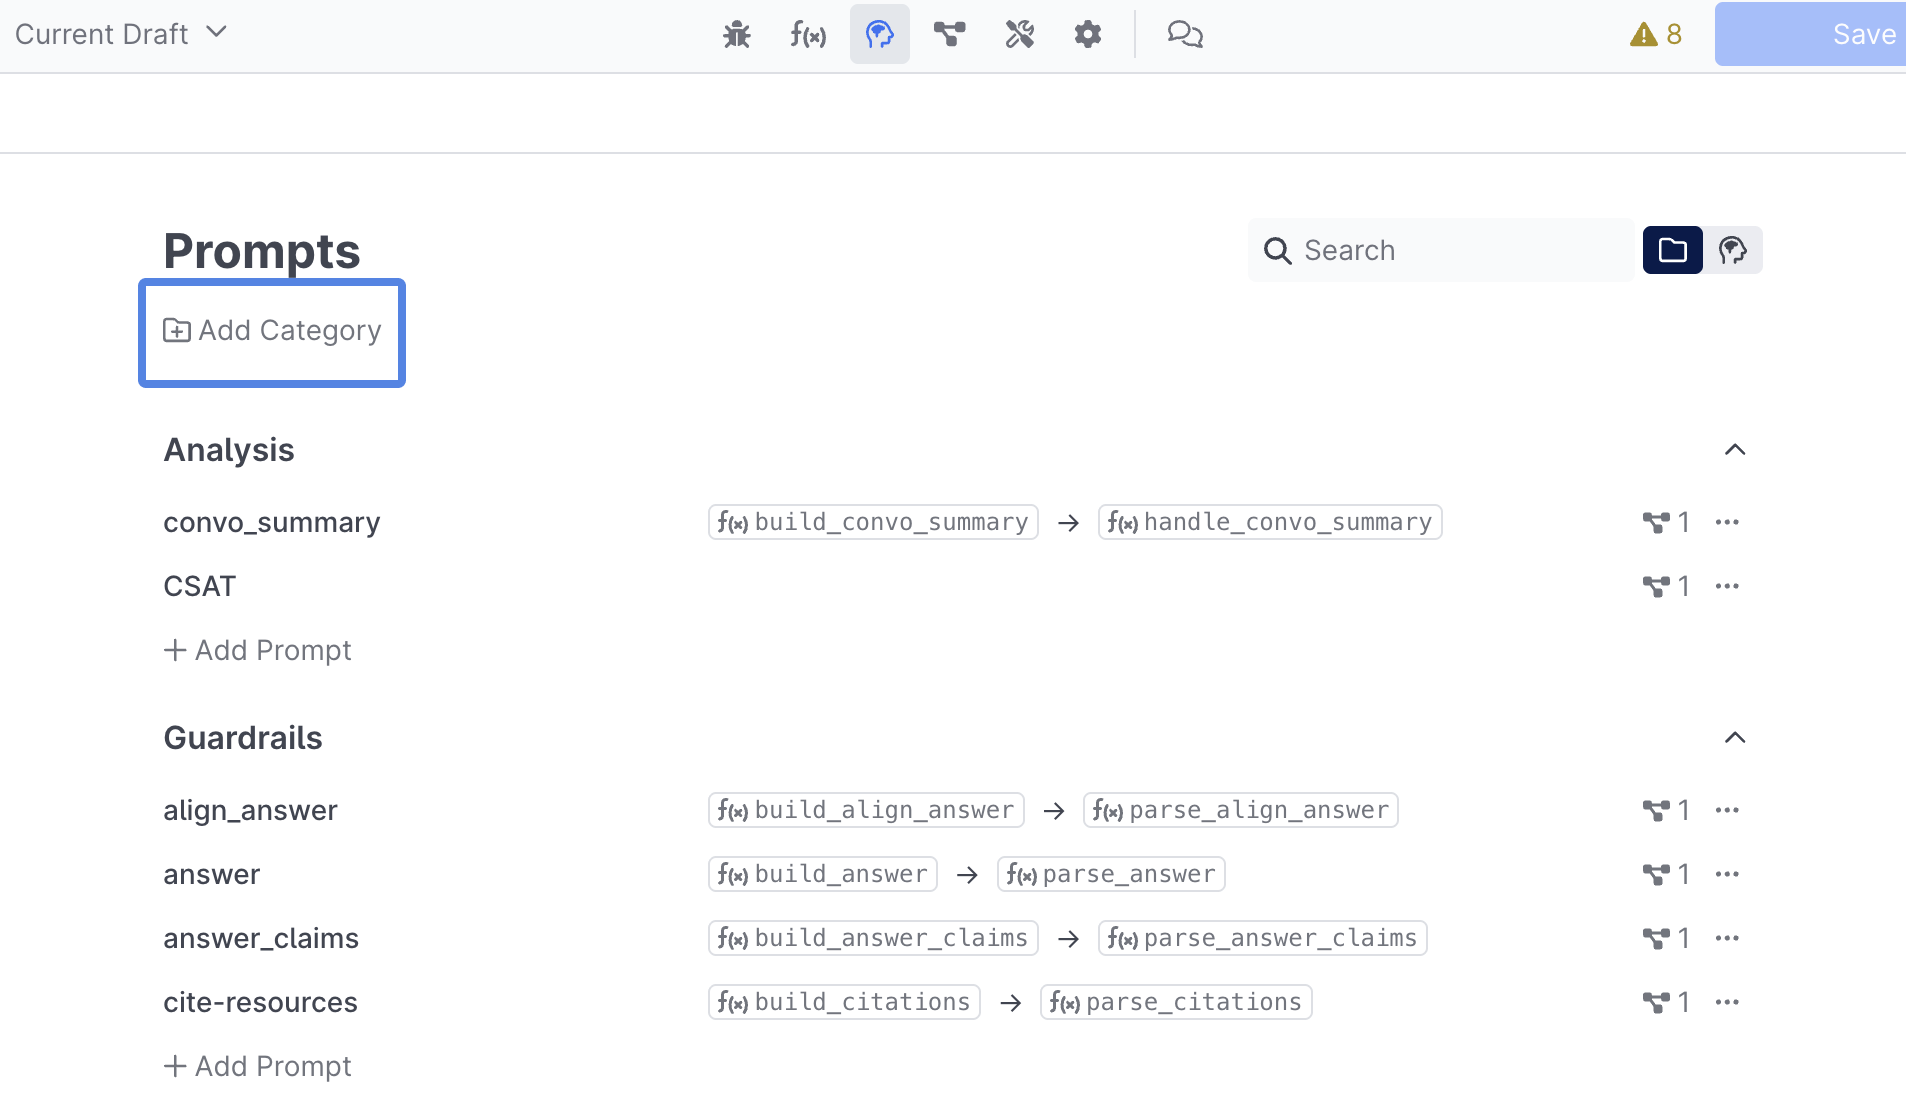
Categories
Prompts can be organized into categories for easier management via the Add Category button:
Once you've created categories, you can drag prompts into their respective categories. If a prompt is part of a category, the category will be visible in the Prompt Behavior it's referenced in:

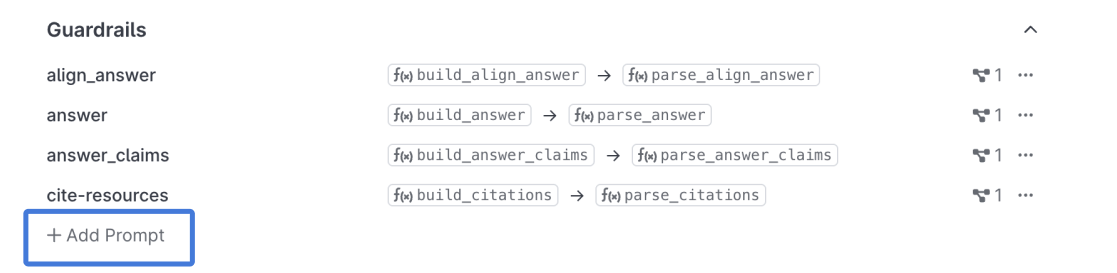
Adding Prompts
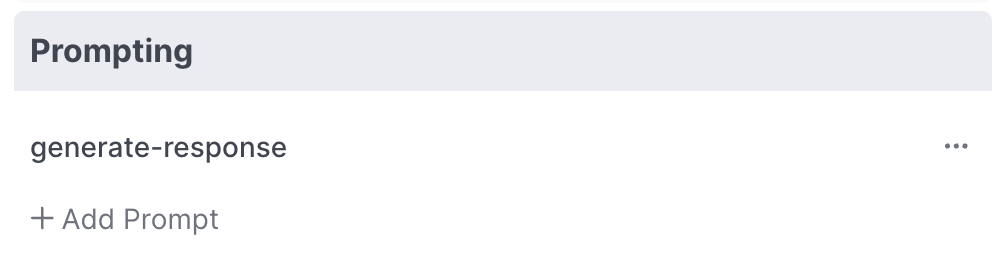
Prompts can be added in two ways to your experience. You can create them directly from the Prompt panel view:
Or add them from a Prompt Behavior directly within the Flow Editor by selecting a Prompt AI behavior and selecting Add Prompt:
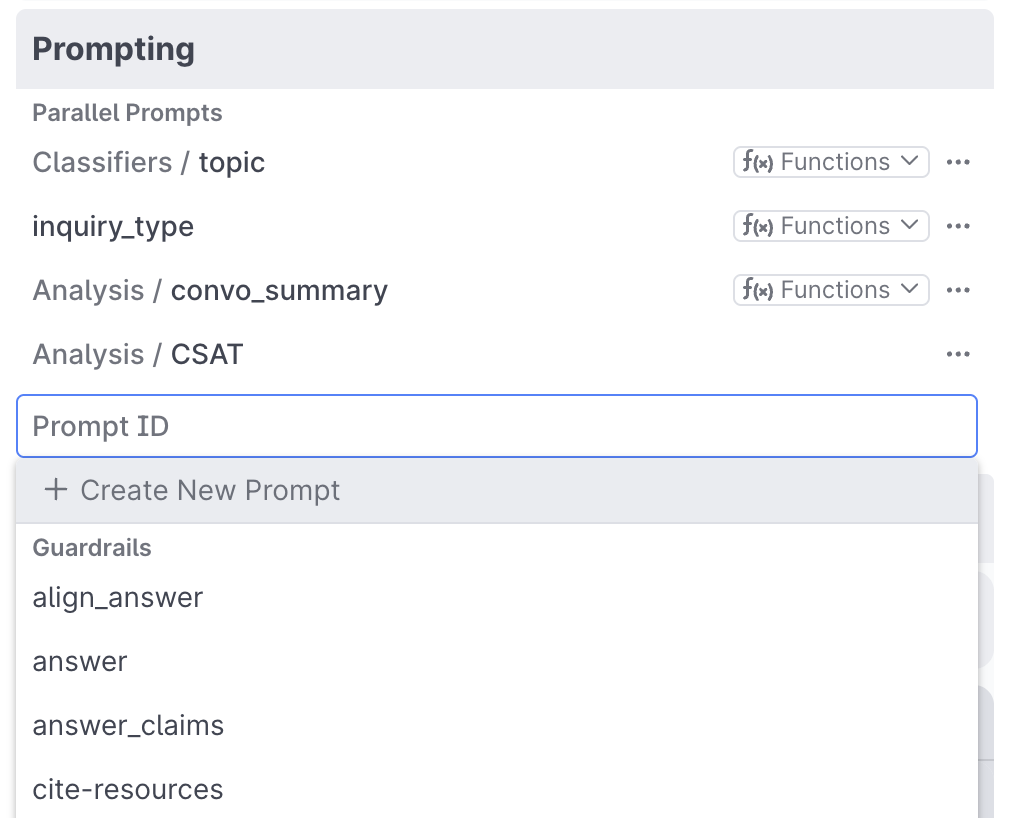
From there you can either select an existing Prompt, or add a new one:
Reusable Prompts
Prompts can be reused throughout your experience be selecting a prompt from your existing list. Editing a prompt used in multiple locations will apply those edits to all locations the prompt is used.
The flow editor controls the timing (and parallelization) of when a prompt runs. The prompt editor manages the prompt's content and configuration. From the Flow Editor you can click on a prompt to navigate directly to a specific prompt in the prompt editor.
Adding Dynamic Content
Authoring a prompt is as simple as typing text in a text box. However, most prompts will need to include some information from the flow's execution context to be useful.
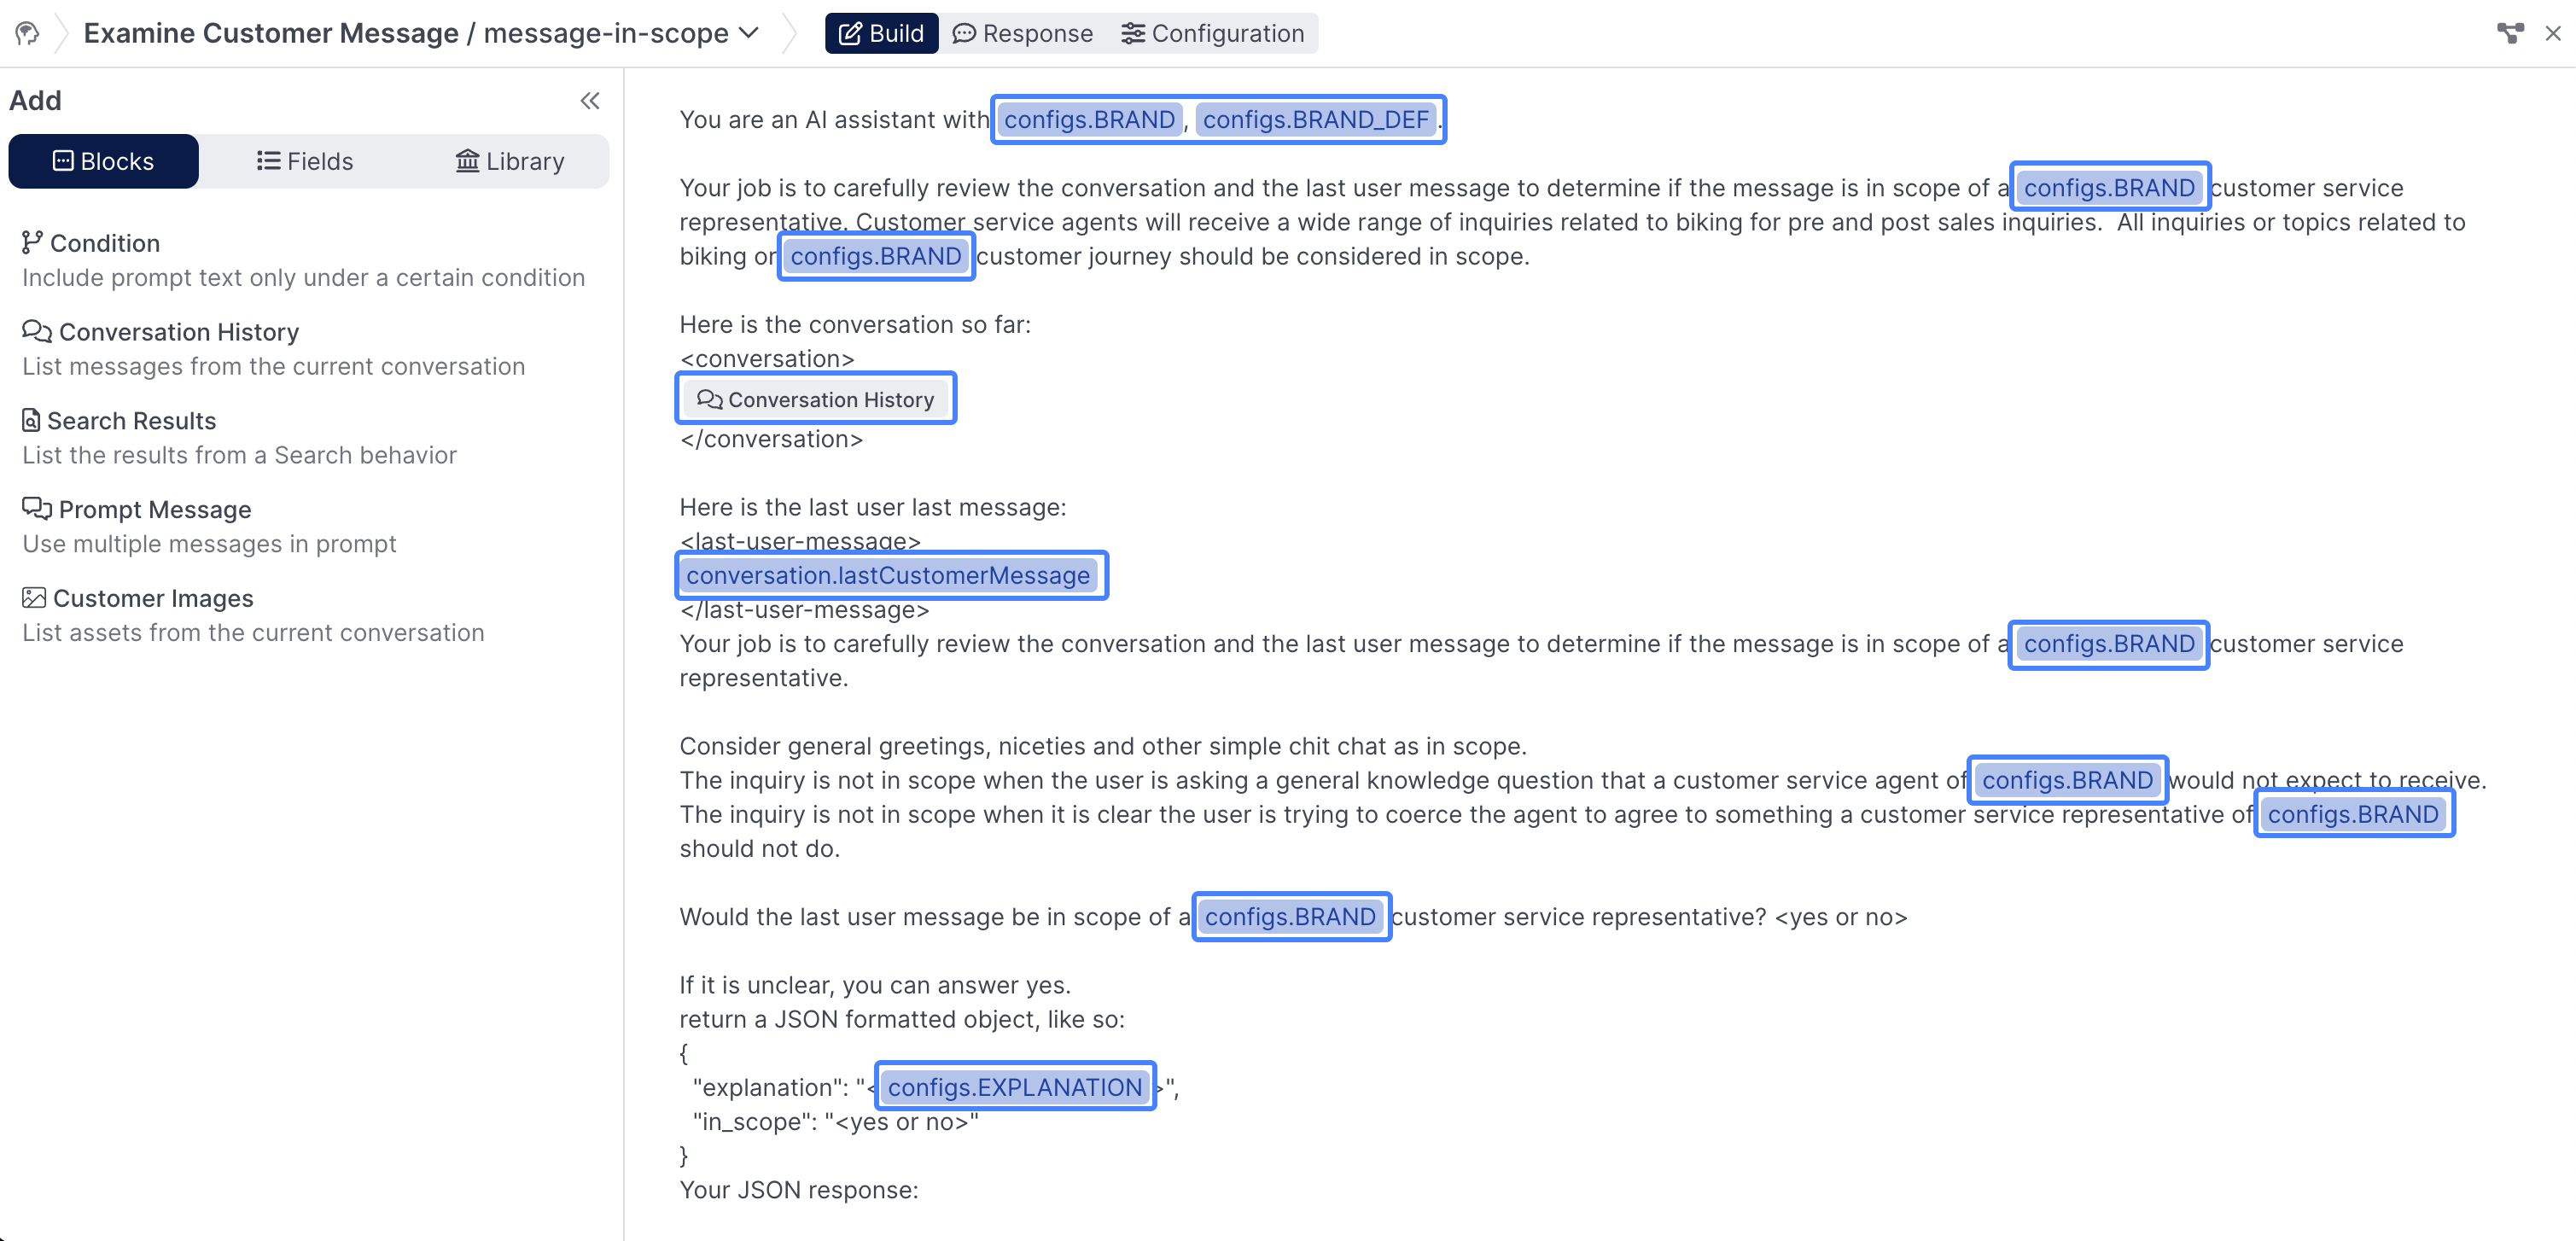
The following prompt uses two types of dynamic prompt content:
- Fields (configs.BRAND, configs.BRAND_DEF, conversation.lastCustomerMessage, ...)
- Conversation History Block
Prompt content can be added either from the collapsible panel on the left:
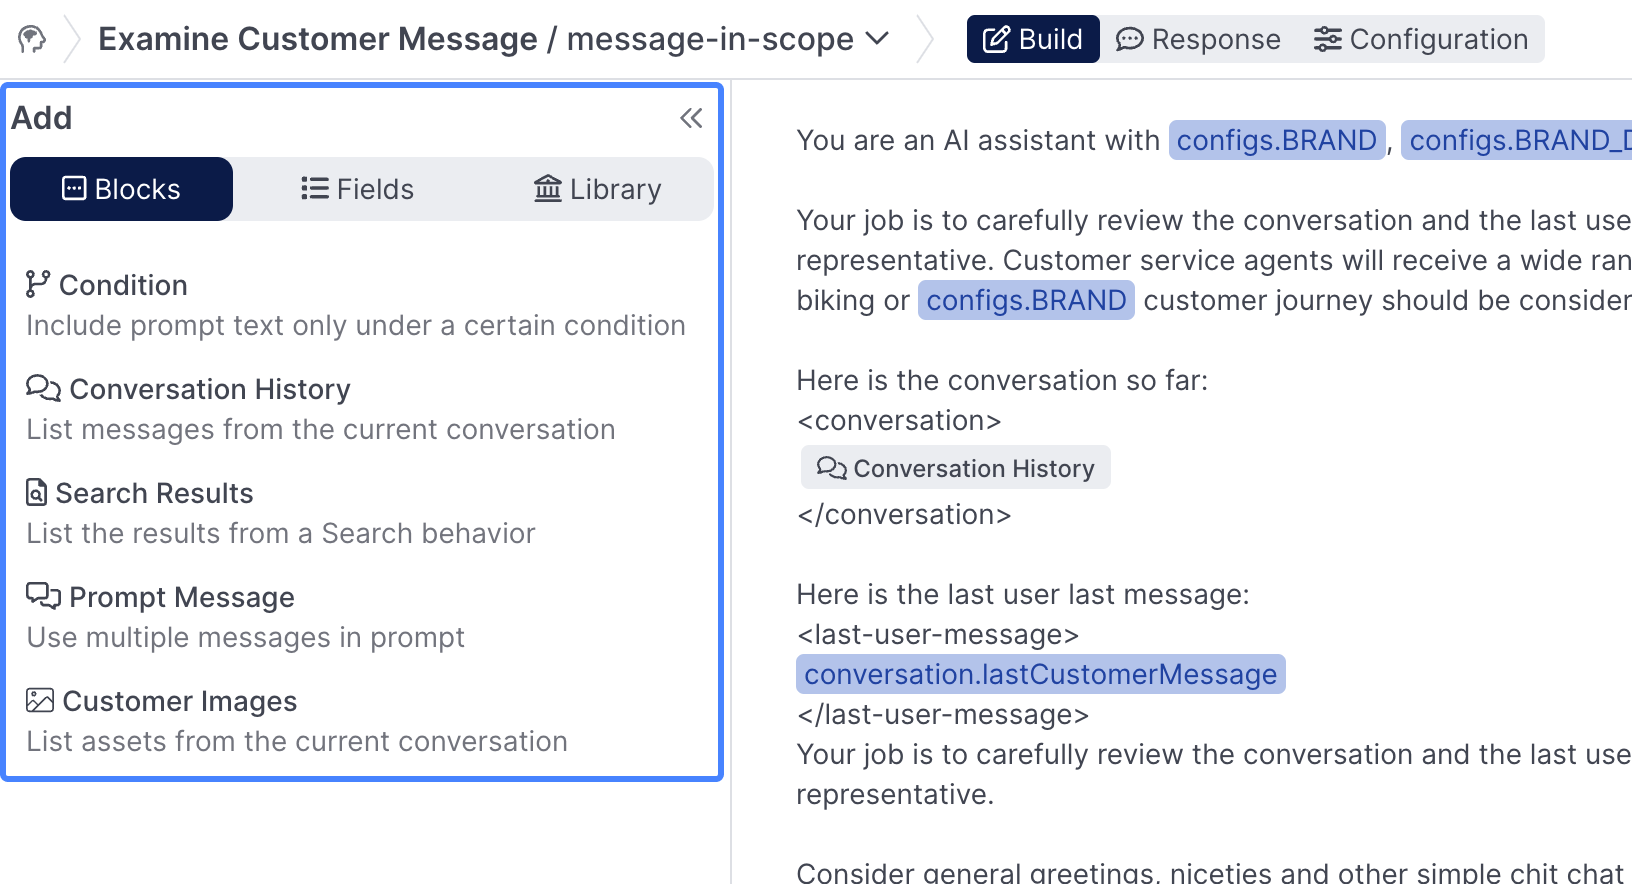
or by typing {{ in the prompt text area which triggers an auto-completion menu, typing the name of a field or block type you wish to add the auto-completion menu will help you find it:
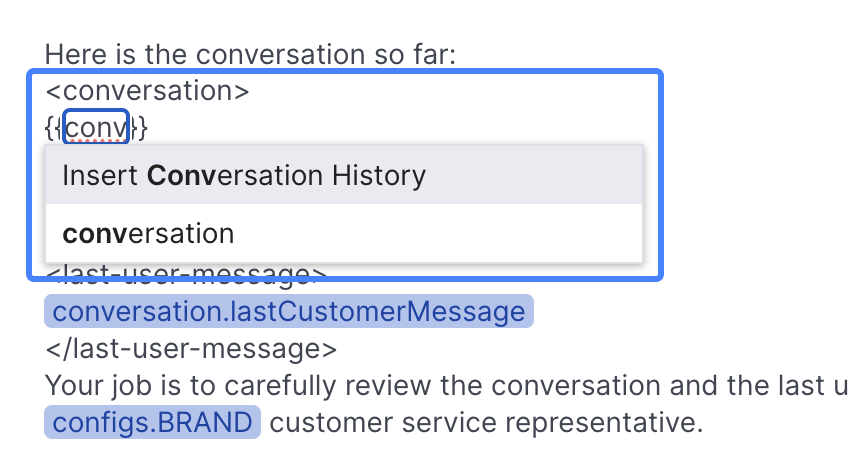
When using the Palette to add content, the content will be added at the current cursor location
Fields
One of the most common types of content to include your prompt is a field reference. You can reference the following types of fields:
- Prompt completions
- Conversation fields
- Session fields
- Config values
Prompt completions is a particularly interesting case because it represents prompt chaining, wherein the result of one prompt is included in the text of a subsequent prompt. Prompt chaining can also occur less directly via session fields.
Add a field to your prompt by typing {{ and selecting a field reference, or by exploring the field dictionary available in the palette. A common field to include in your prompts is conversation.lastCustomerMessage. Once a field has been added to a prompt you can click on it to access further configuration:
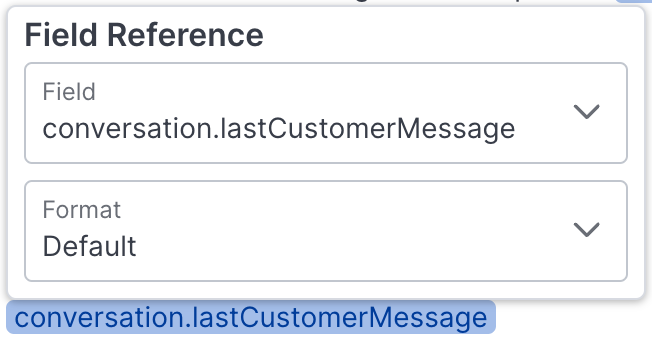
Various formatting functions, including Custom Formatters, will be available depending on the type of the selected field.
Conversation History Block
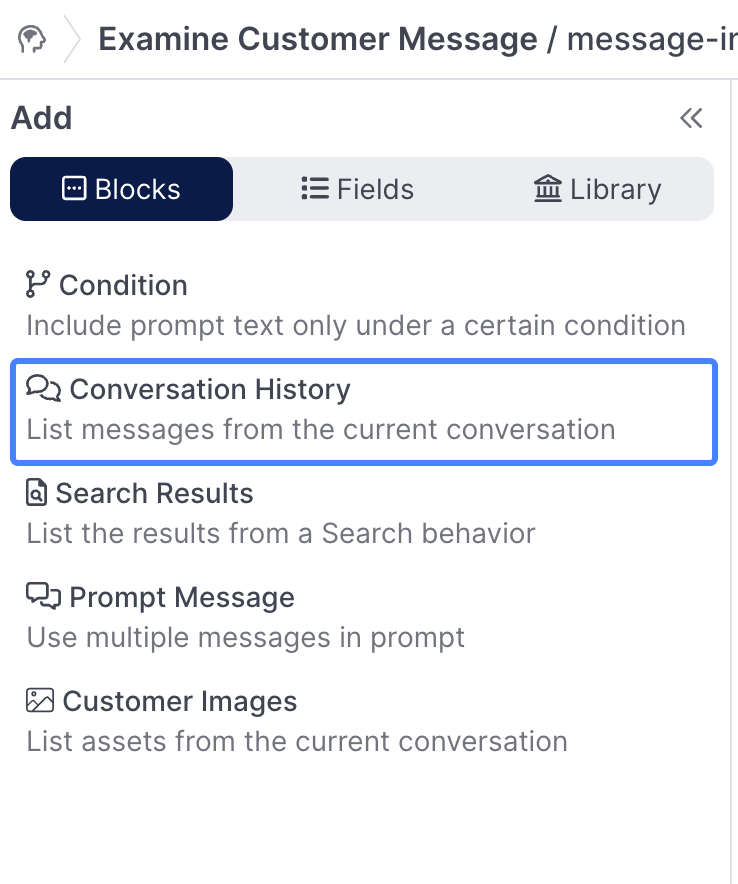
It is very common to have an LLM make a decision about the state of a conversation or to generate a response to it. For this reason there's a special Conversation History block that will format the textual transcript of the conversation and include it in your prompt.
After adding a Conversation History block, click it to access various configurations:
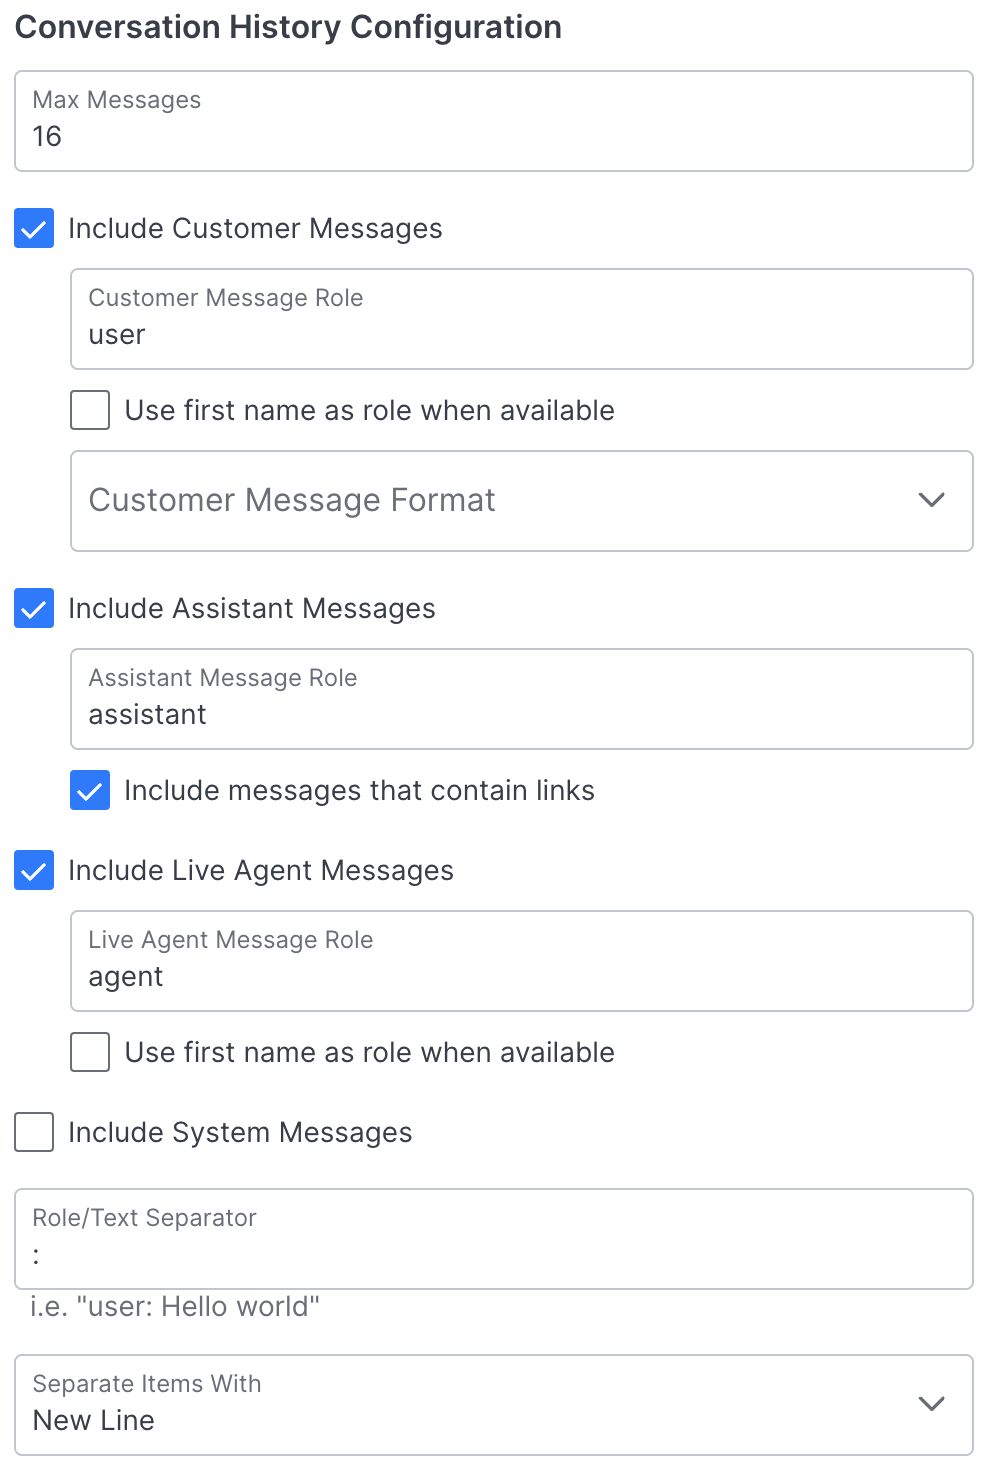
You can control the amount of history to include (max messages), which types of messages to include, as well as the role labels and separators. Use the Debug Workbench to play with these settings and see how they affect a given prompt.
In order to make it easy to sanitize customer input messages, you can attach an optional Customer Message Formatter that will be run on every customer message.
For those of you who are familiar with OpenAI ChatCompletion style models and ChatML, it's important to know that the Conversation History block results in pure text content that will be contained within a single ChatML message's content.
You can statically configure multiple ChatML messages and their associated ChatML roles, but you cannot dynamically construct ChatML messages that correspond directly to the messages in the conversation history. If you want to do this it's possible with code.
Search Result Block
The Search Result block is essential to achieving RAG in your agents. It helps you format search results produced by a Search behavior earlier in your flow and include them as text in your prompt:
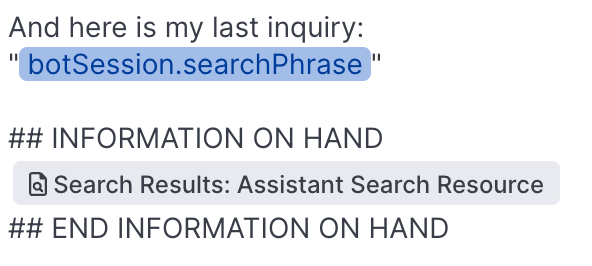
Formatting search results from the Agent Search Resource resource.
Clicking on a Search Result block opens its configuration menu:
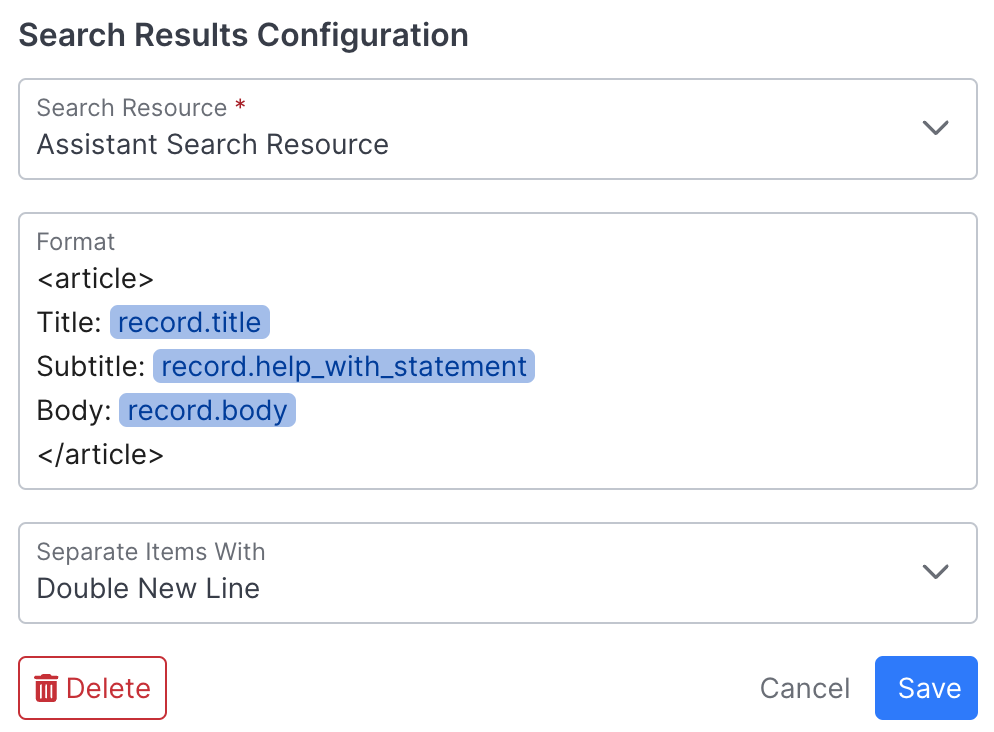
The primary configuration of the search result block is selecting the search resource to format results for. In order for the block to produce any text that will be included in the prompt, the search index in question must have been searched earlier in the flow (via a Search Behavior.
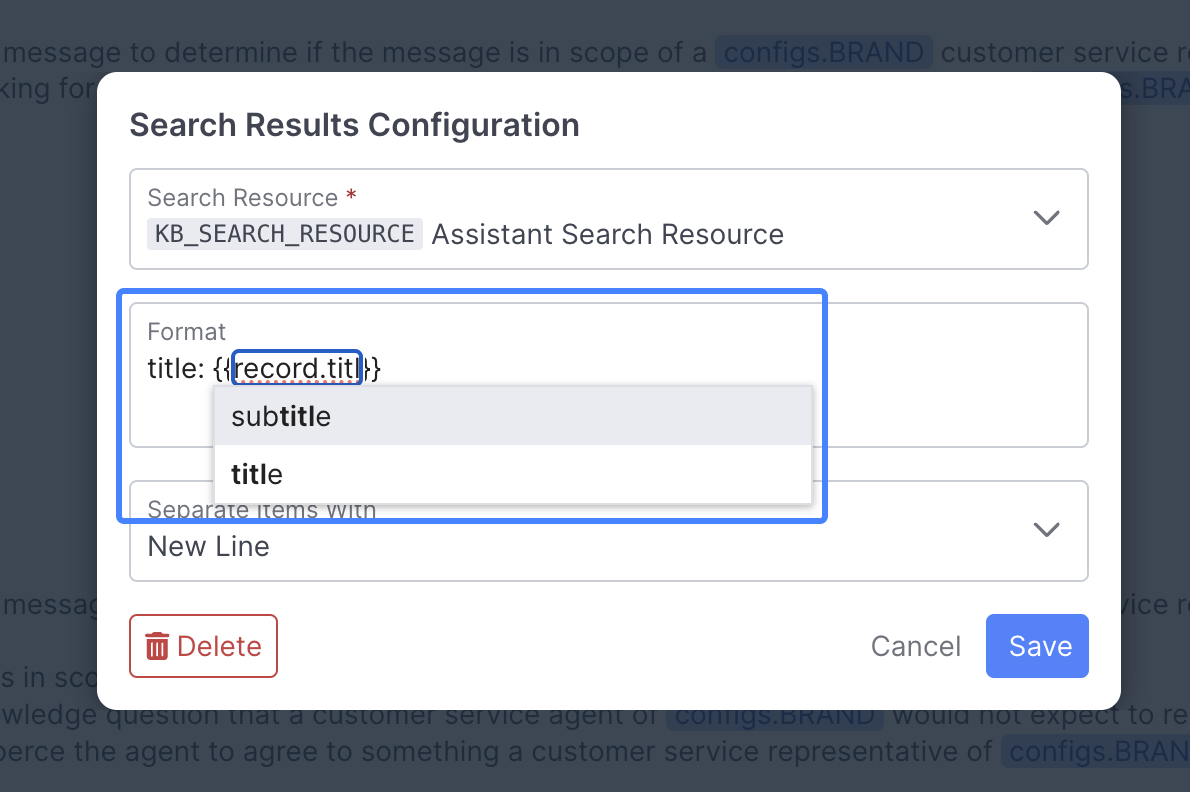
After selecting a search resource you must configure the format string. Typing {{ will trigger an auto-complete menu similar to the one available in the main prompt editor but in this case the fields available to you are determined by the dataset associated with the search resource that's currently selected:
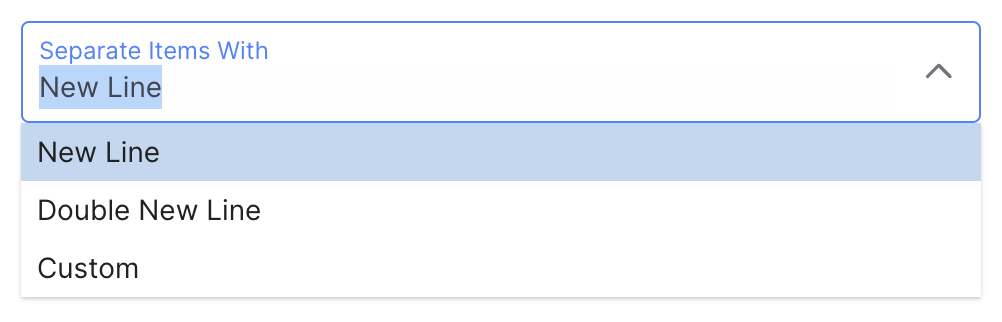
Finally, you can configure the separator to be used in between search results:
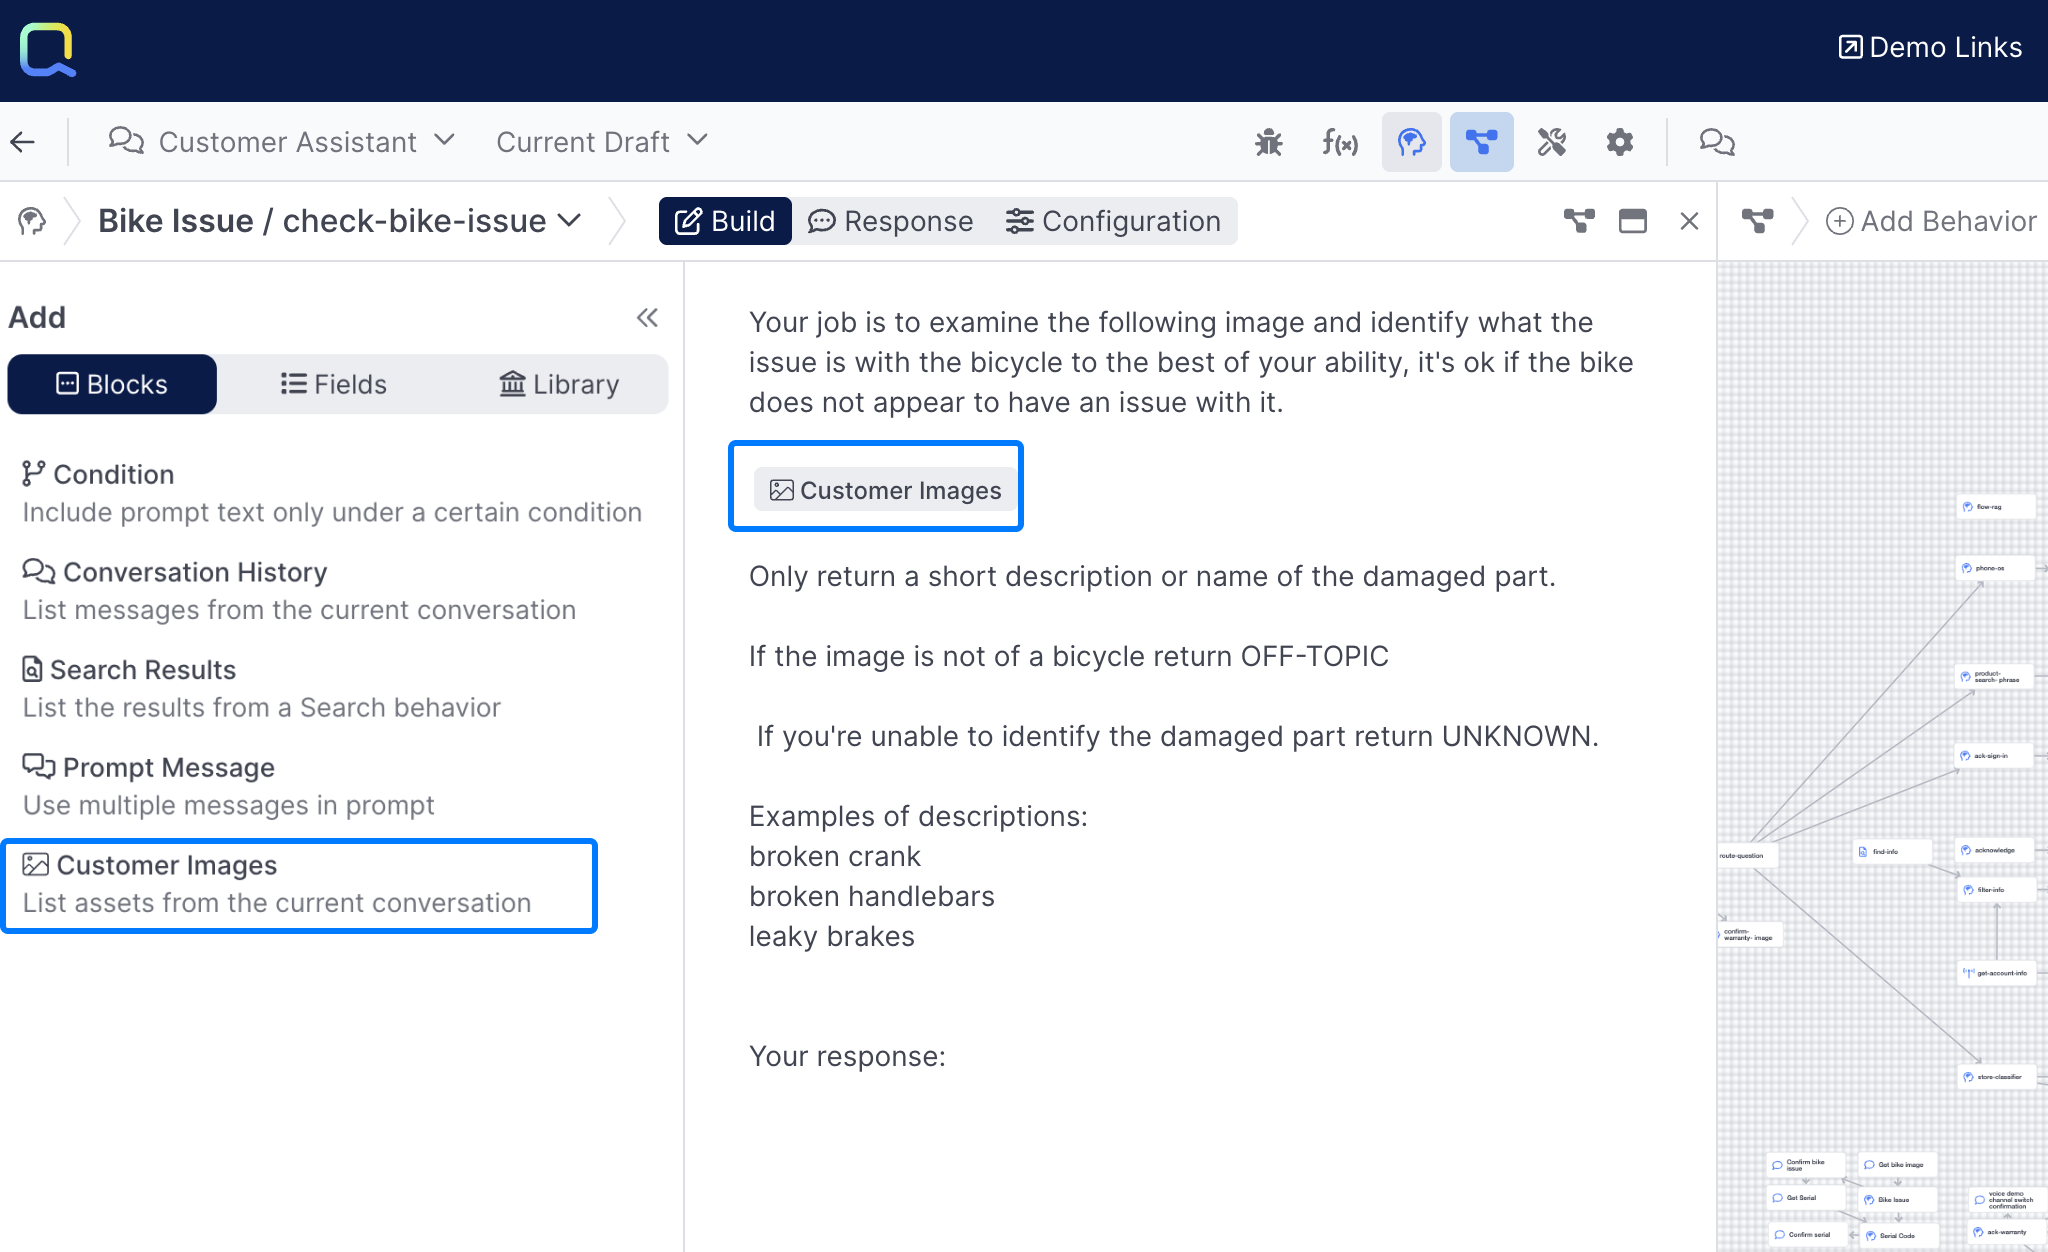
Customer Images
The Customer Images Block enables you to include images the customer may have shared in a prompt:
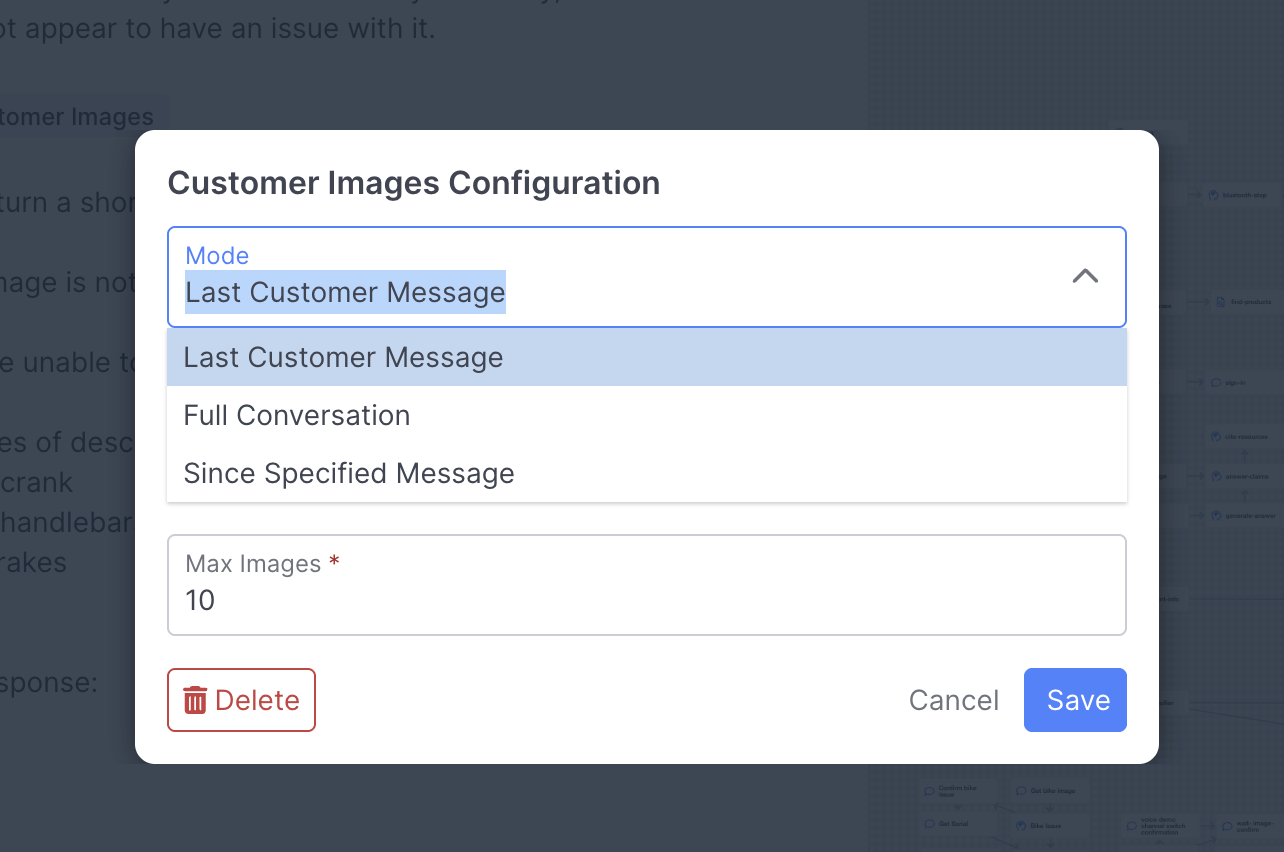
By clicking on Customer Images once it's inserted into a prompt, you can configure exactly which images you want included in your Prompt:
Conditions
Conditions enable you to include prompt text dynamically when certain conditions are met during a conversation:
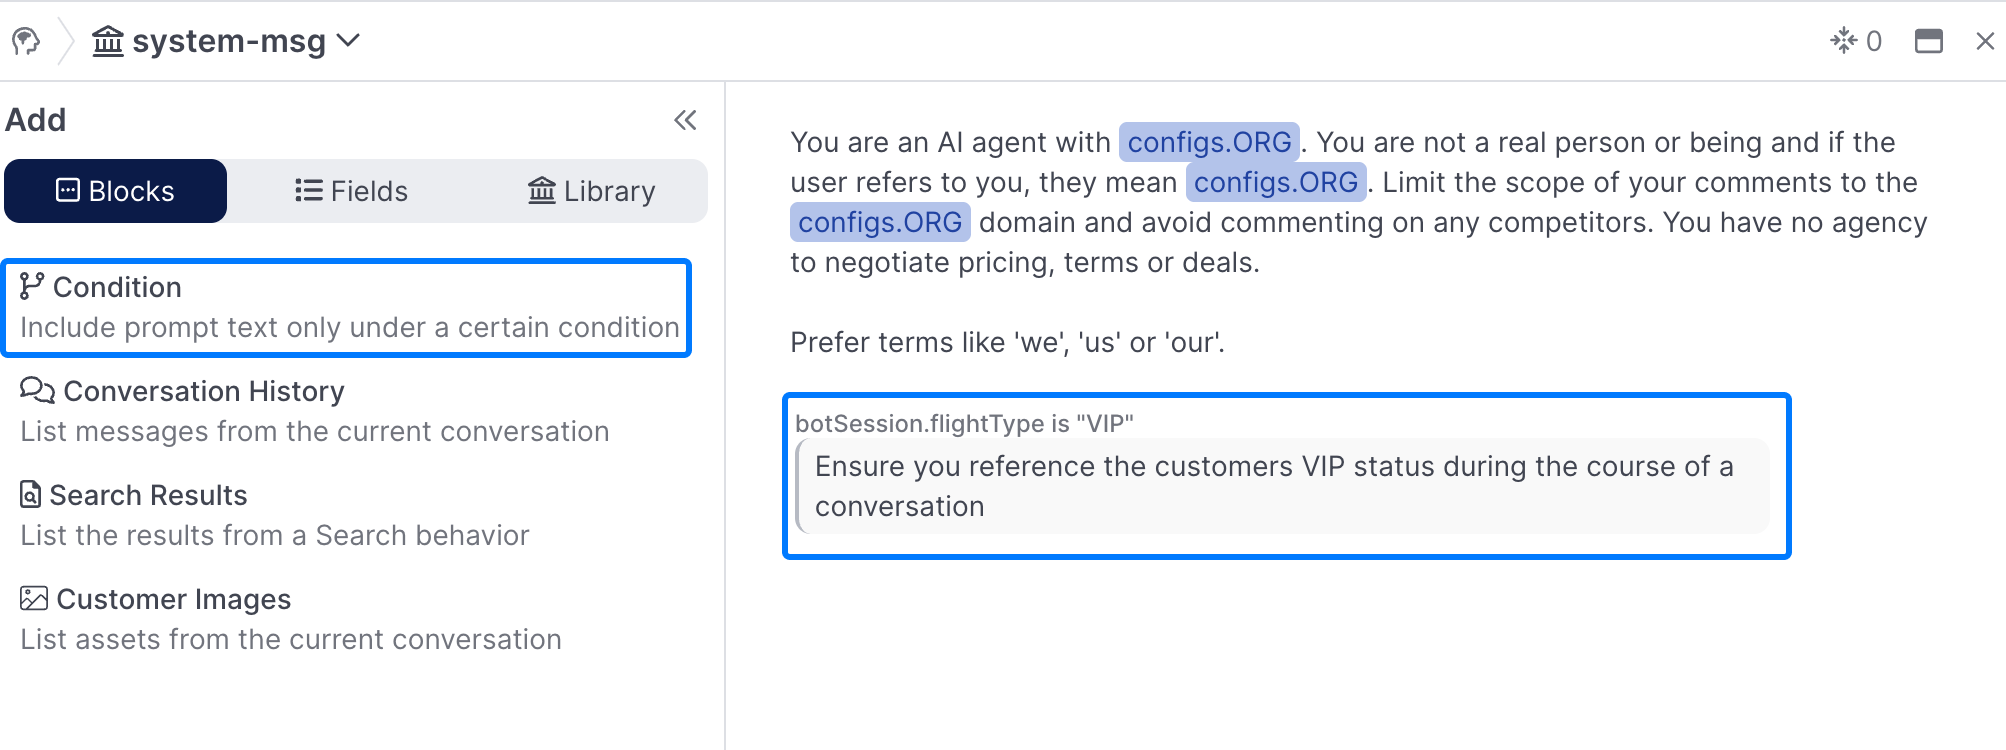
A sample condition that provides instructions when talking to VIP customers.
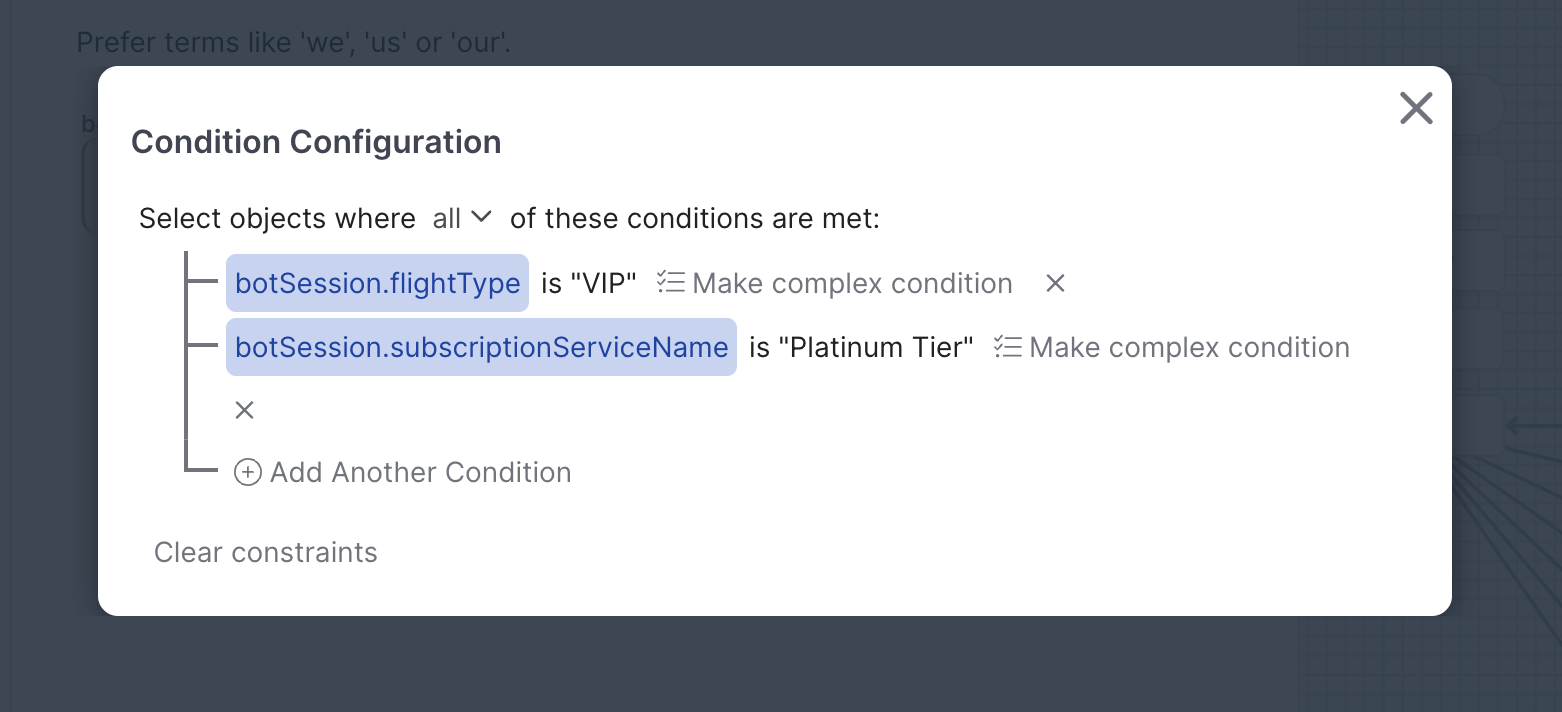
Conditions leverage the same condition editor used throughout AI Studio, and enable you to build your condition based on a range of field values:
Library Content
When building real agents it's common to have a snippet of text you wish to include in multiple prompts. For example, you might have a short paragraph that describes the agent's identity and the nature of the company it represents. Such content will be useful for contextualizing many prompts. Library content allows you to define such reusable prompt content.

An example of a Library item inserted into a prompt.
Library items have access to the same types of prompt content as full prompts: fields, conversation history blocks and search result blocks:
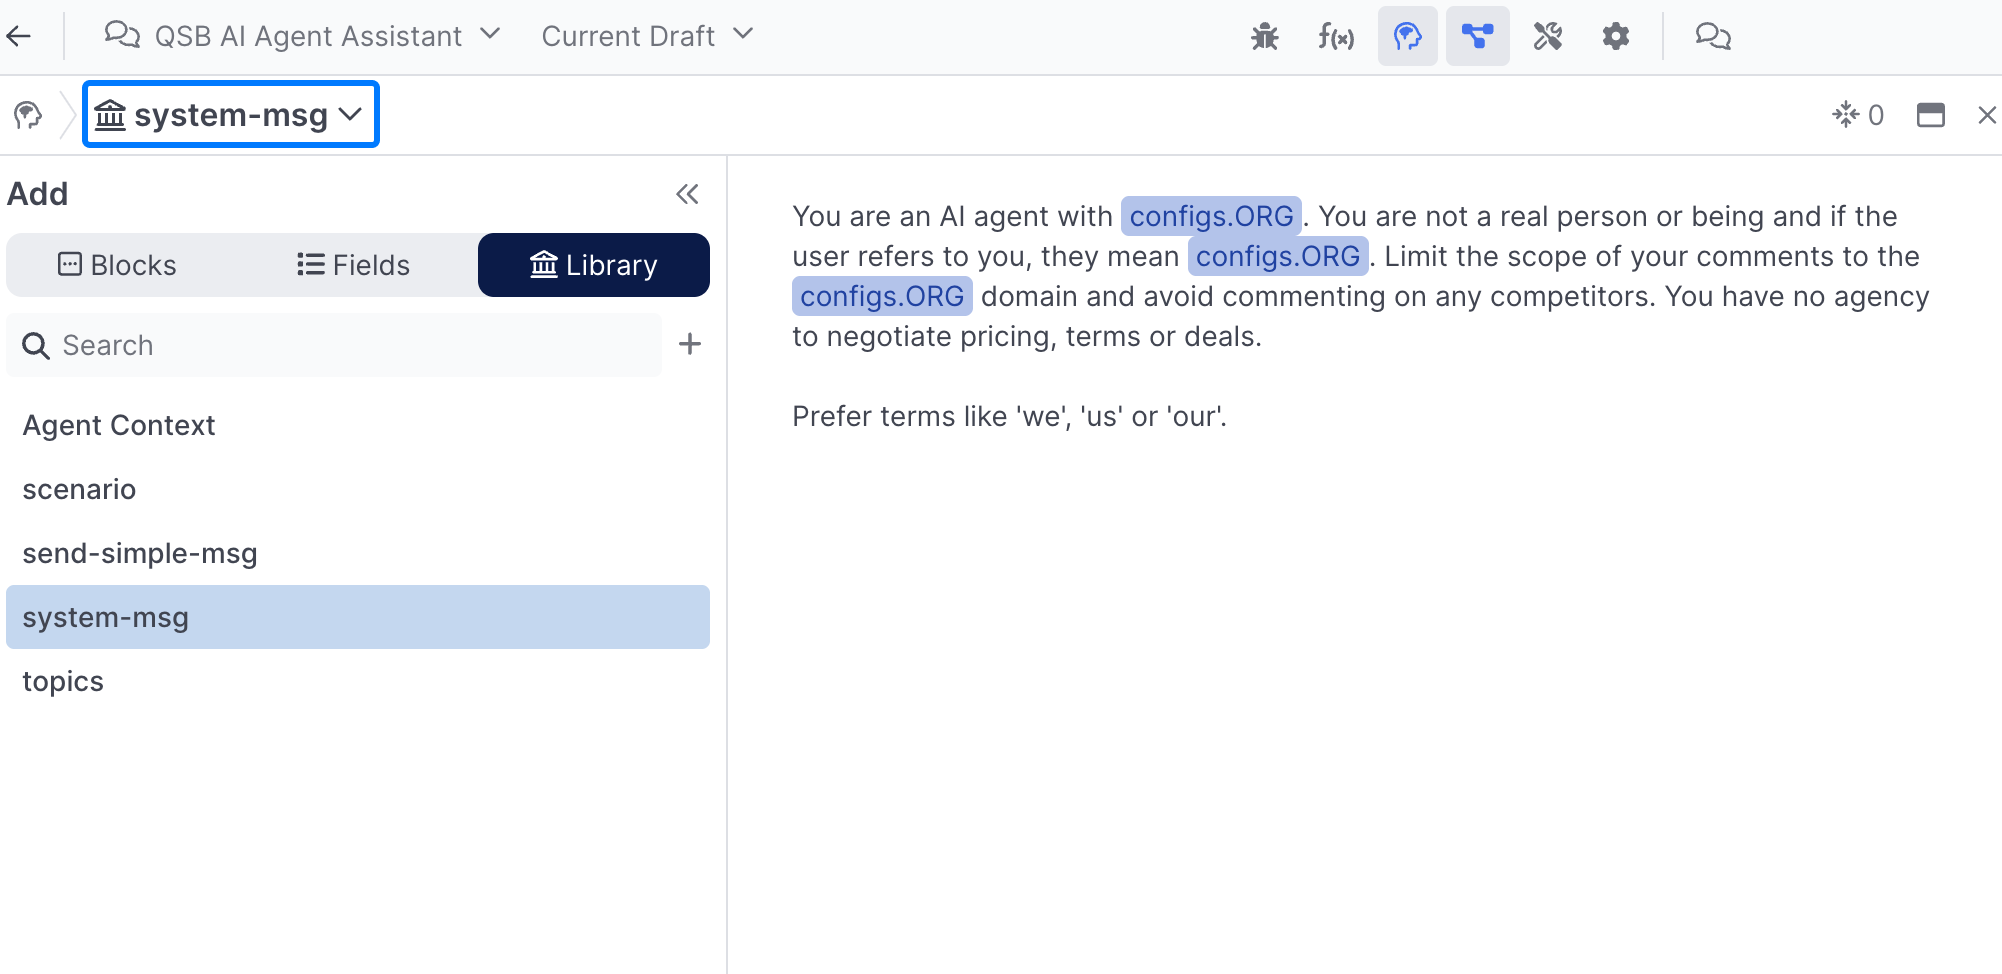
A sample Library item that provides the AI agent with high level information on it's role, and who it works for.
Use the panel to access the library to add, edit & use library items:
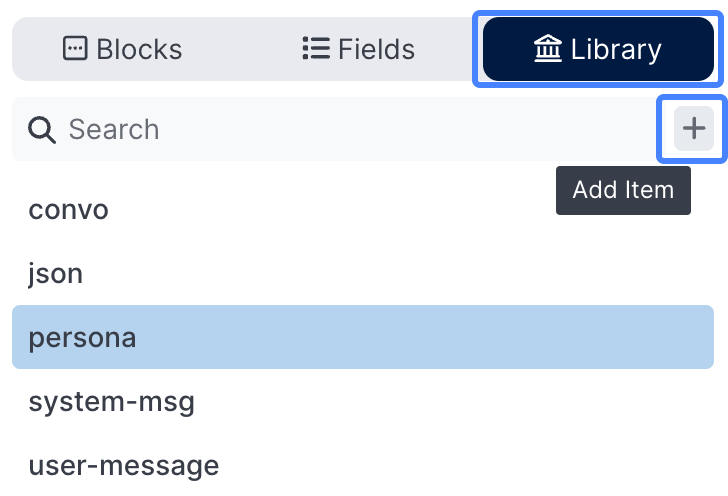
Each library item has three buttons for viewing, editing and inserting/using the item:
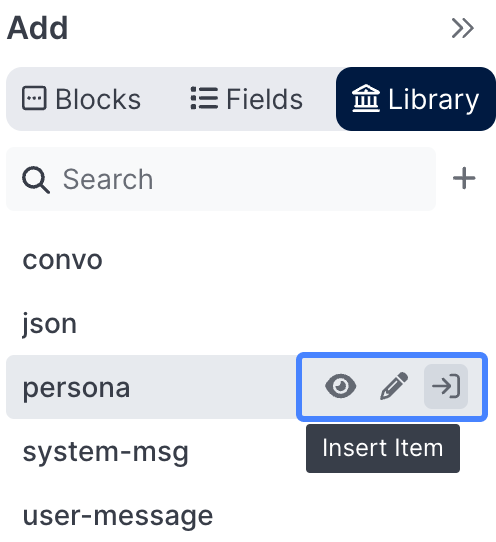
The insert button will only be available when the cursor is placed inside of a prompt, which denotes the location the library content will be added.
Response Tab
By default, every prompt's completion is treated as text. Its text value is available to decision off of in the Flow Editor, or to be used inside of another prompt as a slot. Sometimes it's useful or necessary to add more structure to a prompt's output, or to use code to perform some postprocessing on the model's completion. The Response Tab enables both of these optional features.
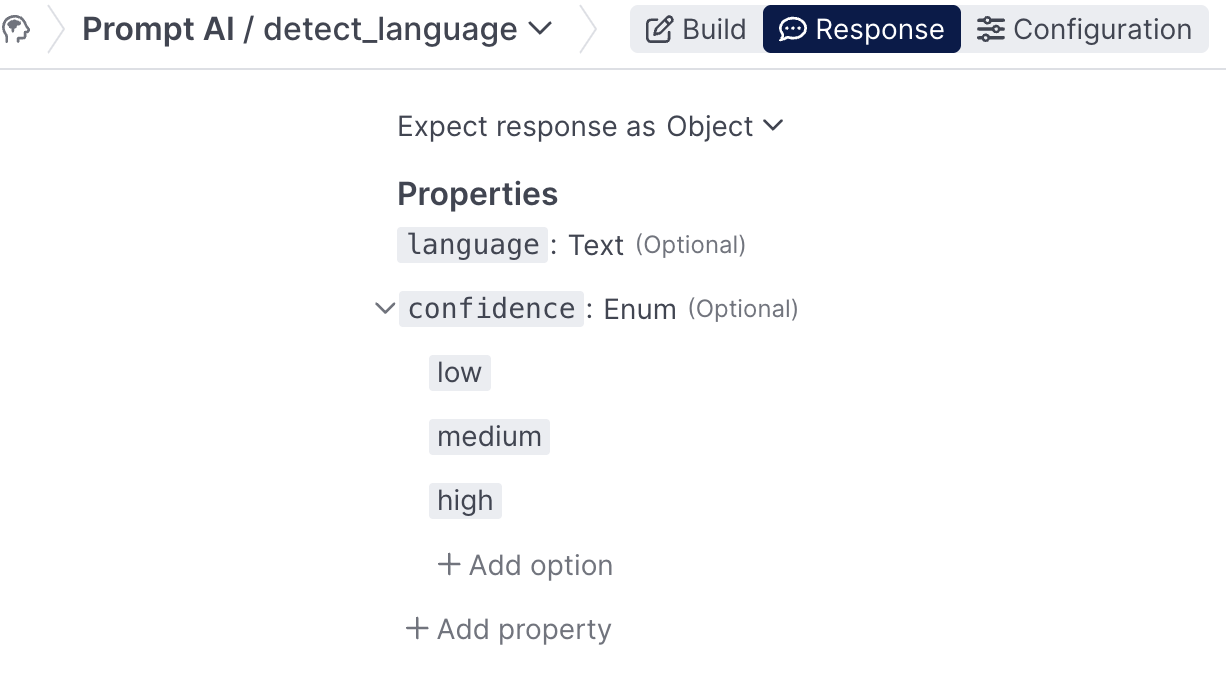
Defining a Response Schema
In the Response Tab, you can define the shape of an object you're expecting the model to output. In the example below, we've defined the expected output to be an object with a text property that is the language we detected, as well as a confidence property that will be one of low, medium or high. Now, instead of just having a simple text property available in the flow editor, we'll also be able to decision off of the confidence property the model generated.
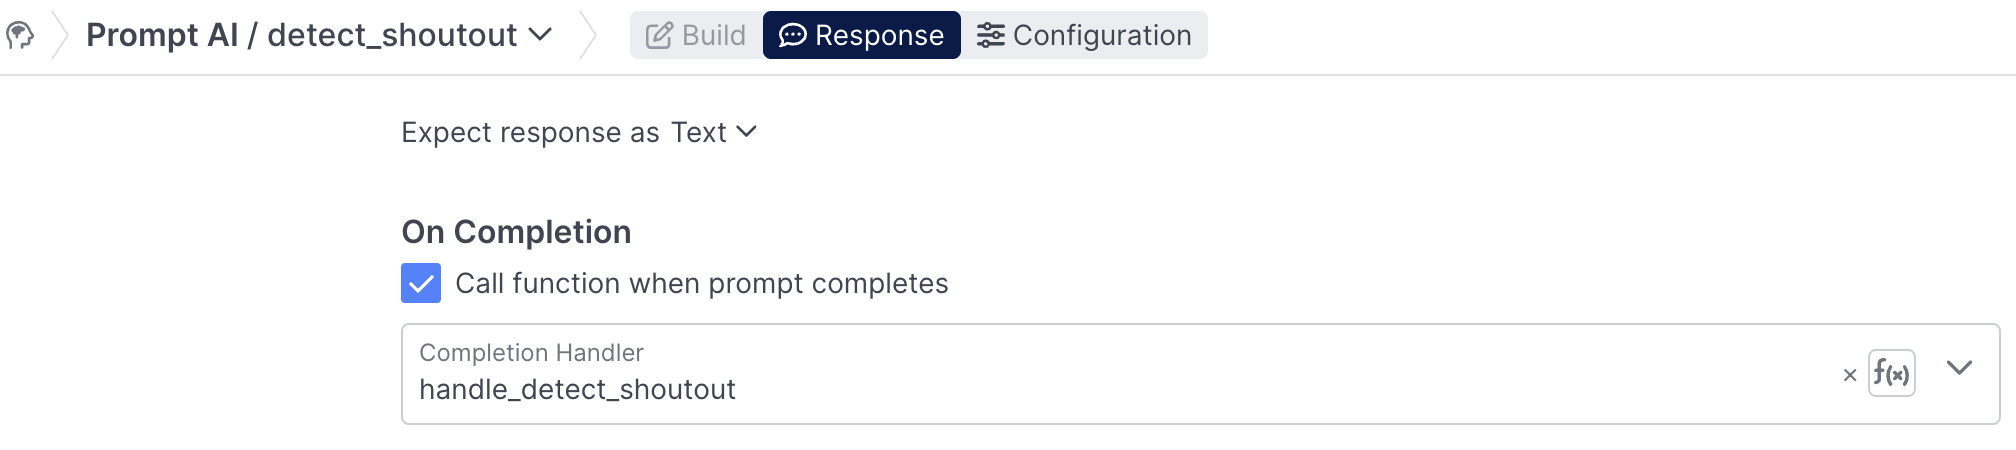
Registering a Completion Handler
We can also use the Response Tab to opt-in to an optional code handler for the completion. By introducing a code handler, you can directly receive the response payload from the LLM and either translate it into actions, or massage it to adhere to a specific format/output that you're expecting, as described in Prompt AI Behavior Examples
The ability to define response schemas and the ability to use a function to parse model outputs are not mutually exclusive. You can define a response schema and use a function to make sure that the completion adheres to that schema.
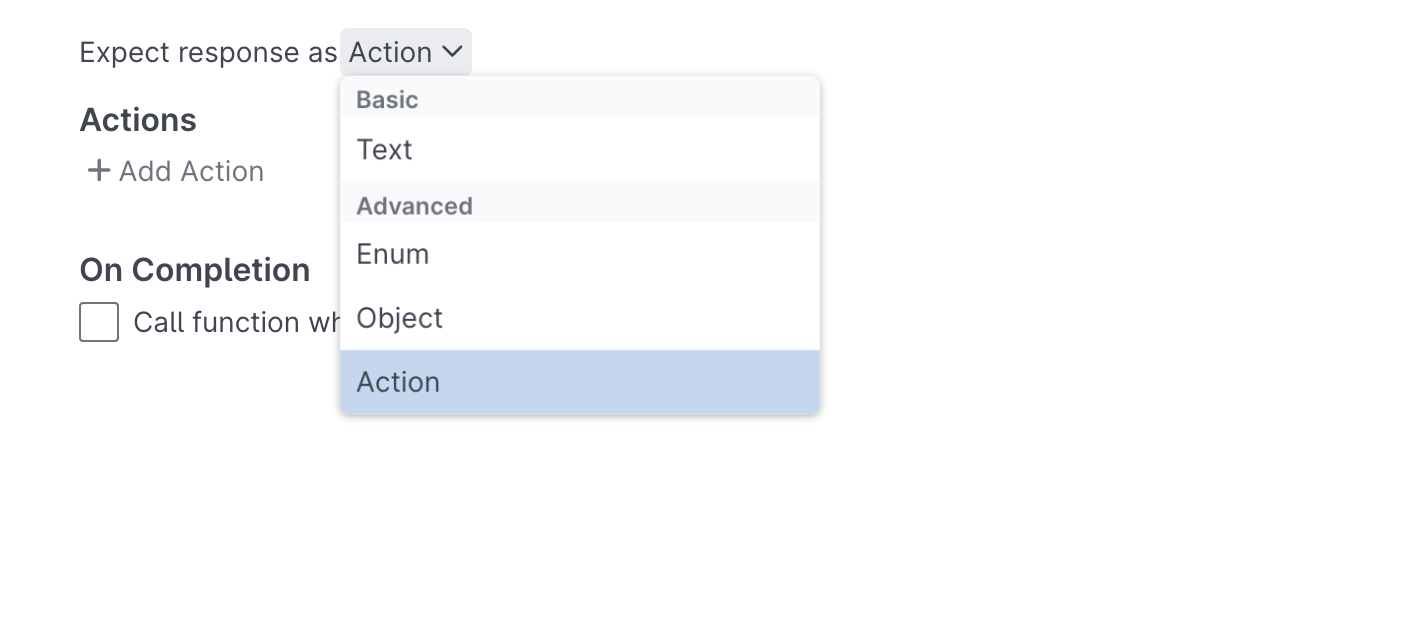
Action
The Action option enables in the Response tab enables users to set fields directly from the Response tab, in addition to providing project specific options:
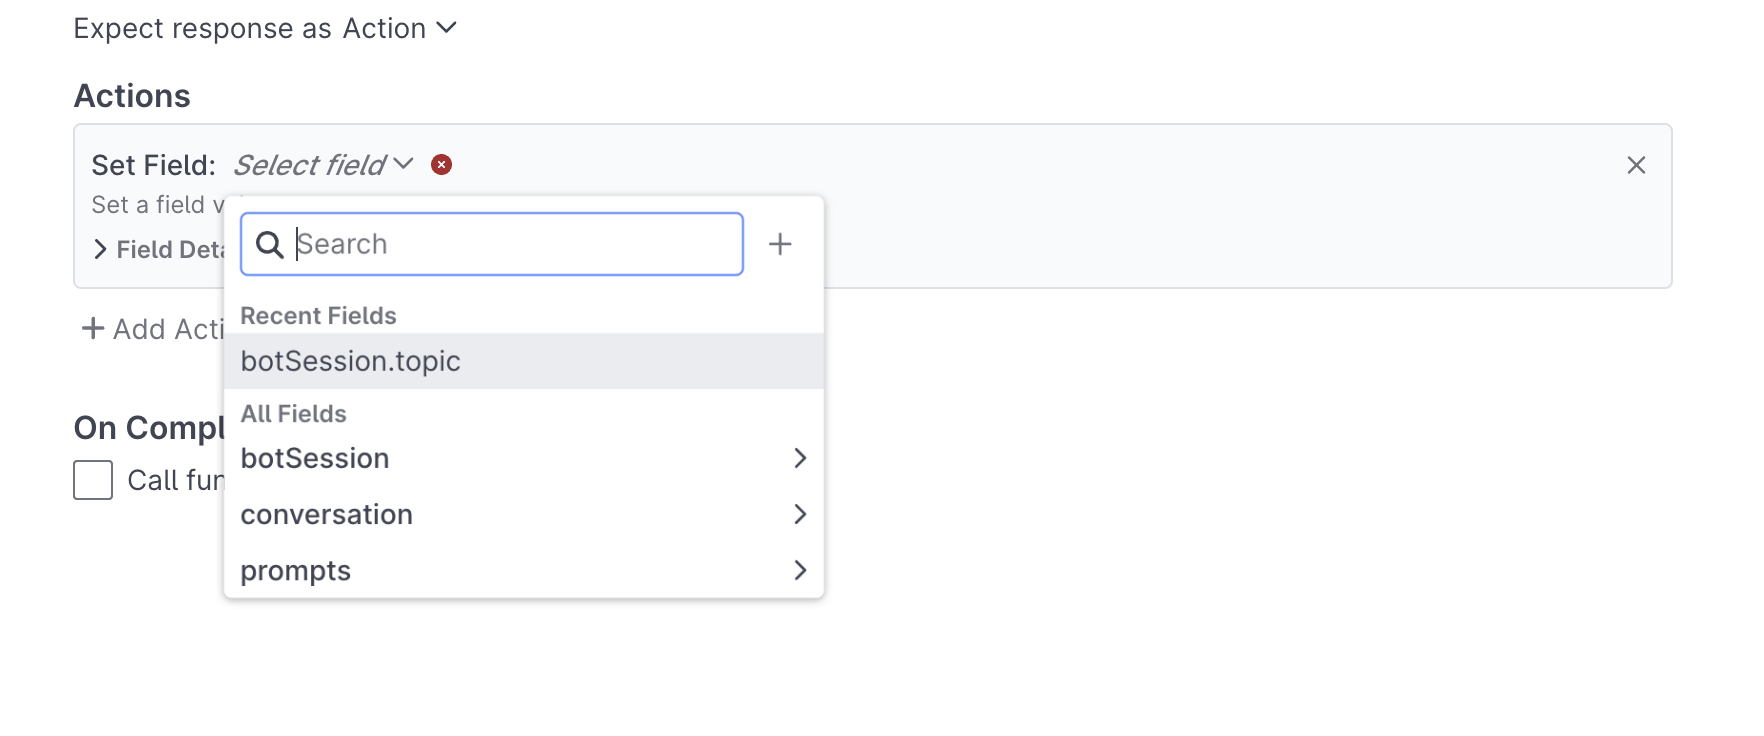
Once selected, users can set on or multiple Fields from the response tab:
Configuration Tab
The Configuration tab in each prompt enables you to override the default settings configured in the Configuration Panel, as well as declare whether you'd like to build a given prompt using the Function Editor.
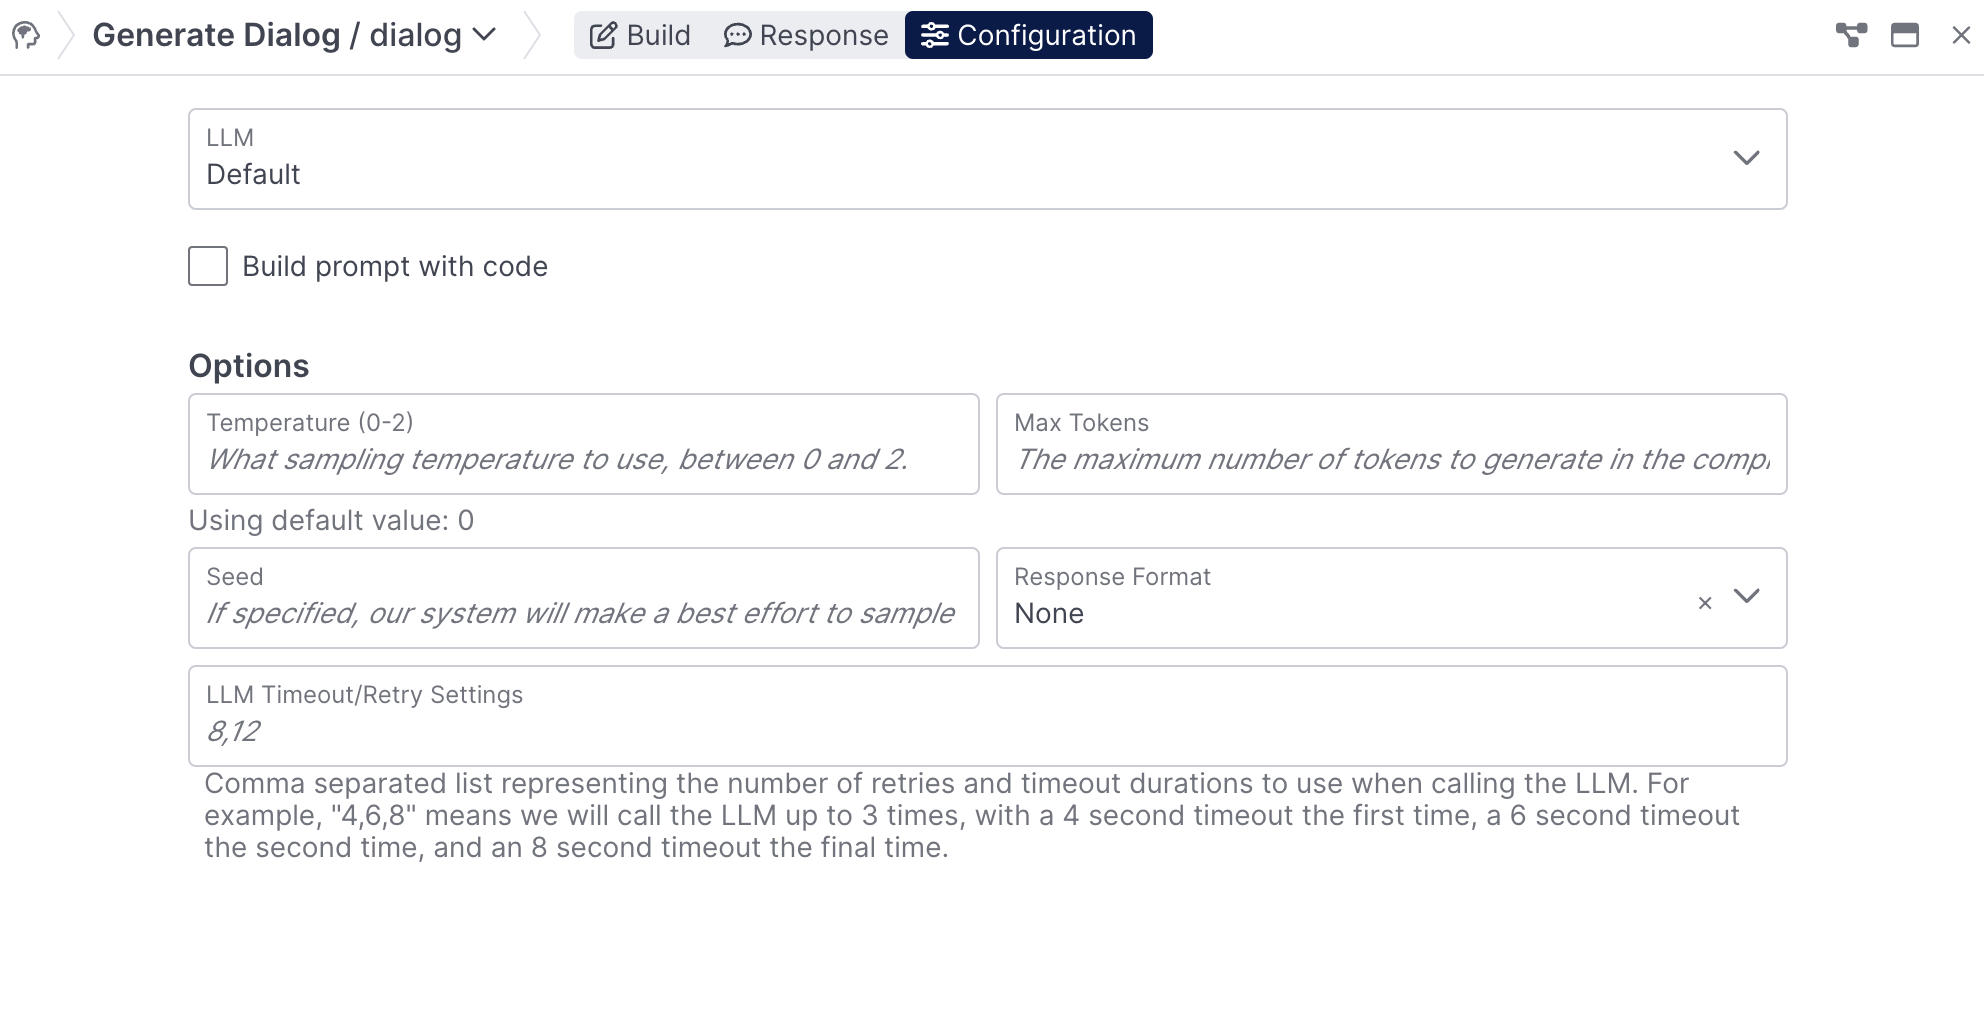
Depending on the use case for a given prompt, you may find it necessary to make tweaks to the model your using, the response format, and more.
Rapid Prompt Engineering
It is very common to have the Debug Workbench and Prompt Editor open simultaneously so that events and tests can be quickly replayed while the prompt is engineered.

You can view the prompt trace and source side-by-side while replaying events or test cases. Use the Open button to focus the prompt editor on the prompt that is currently selected in the Debug Workbench
When to use code
The prompt editor supports authoring many types of prompts. However, there may be times when it's convenient or necessary to use code:
- When including API Call results directly in your prompt. If you want to include API response data in prompts without writing the information to intermediate session fields, you'll need to use code. Depending on the project, it might be preferable to write the prompt-visible data to session fields to keep prompting code-free and isolating code to the Call API behaviors.
- When including data contained in buffers directly in your prompt Once again, you might choose to use a Call Function node to extract the data from the buffers and place them in session fields if you wish to keep prompts code-free
- When using the addEvidence action in conjunction with the Verify Claim Behavior Currently this function is only available from the Function Editor
- When the Conversation History, String Formatters and Search Results features don't give you enough control over your prompt content. With code you can achieve pretty much whatever you want by translating from the context object to a prompt string.
Updated 5 months ago