
Debug Workbench
Overview
The Debug Workbench is a bonafide Swiss Army Knife. It enables you to do all of the following:
- Visualize how events (like new customer messages) traveled through your project's flow.
- Debug your functions, review your prompts, token usage and execution time
- Quickly replay events against different versions of your project, allowing for rapid prompt engineering and function development
- Promote events into regression test cases and add assertions against the final state of the context
Tracing an Event
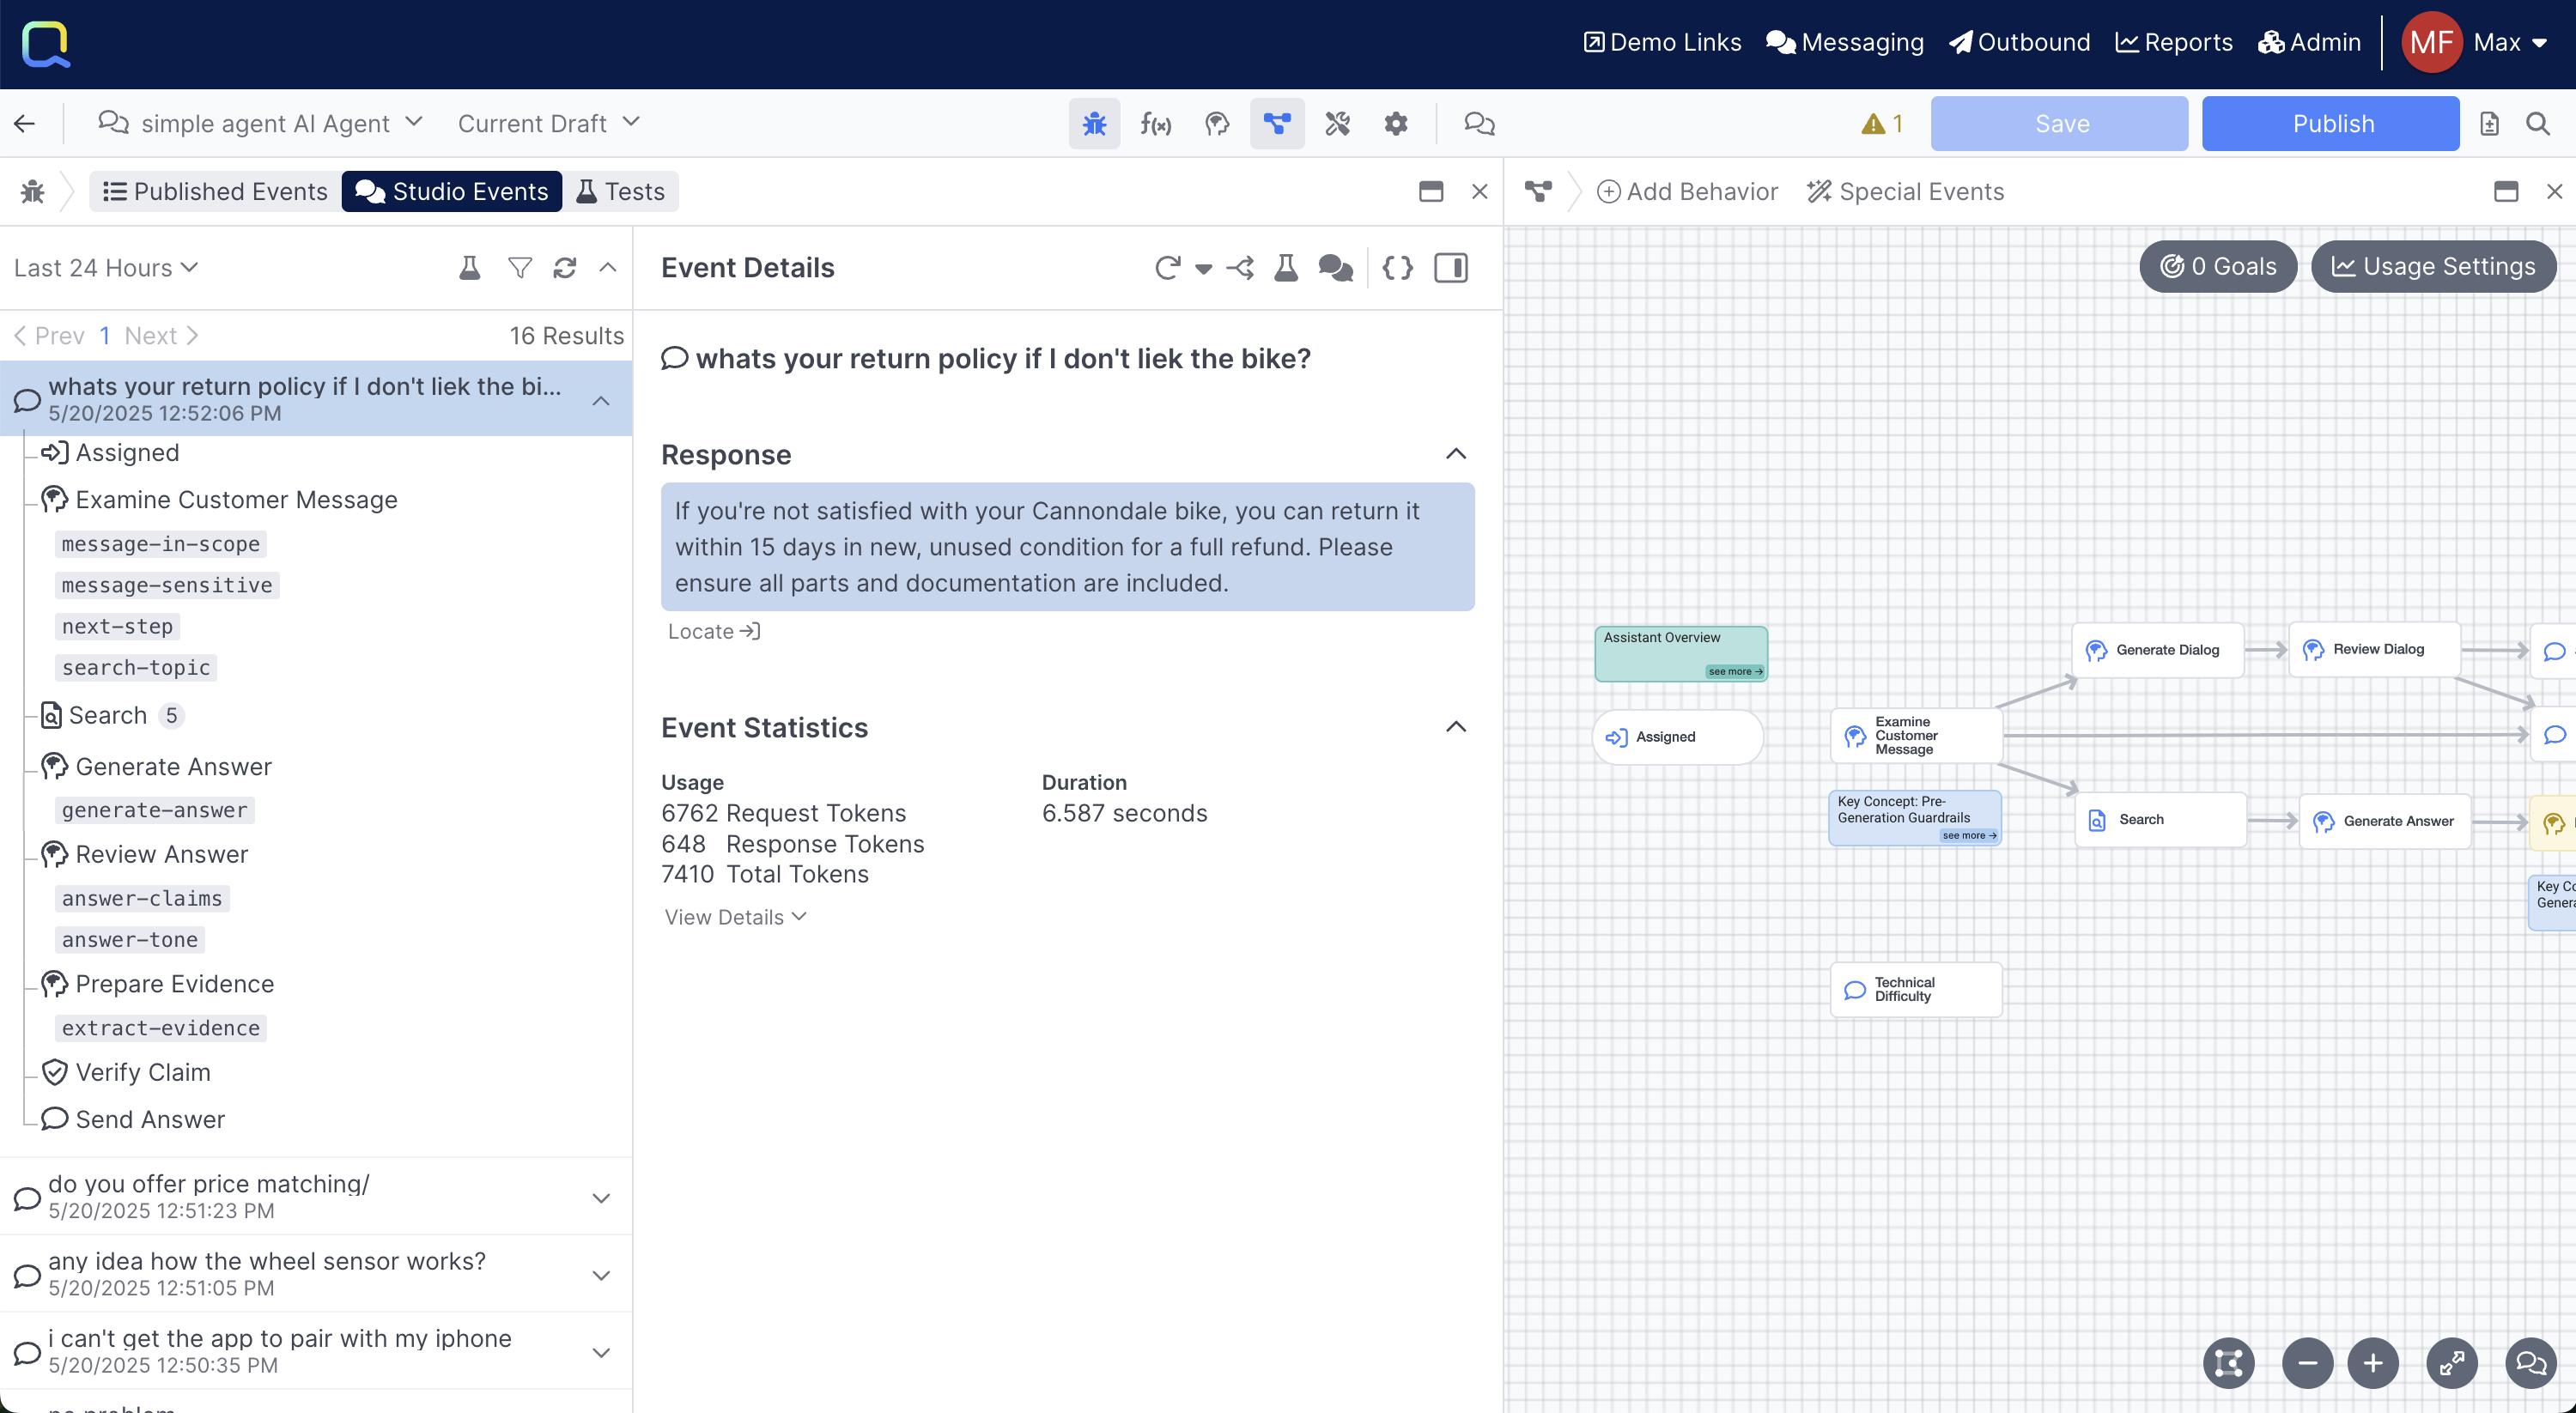
When you select an event from the left handle side, it will expand, enabling you to see all of the steps that were taken during a give turn.
You can click into every step to get a detailed breakdown of exactly what happened during that step:
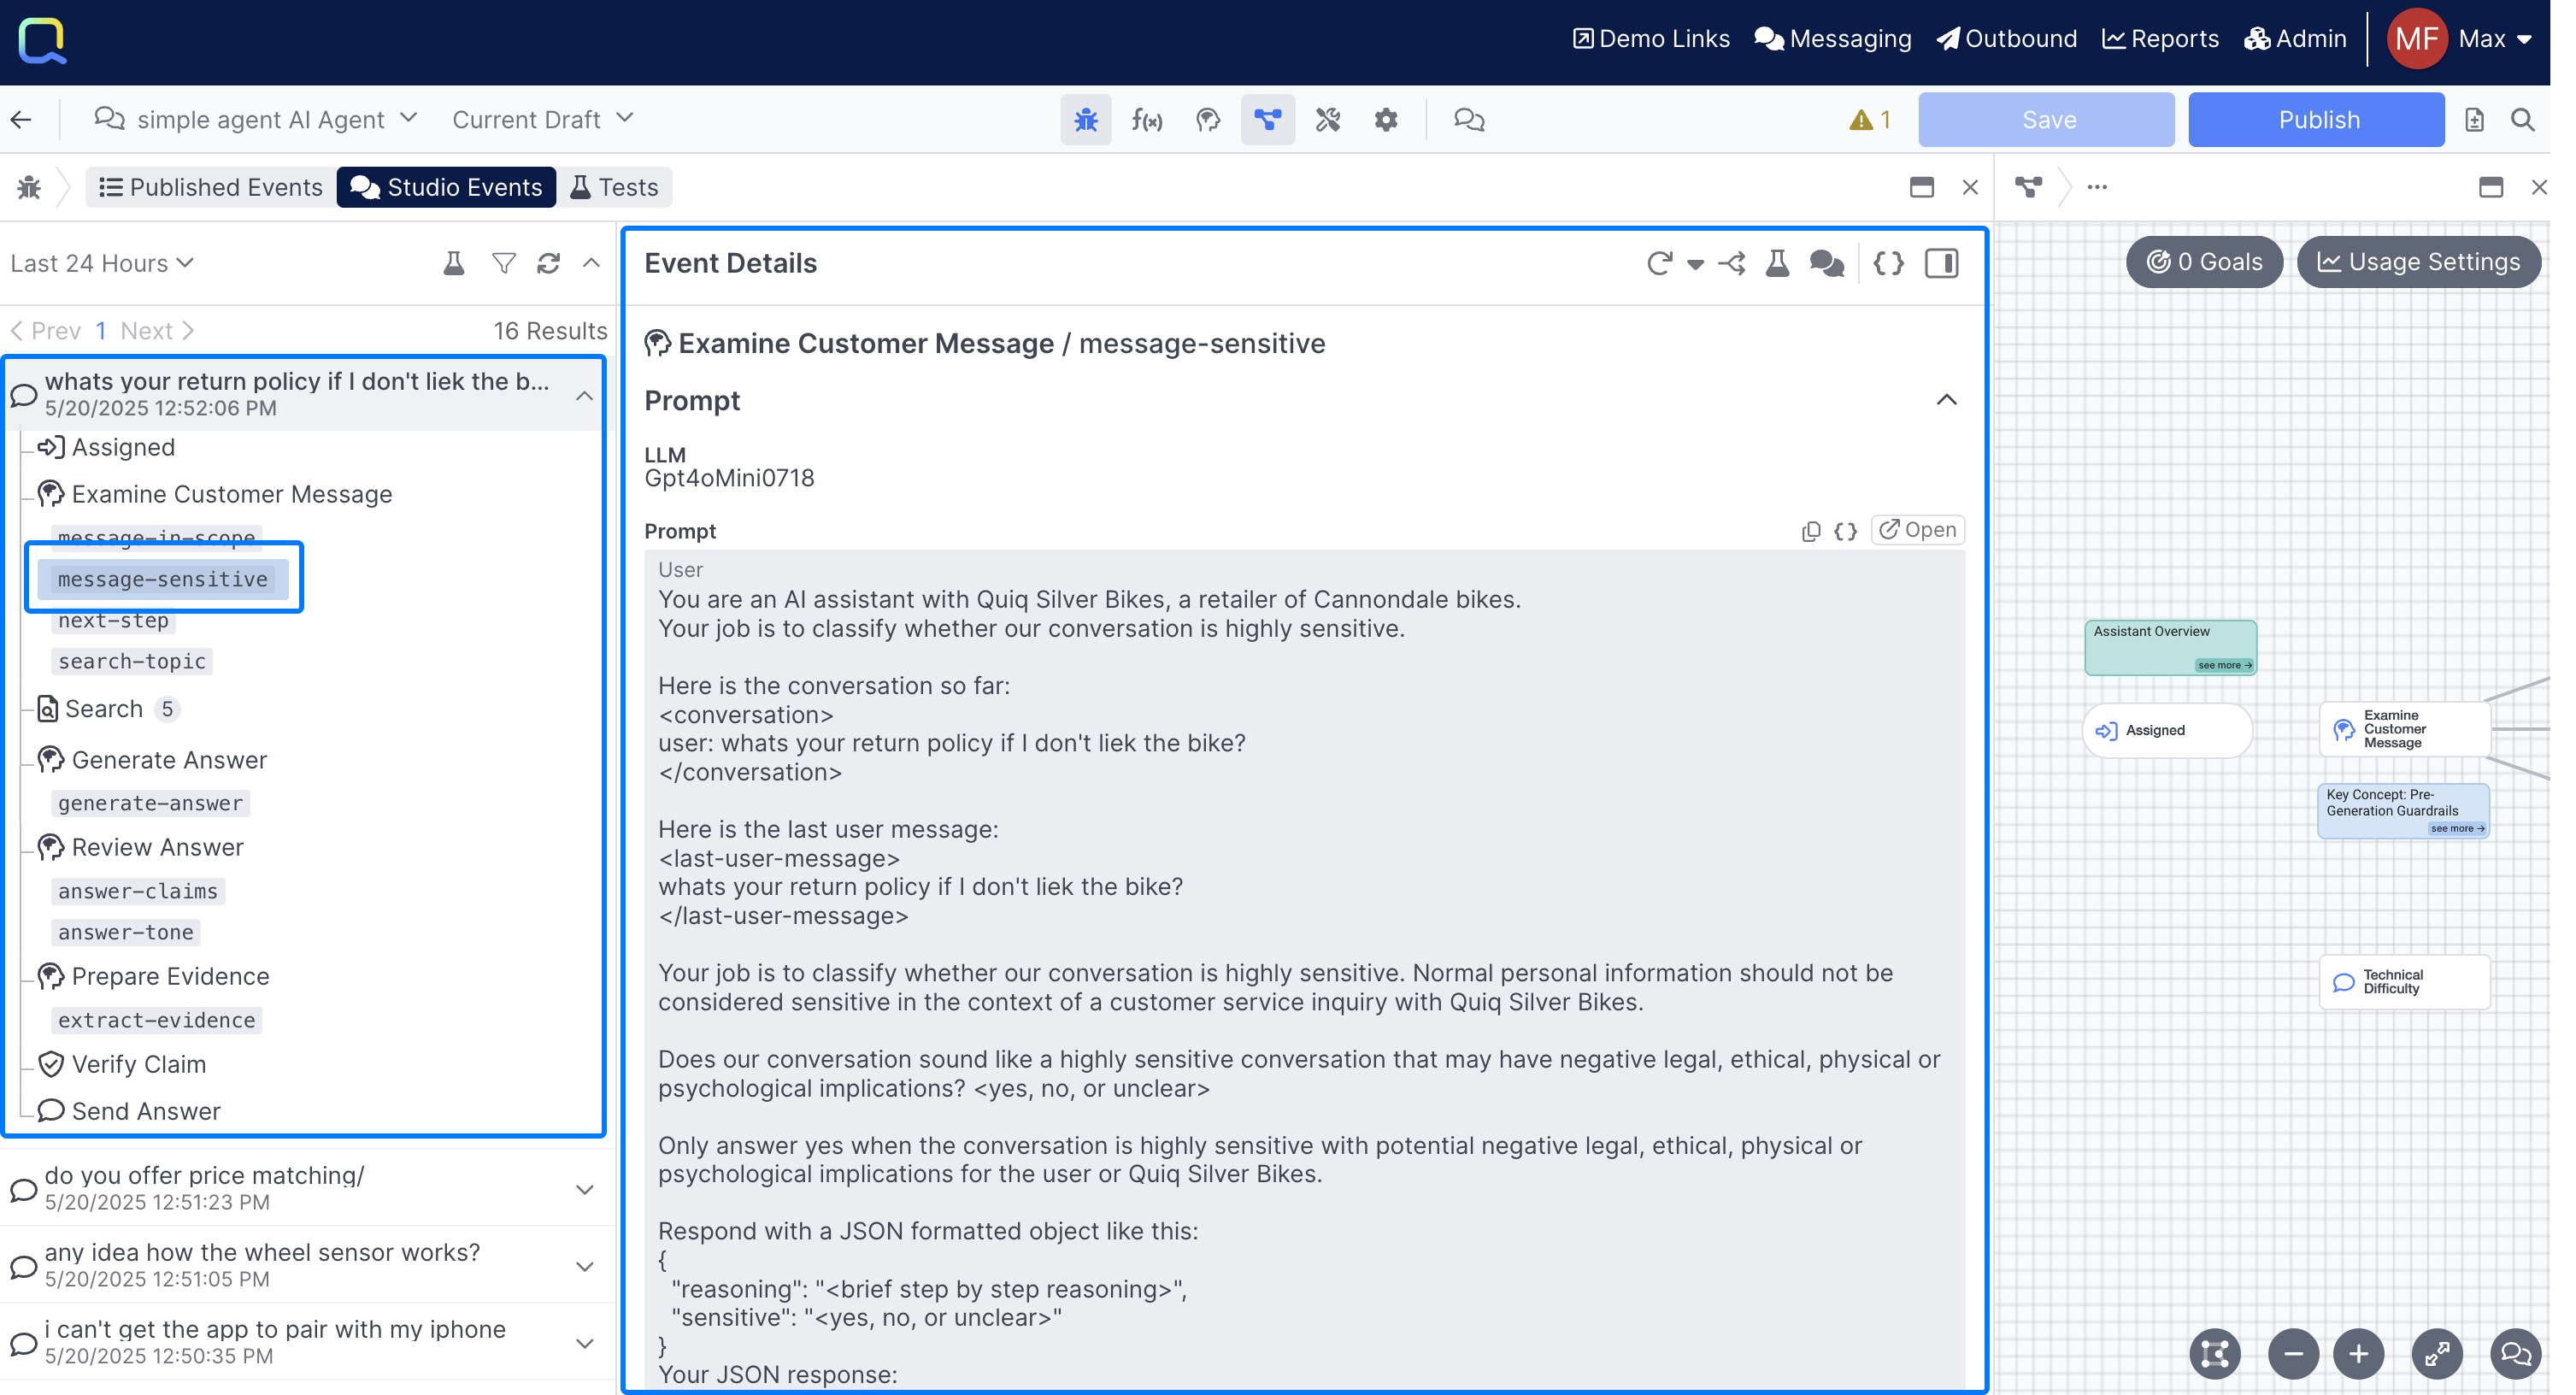
In this example we can see a the prompt used in a sample message-sensitive prompt.
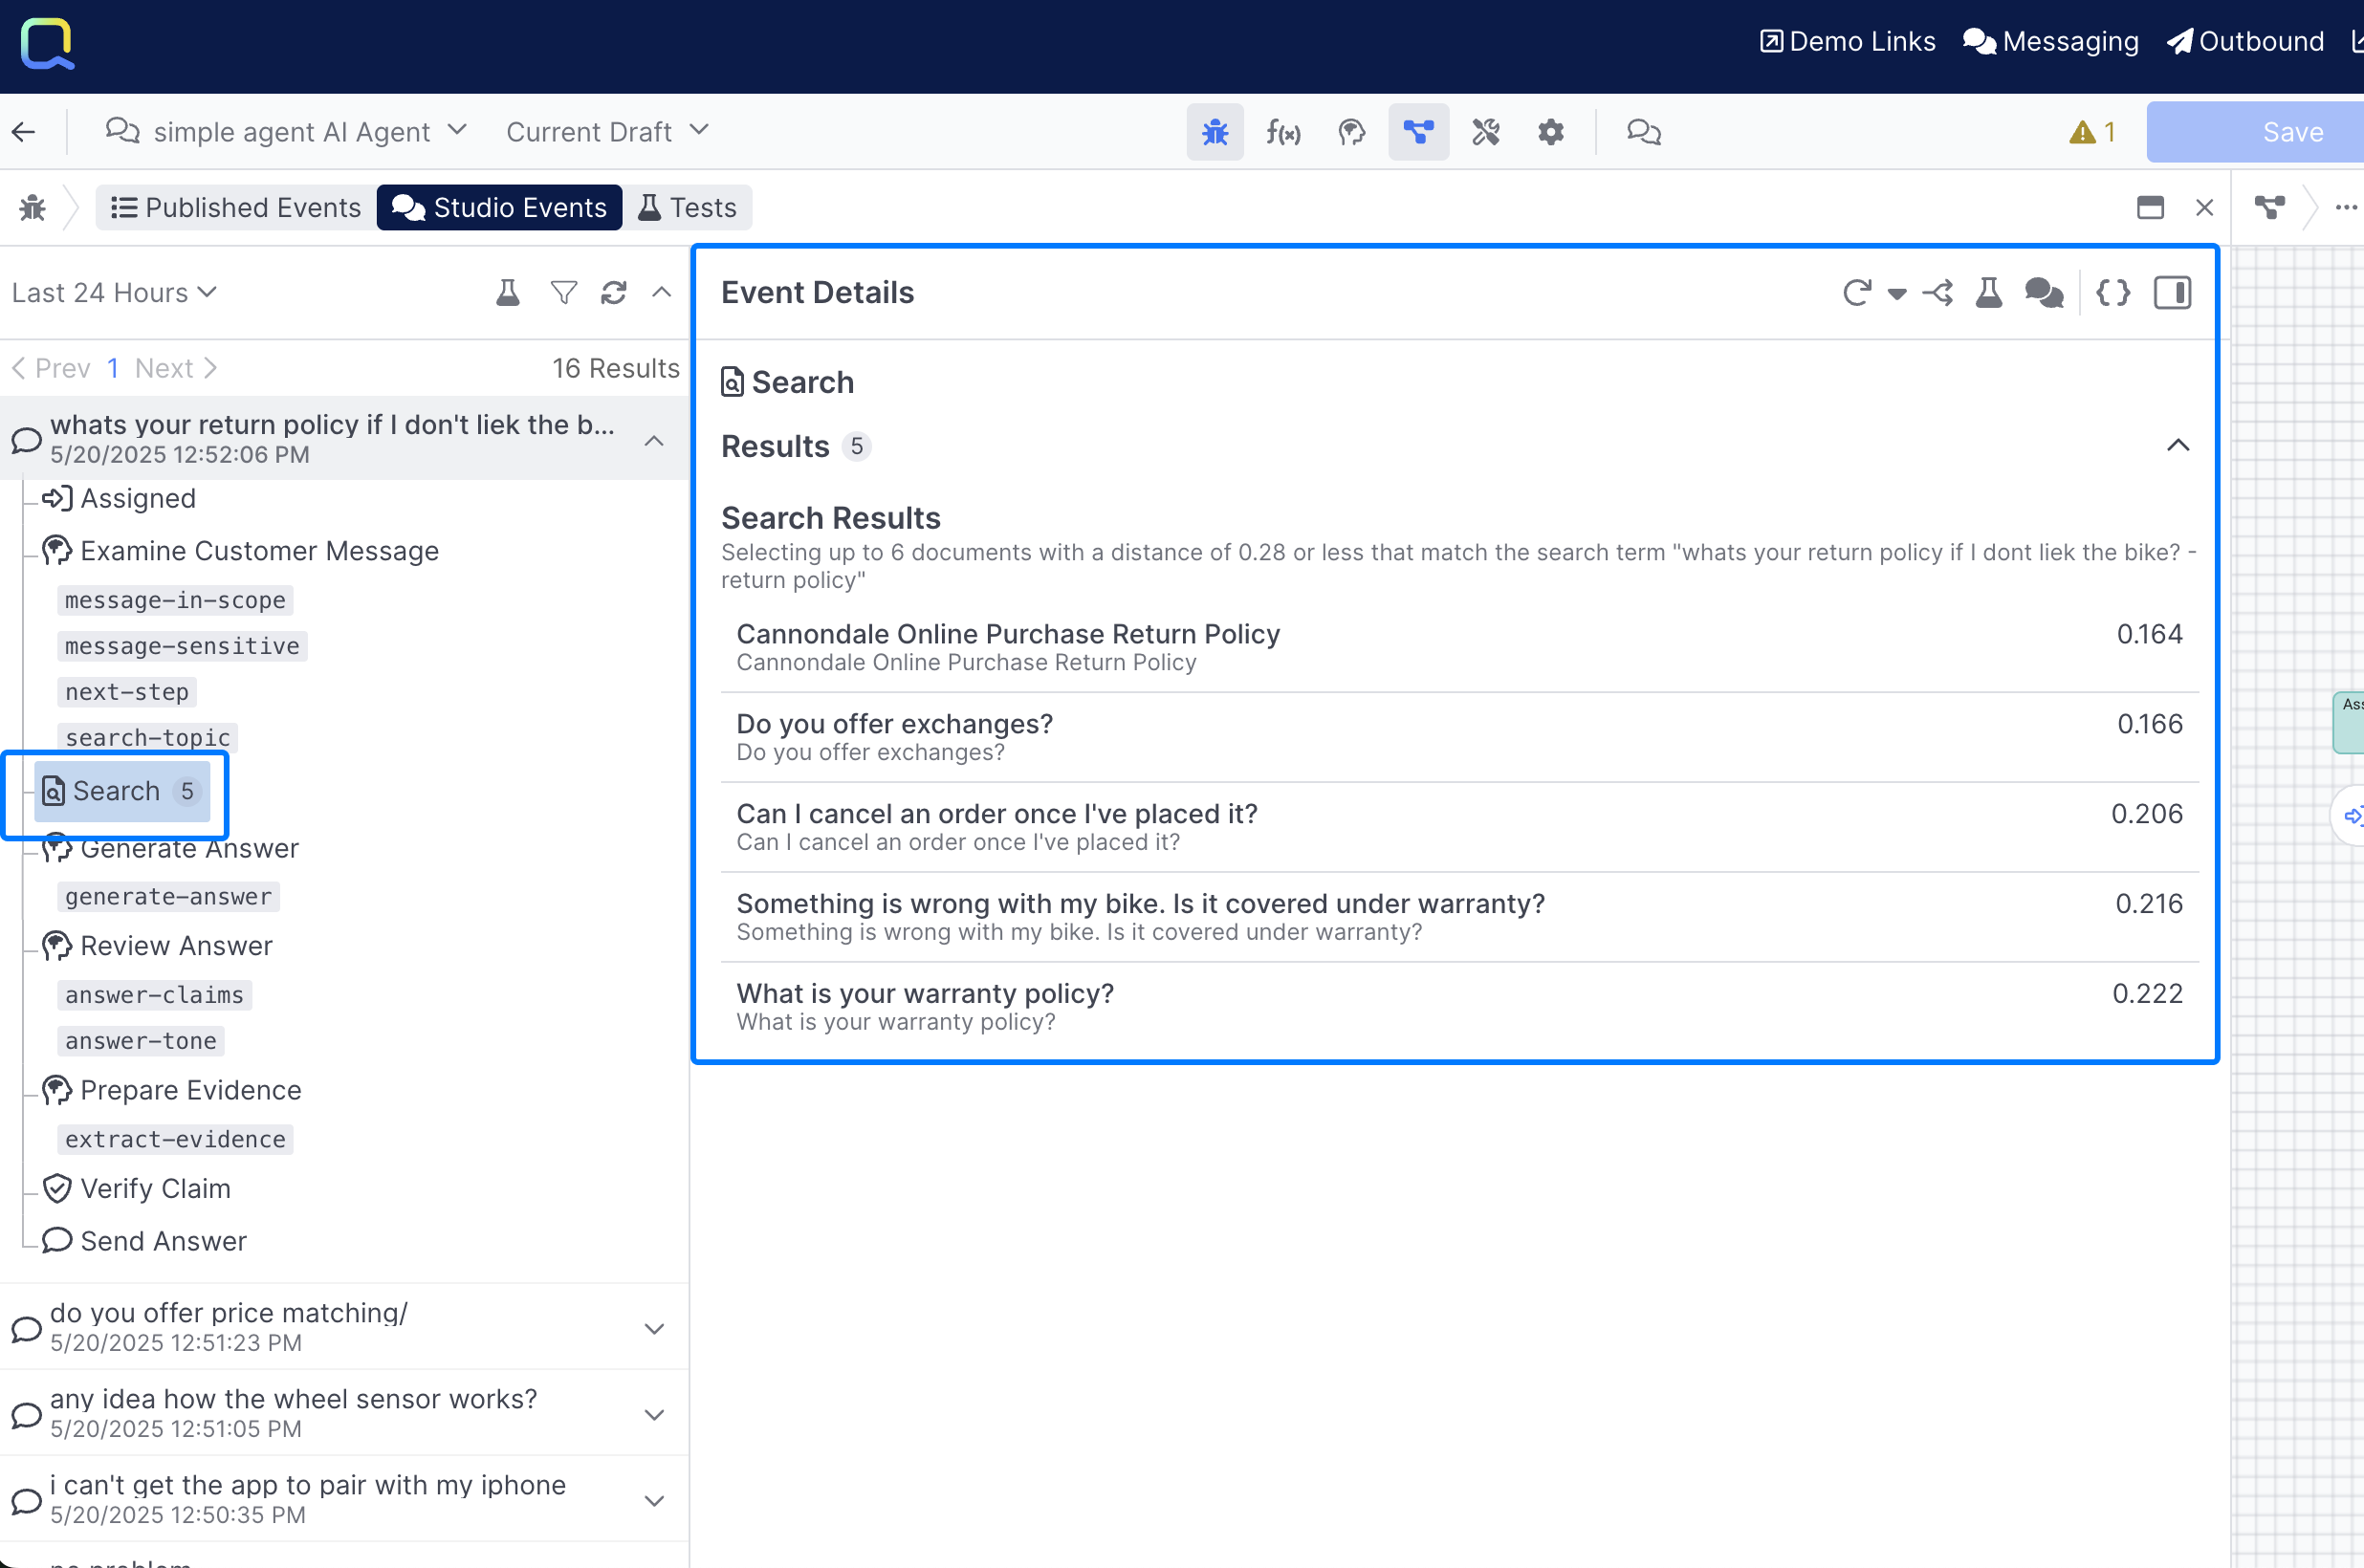
In the above example, we can see the customer question passed through multiple different prompts and behaviors, different behavior types reveal different information, for example when you click on a Search Behavior in the Debug Workbench, you'll see what documents got returned:
Finding Events
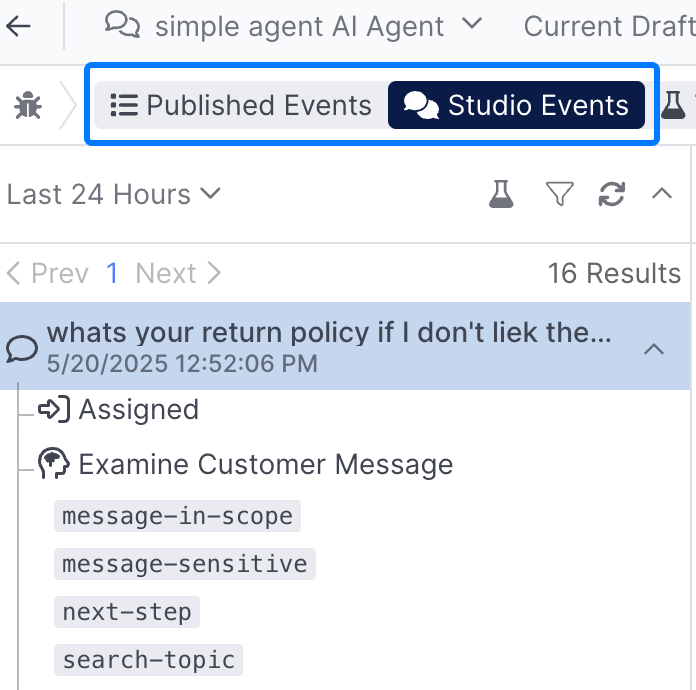
There are two tabs for viewing events with Debug Workbench, Published Events and Studio Events, Studio Events occur from conversations using the Chat Panel, and Published Events show real conversations with your users:
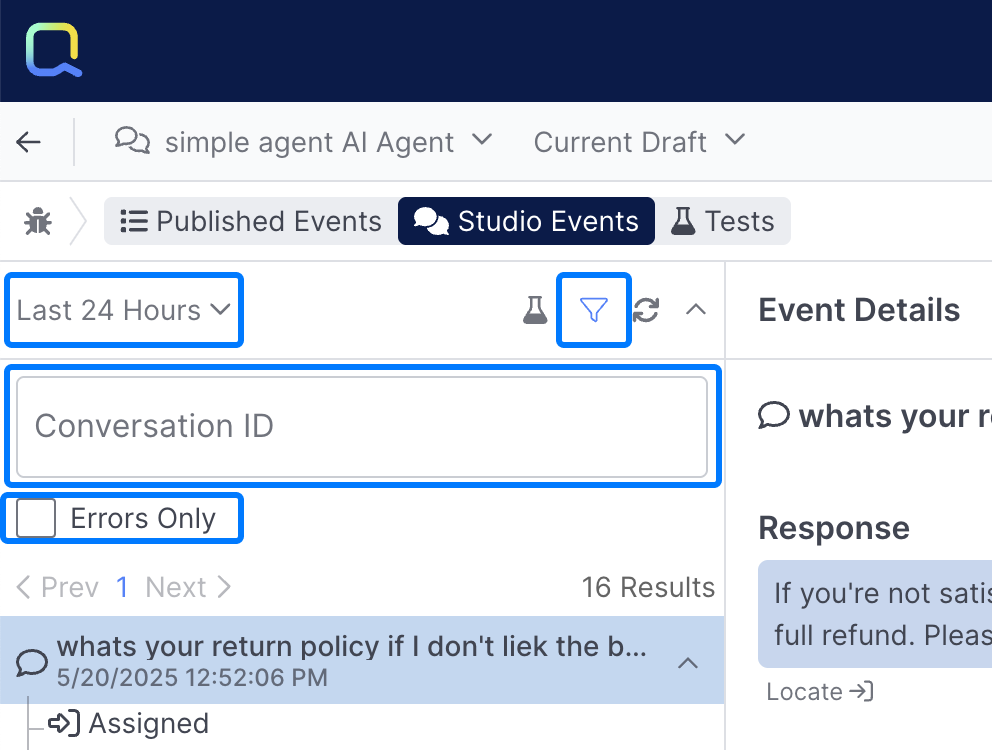
You can use the date selector, Conversation ID filter, and Errors Only checkbox to further refine the events that show up:
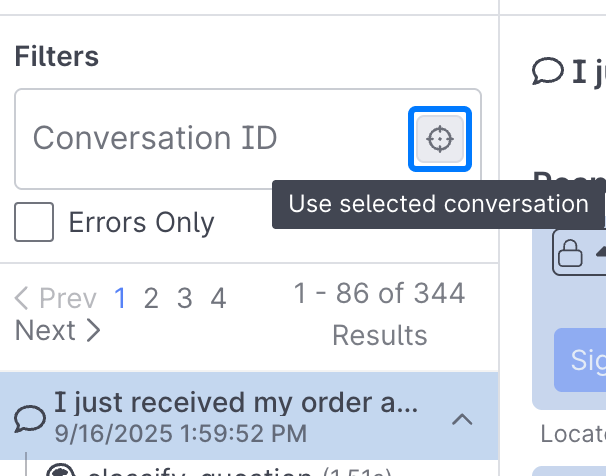
If you have an event already selected, you'll see the ability to filter to just events from that conversation:
Additional Tools
In addition to the Event Details view, there are a handful of other analysis capabilities that are helpful.
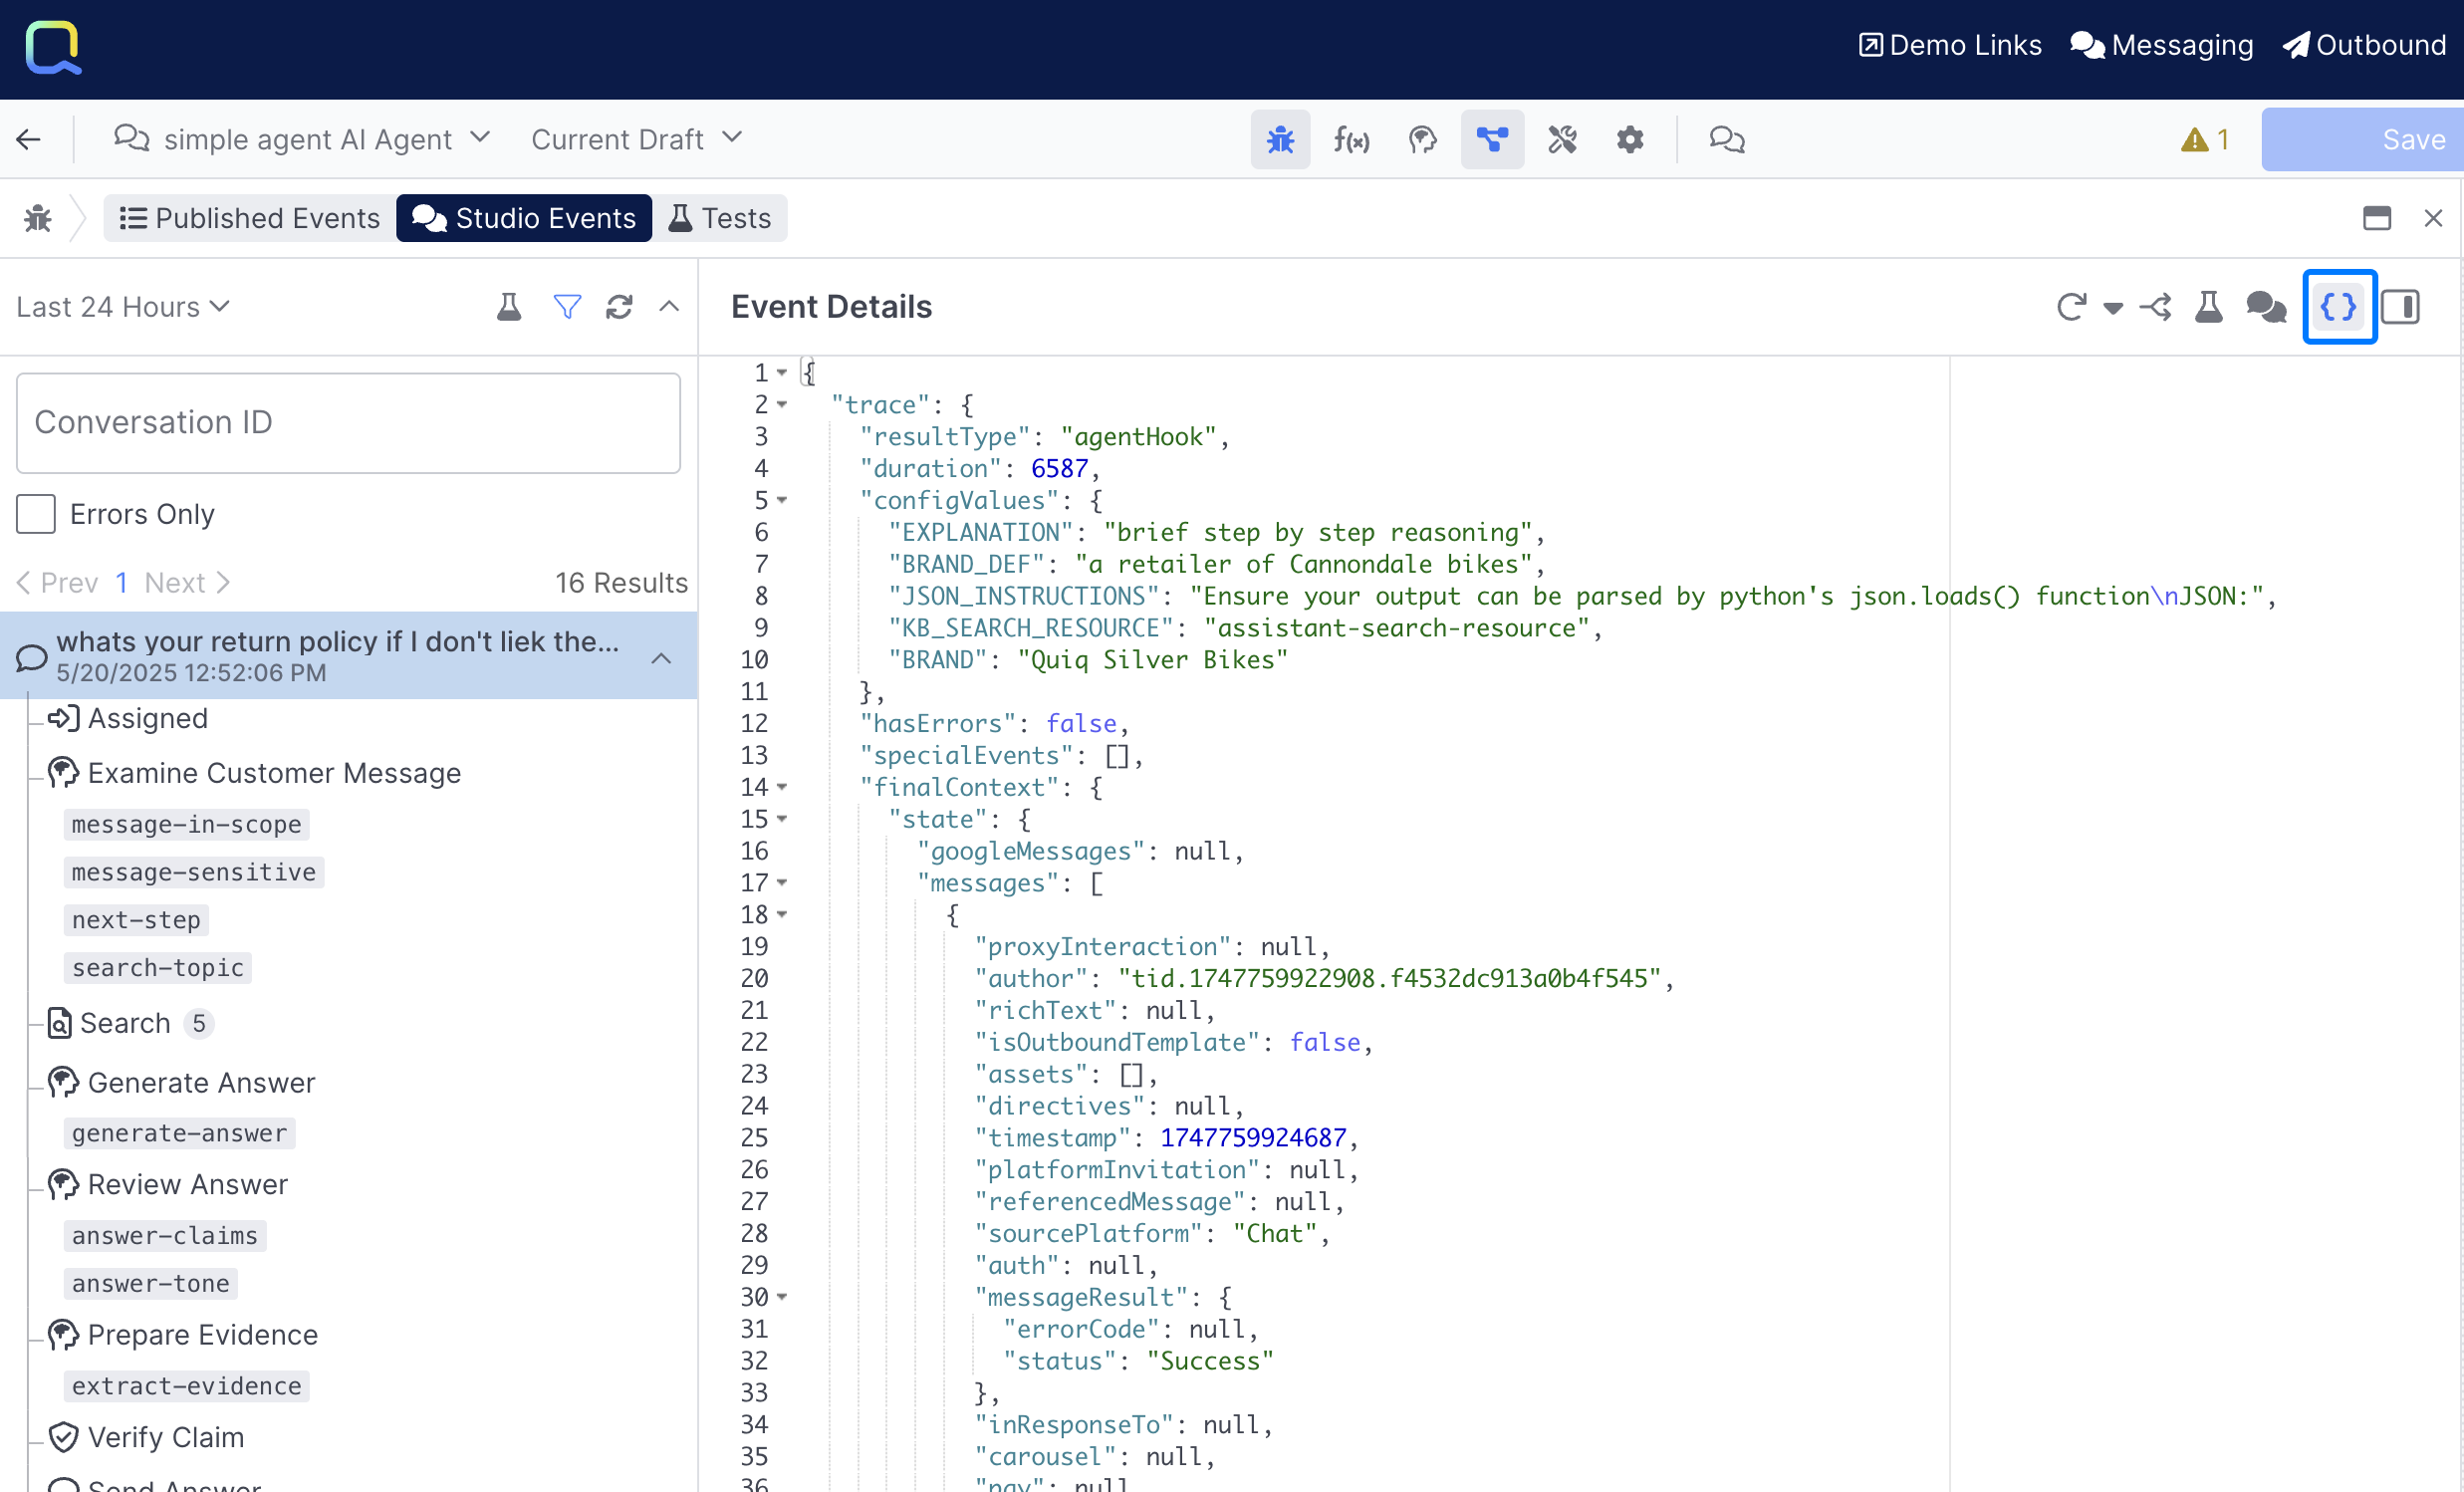
View JSON
The View JSON button enables user to view the event as JSON, with full granular detail:
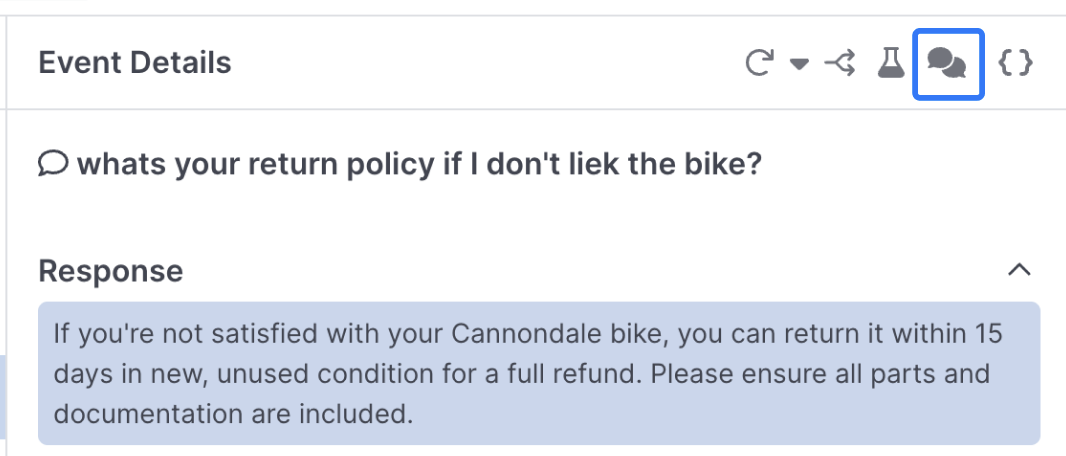
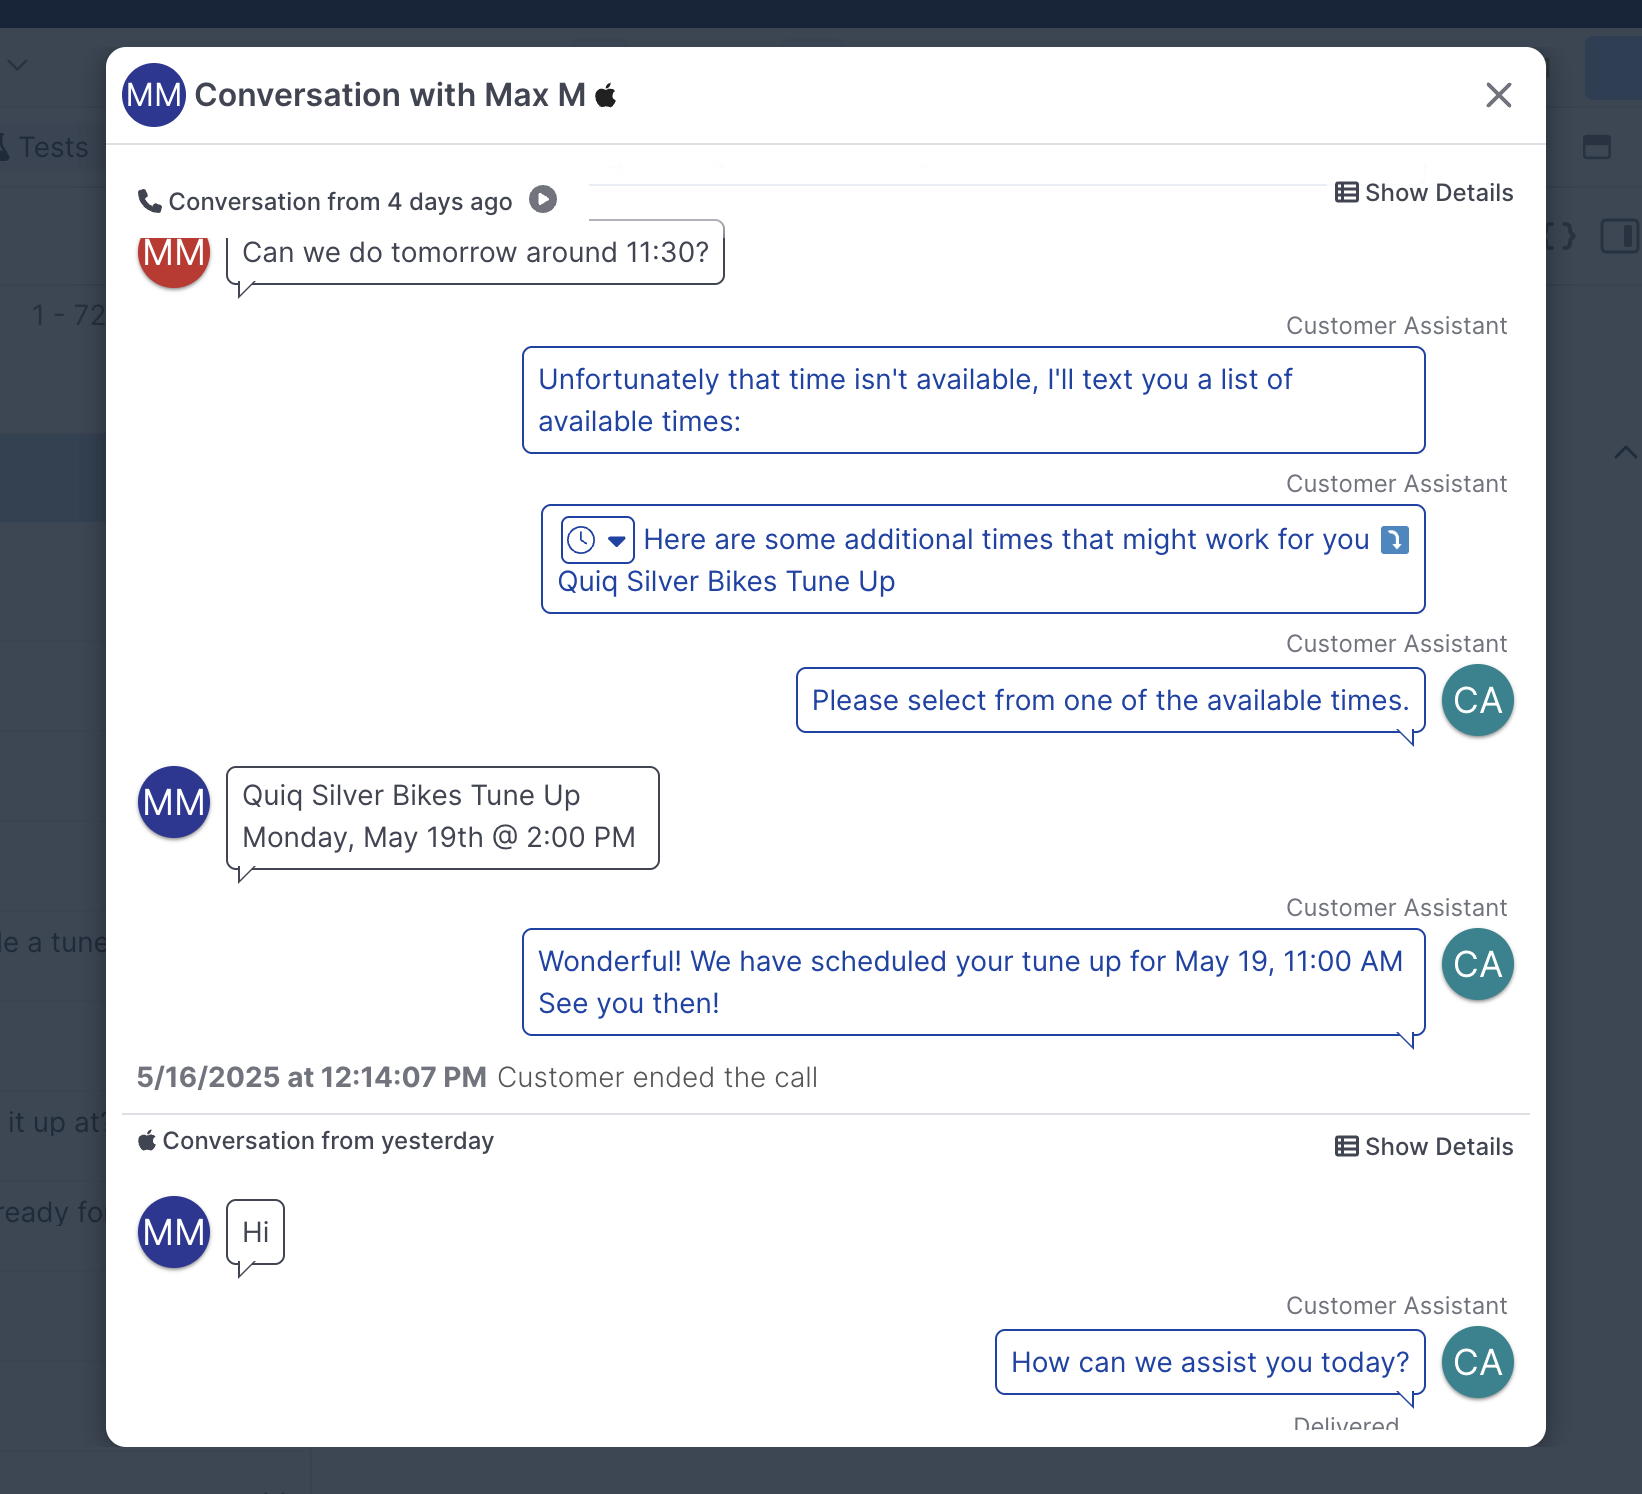
View Conversation
The View Conversation button provides a transcript view of the conversation, if applicable other conversations will show in the transcript view:
Inspector
The Show Inspector button provides a range of additional helpful details:
- View the full conversation transcript at the time the event occurred
- View the console output (print output) of the Functions that executed. This is very useful for debugging functions.
- View the change in field values from the beginning to end of flow execution
Event Replay
Event Replay enables you to replay a given event as many times as you'd like, which is very helpful for both rapid testing and building of an experience, and for getting a sense of how often a prompt completion might vary:
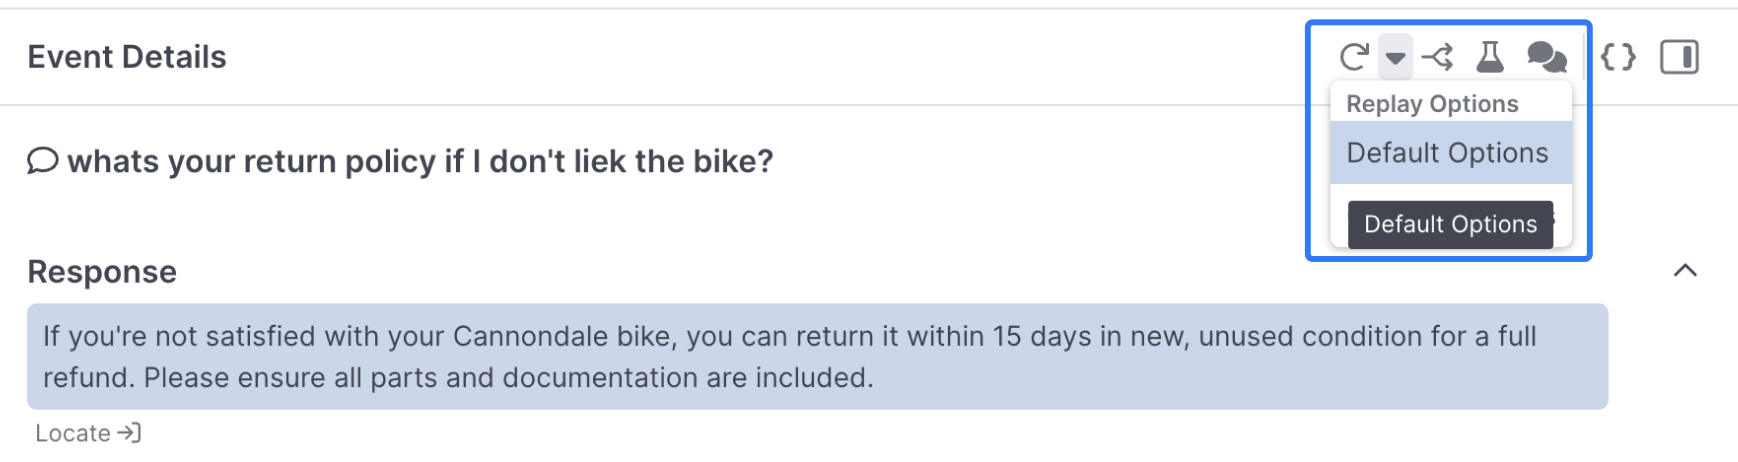
You can define various replay options using the Custom Options button, which lets you modify the search phrase and decide how you want to handle API calls that are executed during your replay:

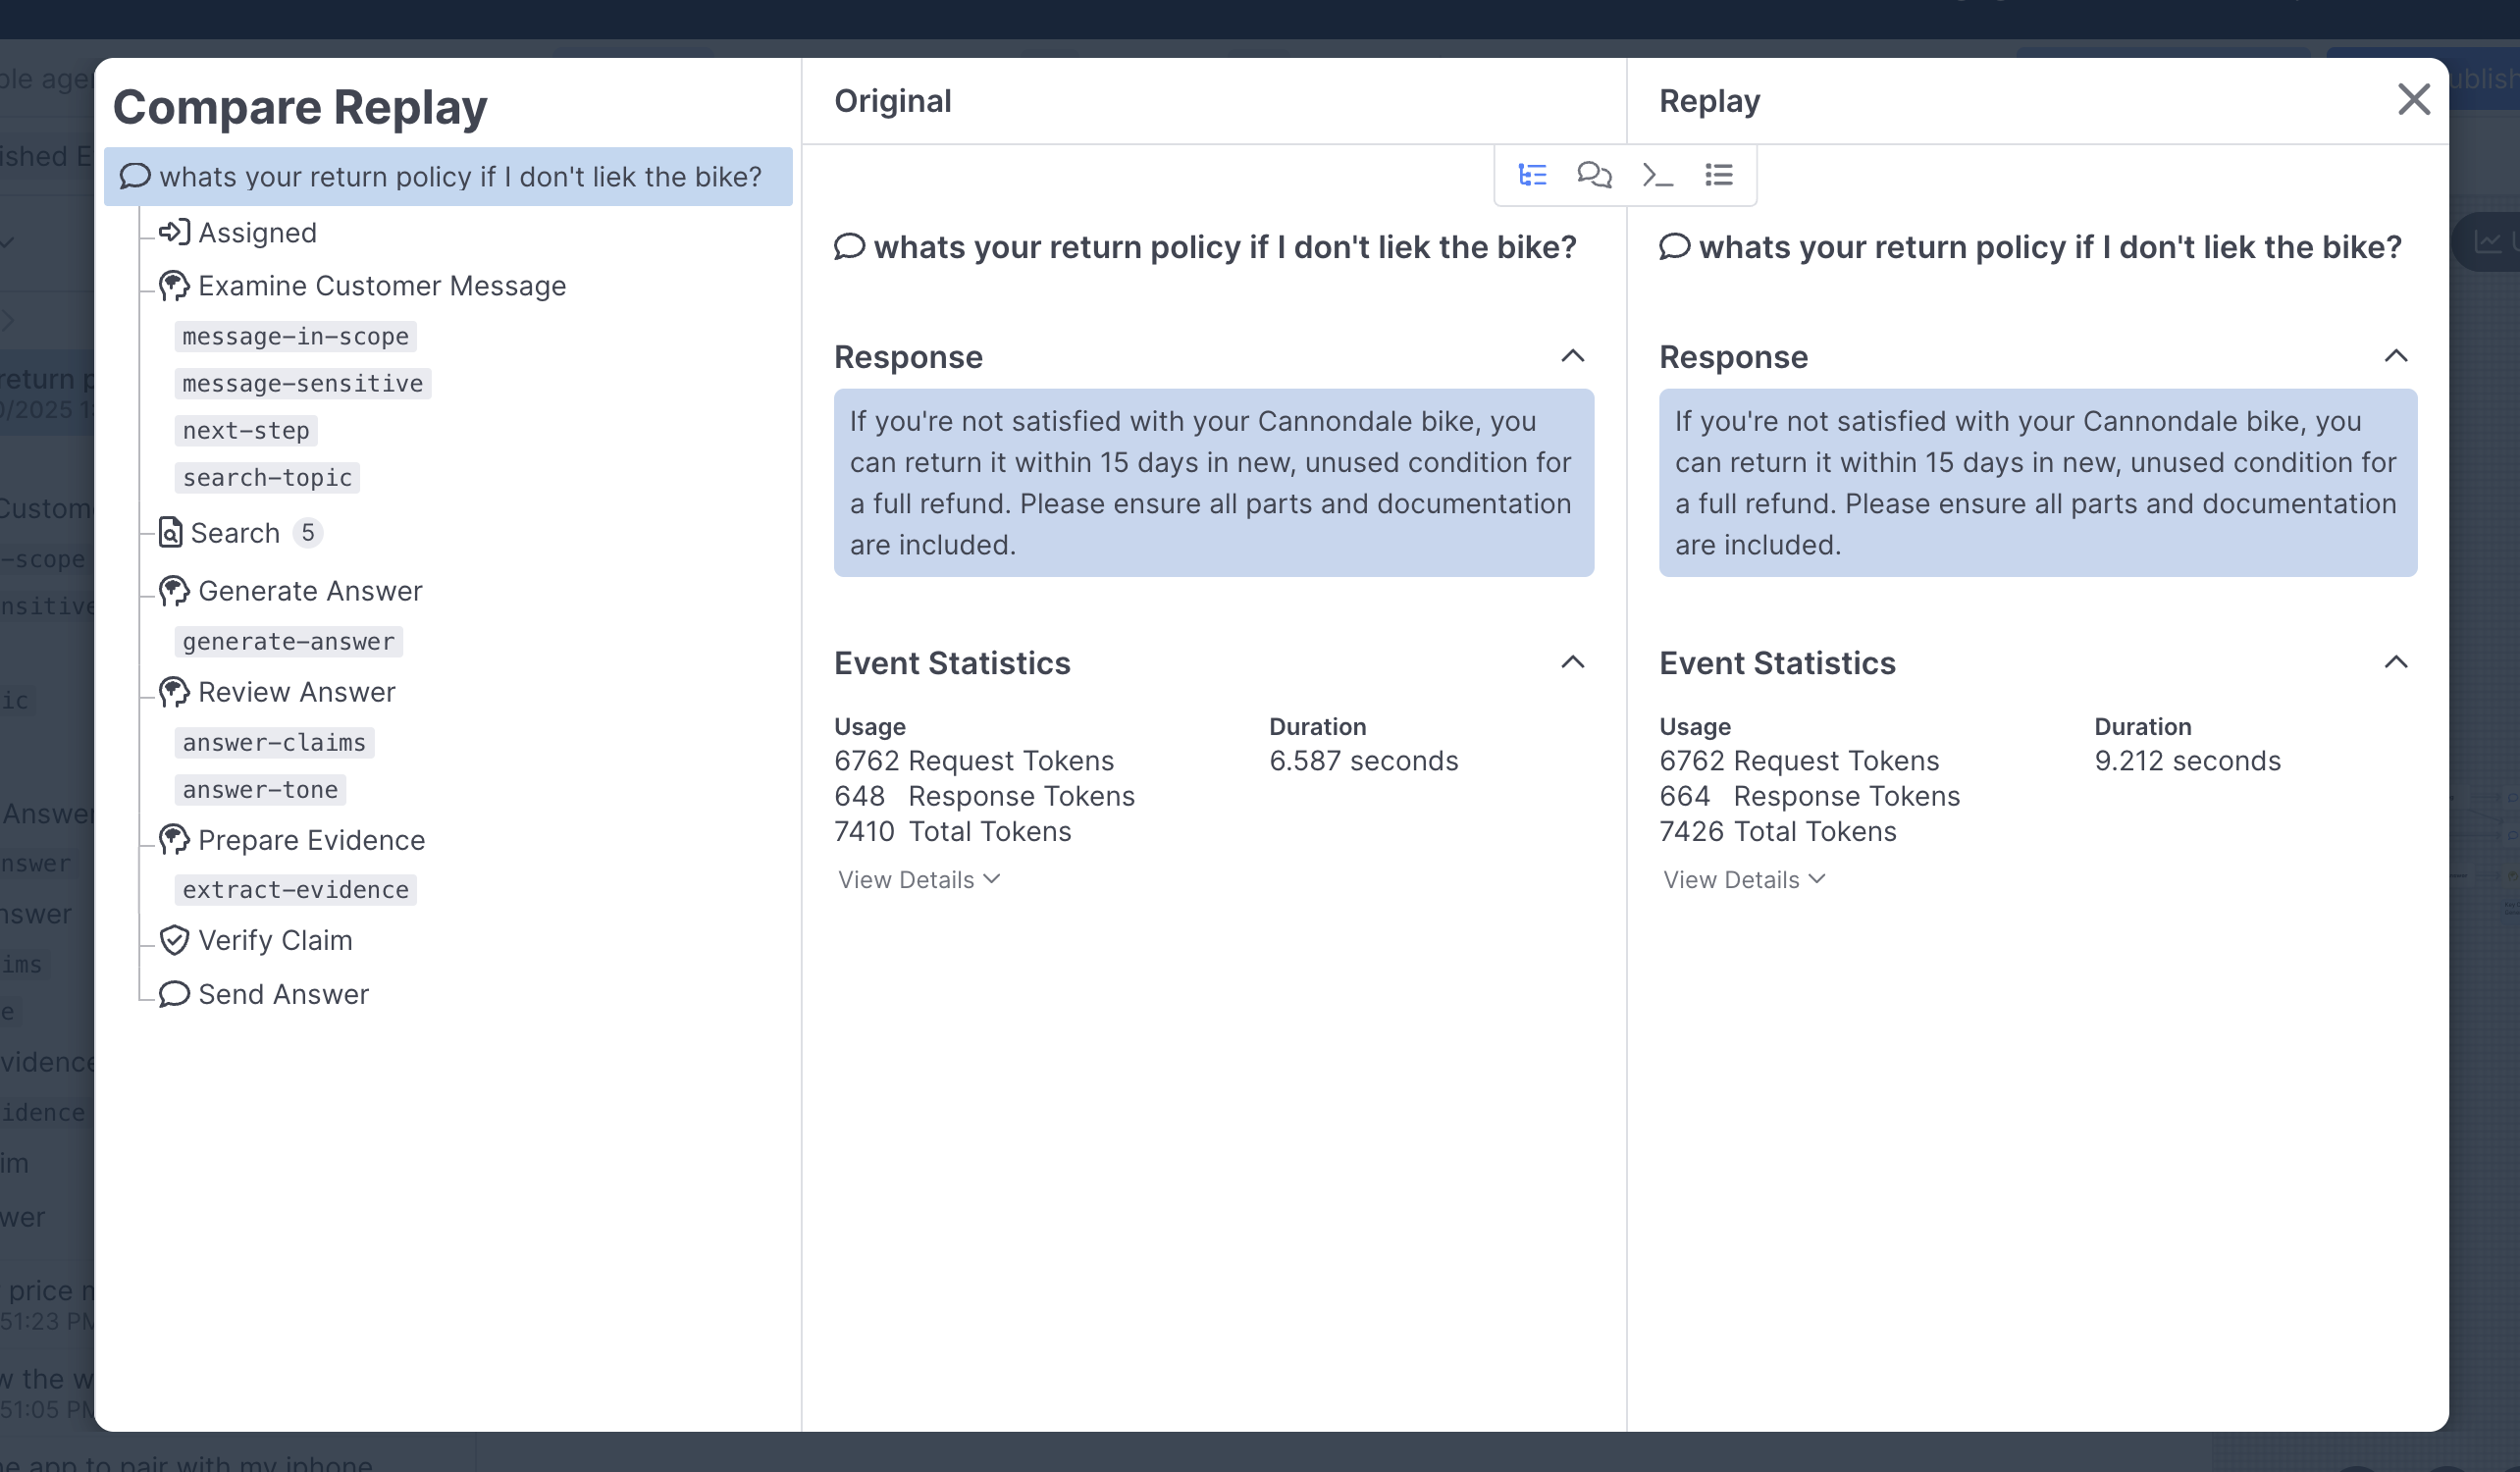
Once you've replayed an event, you can then use Compare Replay button:
Which will give you a detailed breakdown of the original and replayed event, much like you can get in the default Debug Workbench view:
Event Replay & Functions
Writing functions like prompt builders and API response handlers requires a tight development loop where you can quickly reproduce and fix coding errors. Similarly, building good AI agents requires significant prompt engineering which likewise requires a tight prompt experimentation loop. Event Replay satisfies both of these needs.
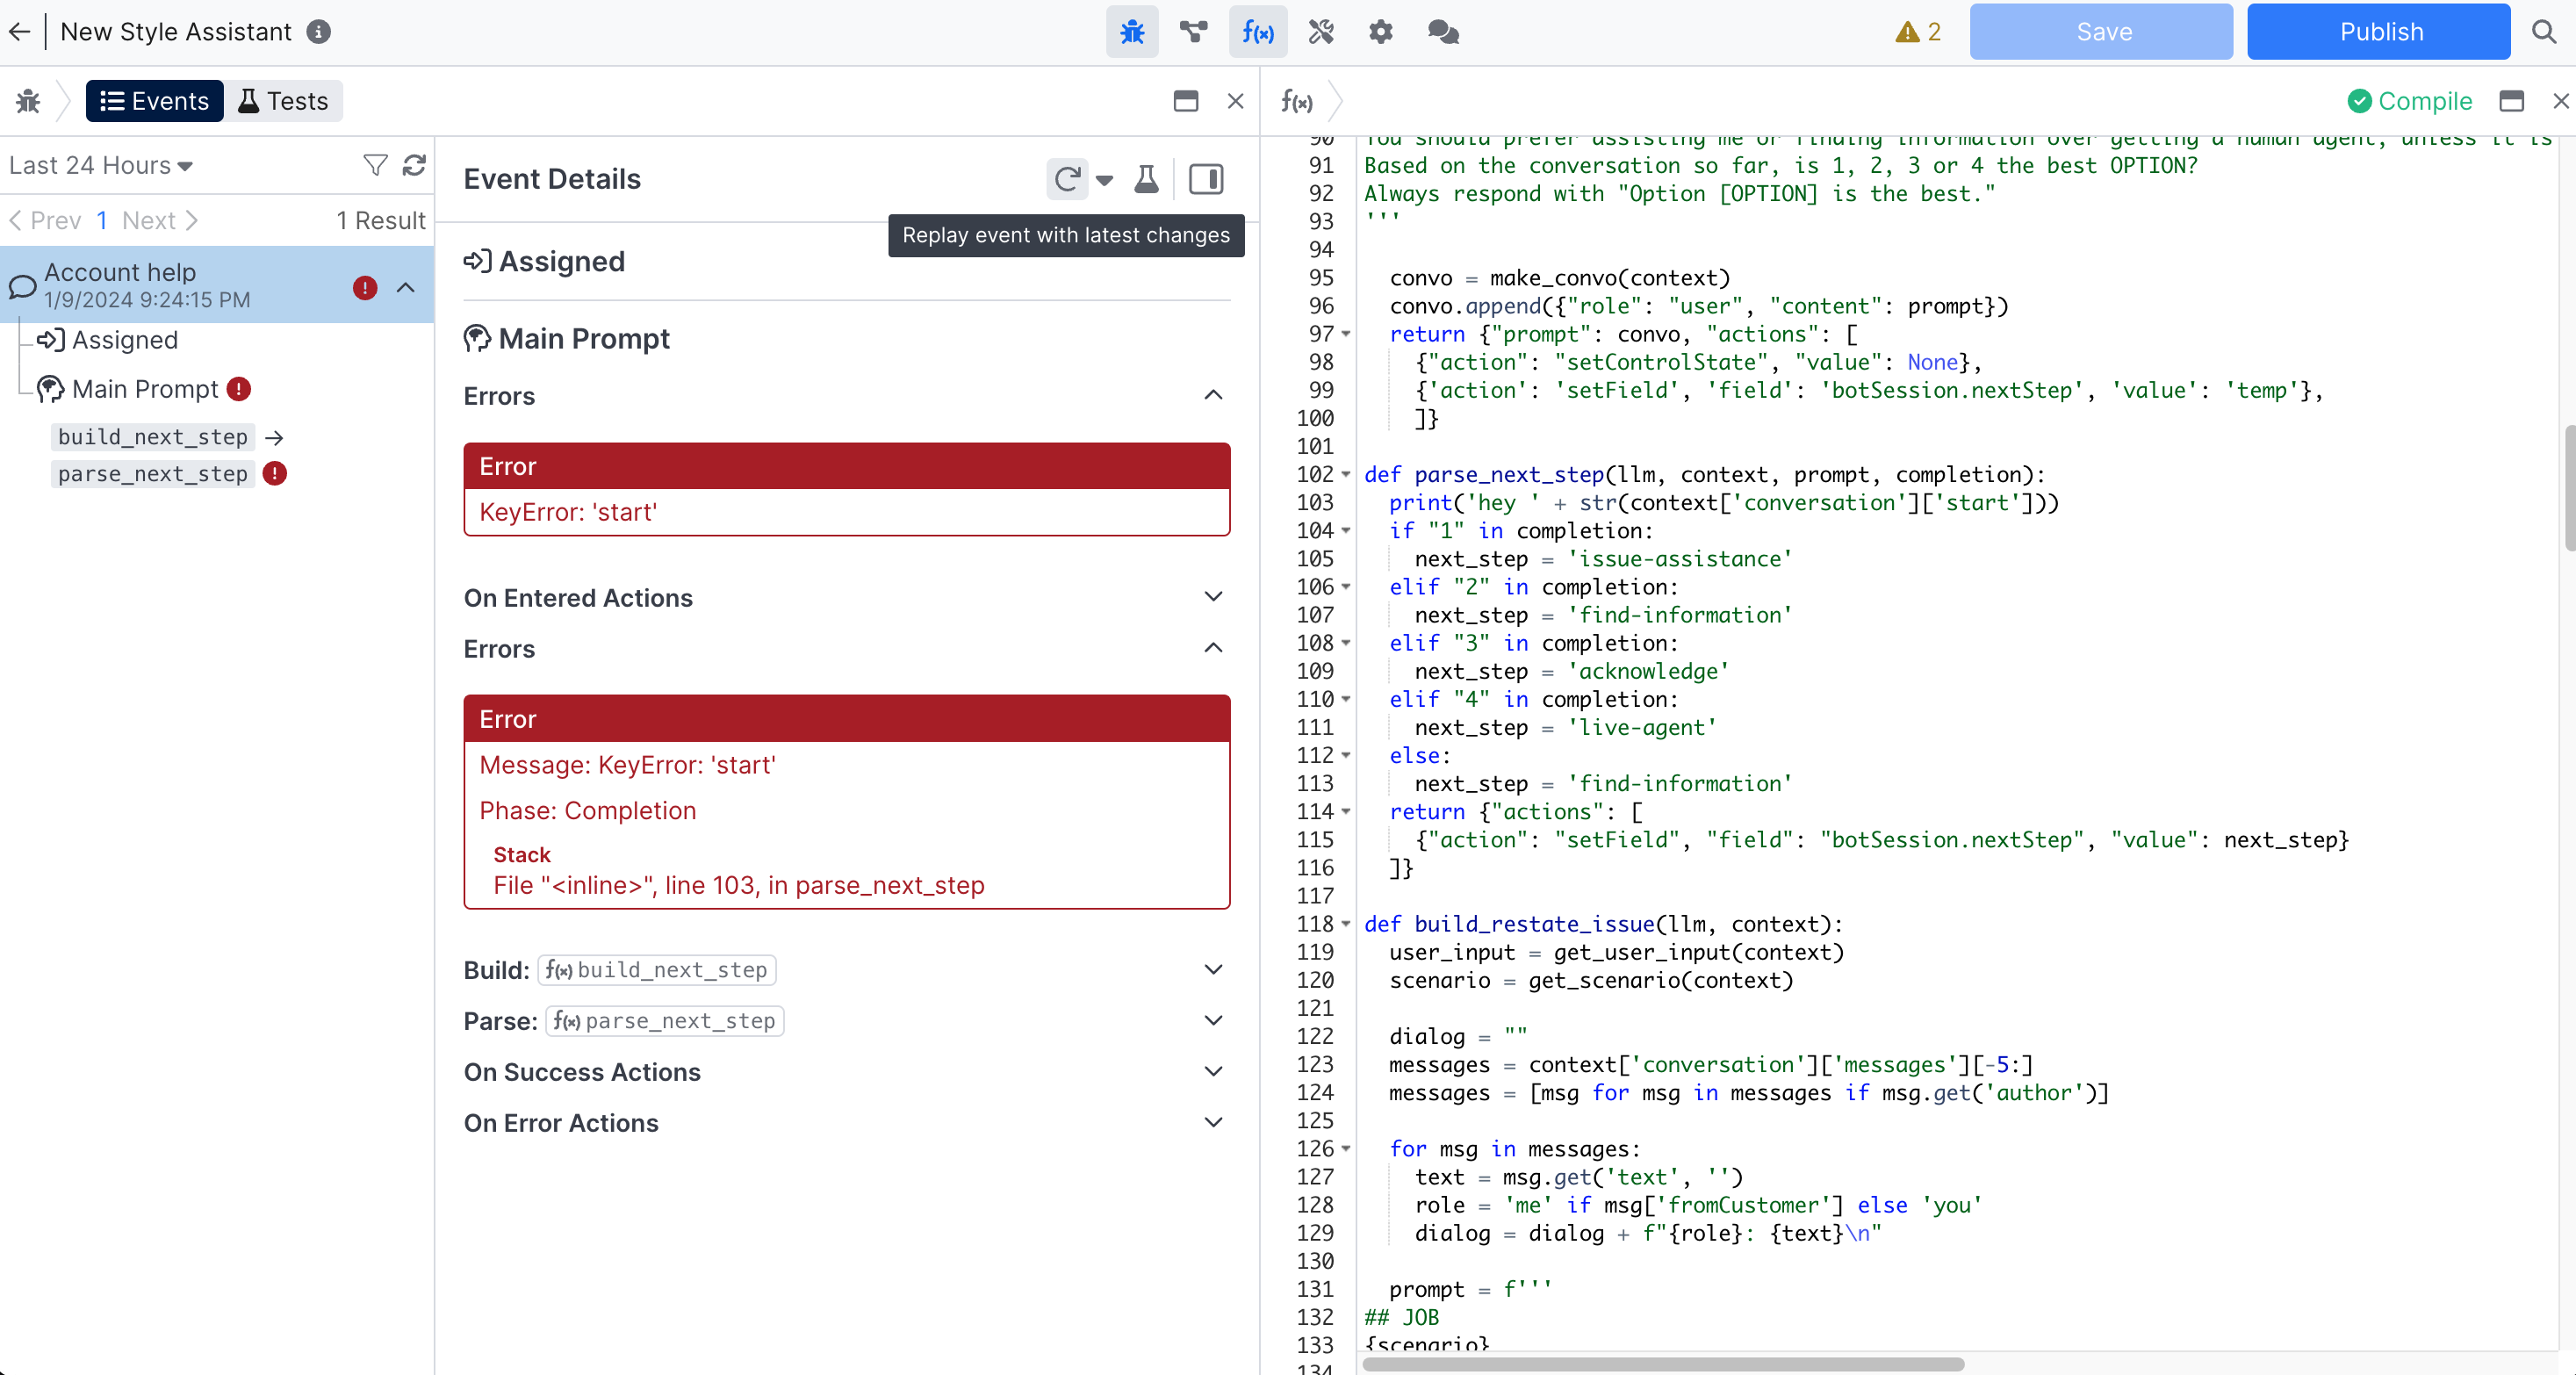
In the screenshot above, an event occurred that triggered a (python) Function Error. We can quickly go to that location in the Function Editor to remediate the problem (in this case the key name should be startTime rather than start). We can quickly verify our fix by replaying the event which executes our current agent definition (even if the event occurred against a published version of the agent), the result of which is shown below:
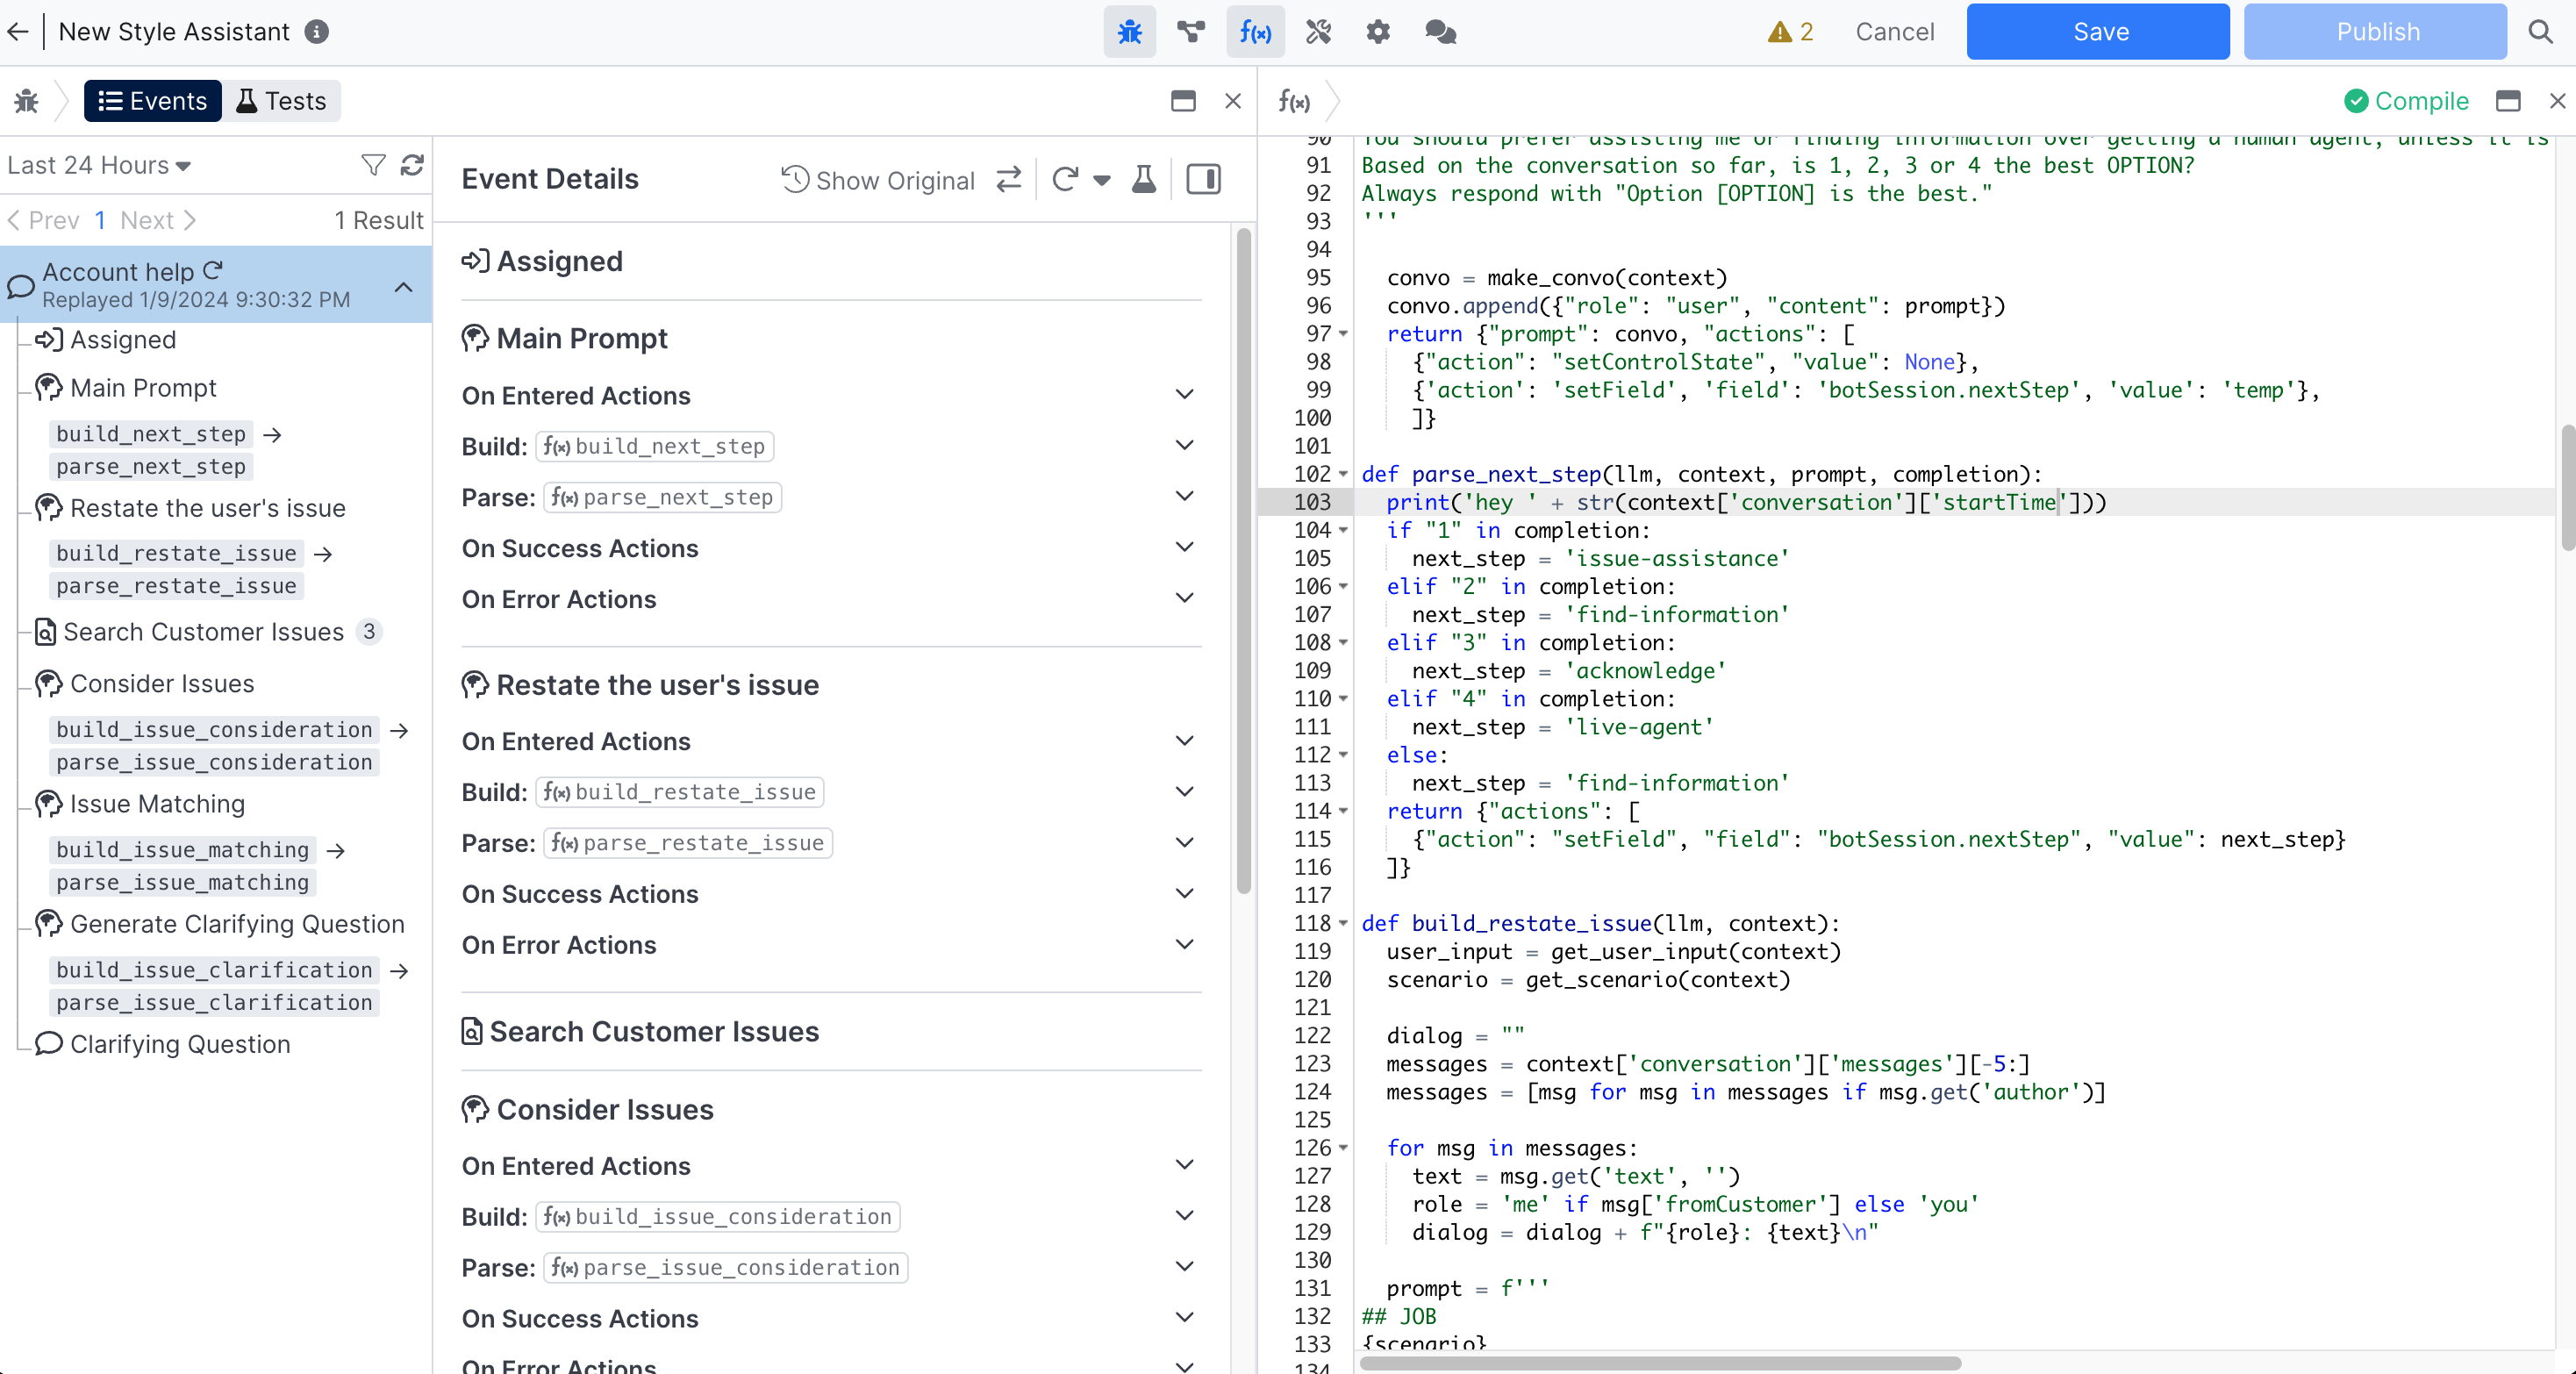
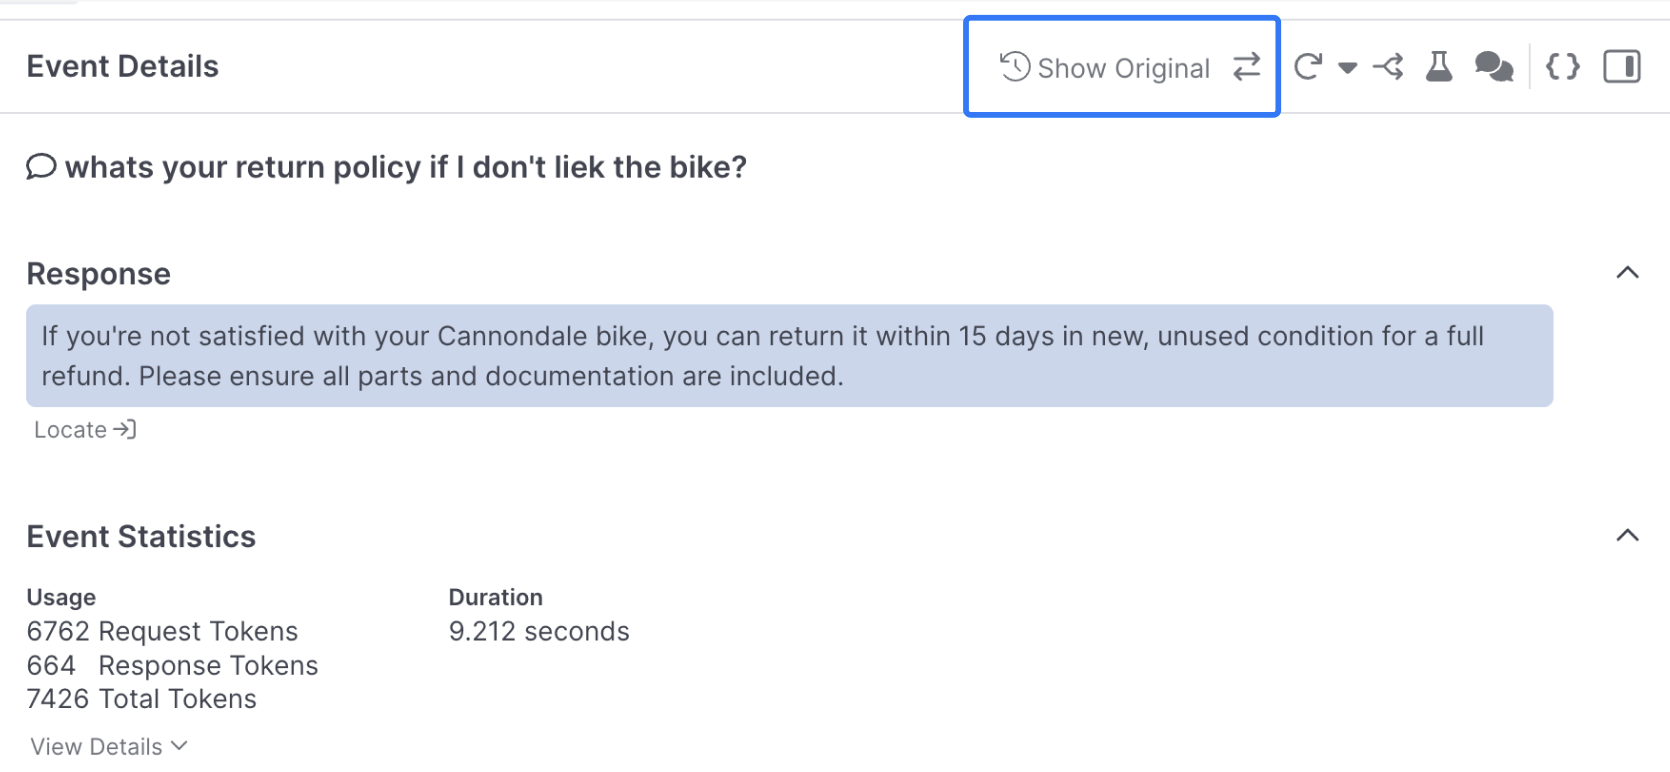
After fixing our coding mistake and replaying the event, we now see a full event trace without errors. You can toggle back to seeing the original event by clicking Show Original. You can also view original and replayed event traces side-by-side by hitting the 'Compare Replay' icon next to Show Original.
Although this example focused on fixing a coding error, Event Replay is just as useful for quickly experimenting with prompts.
Conversation Simulator
Conversation Simulator enables you to test how your AI Agent handles a range of different responses at any point in a conversation. It's great for rapidly testing multi-step, agentic interactions like helping a customer rebook a flight or troubleshoot a device.
Conversation Simulator is currently in beta, please reach out to your account manager if you'd like access
Conversation Simulator shows up in the Event Details panel when looking at either a Studio Event or Published Event:
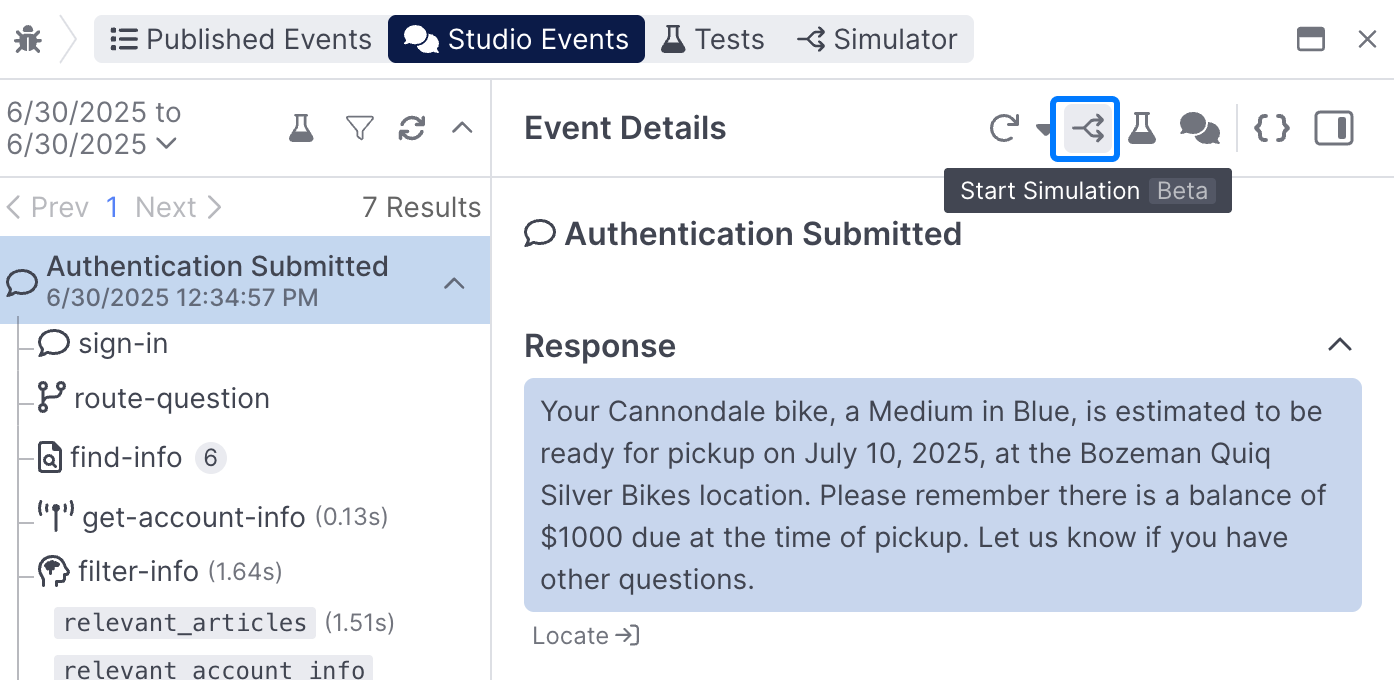
Once you've selected Start Simulation for a given event, you'll open up a tree view that enables you to test out as many replies as you'd like at a given turn in the conversation, will all the conversation context intact:
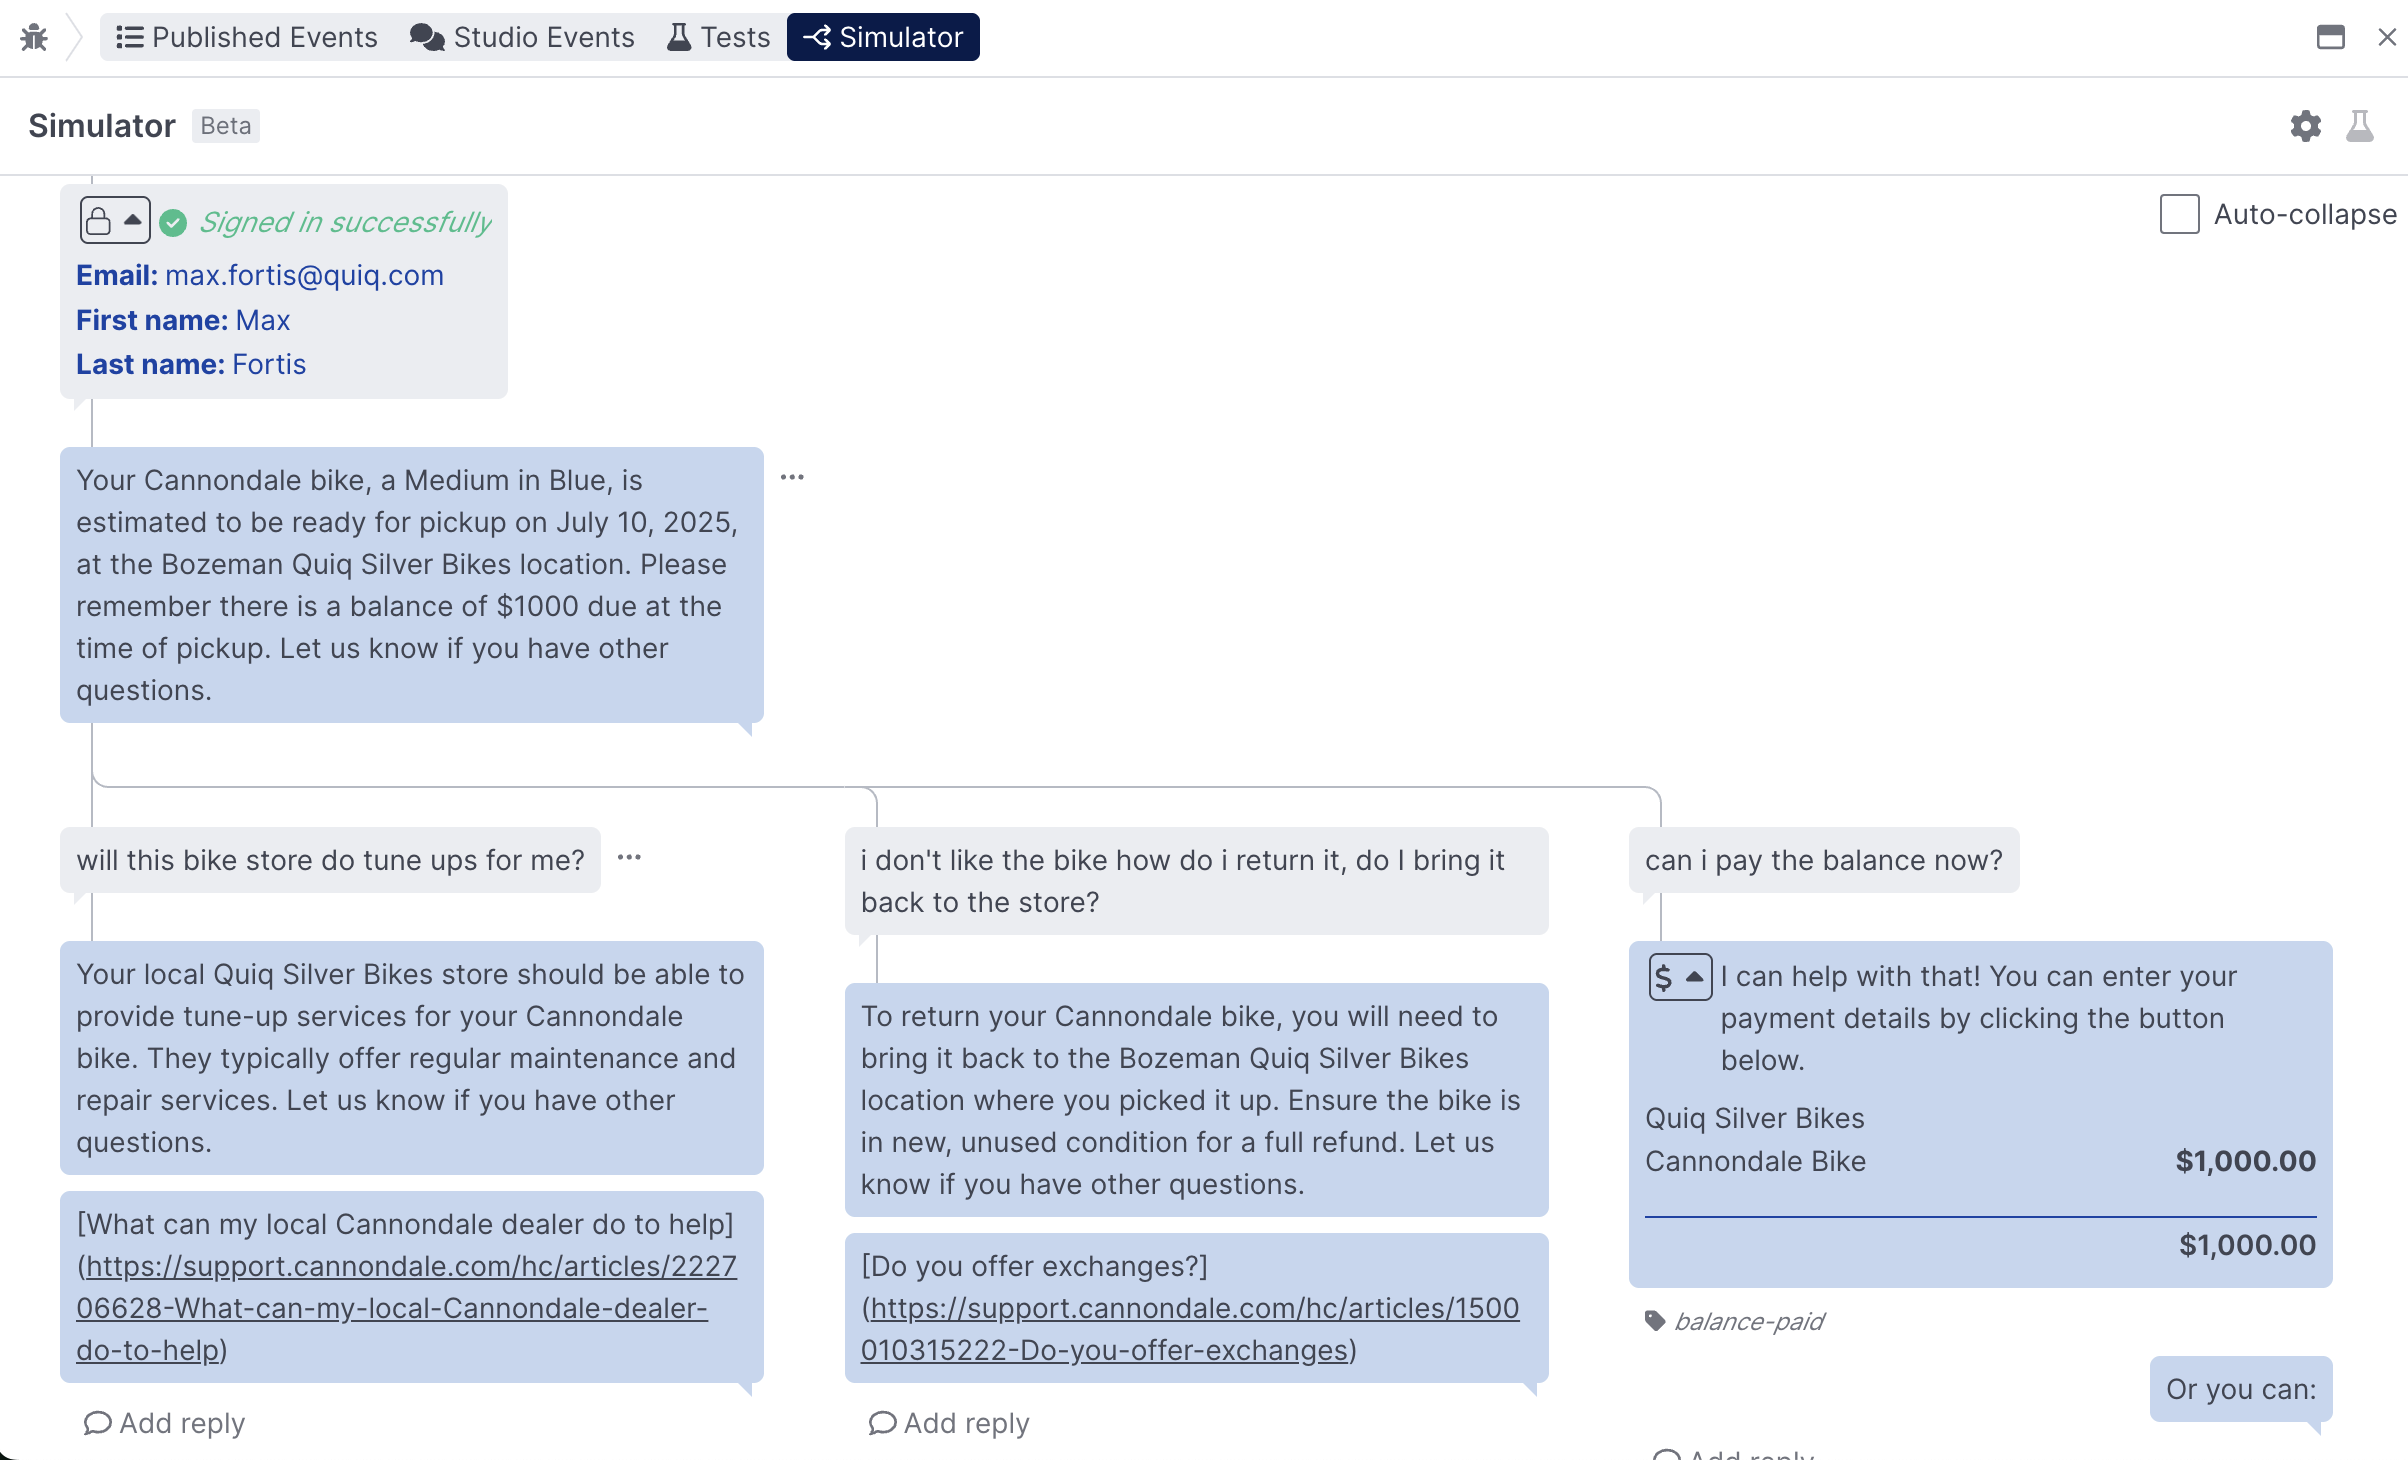
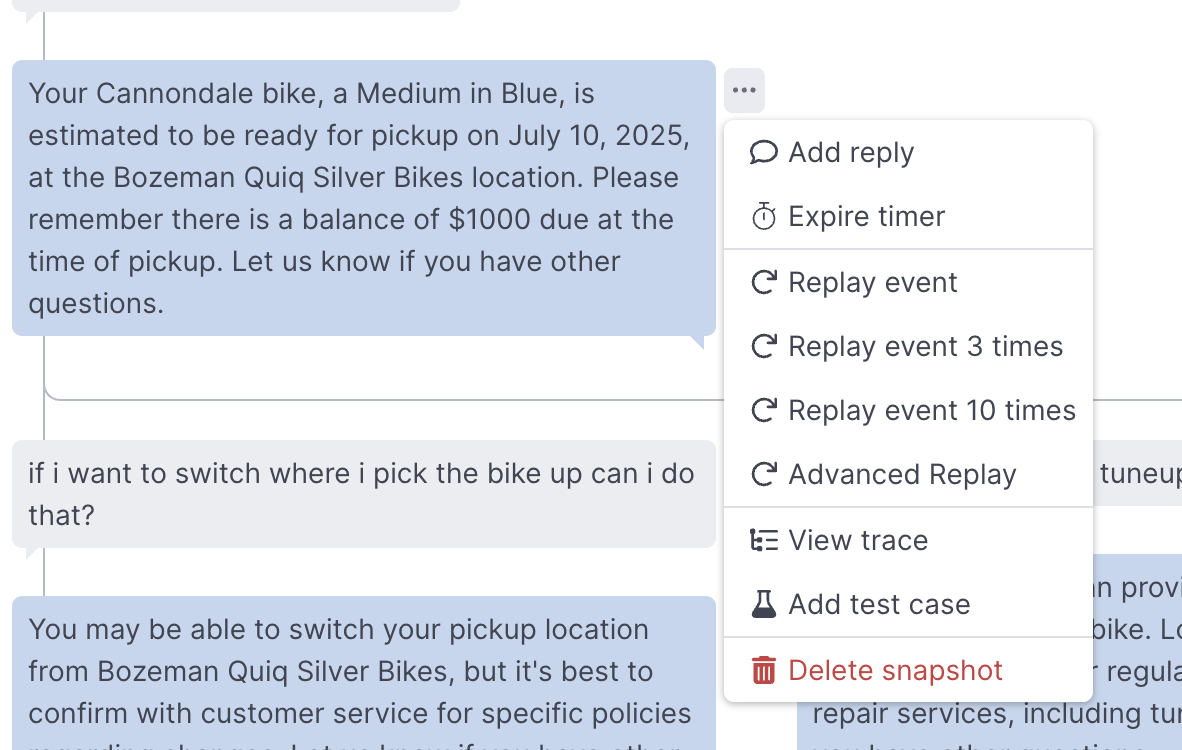
You can use the More menu next to each message to take additional actions, like replaying the event, creating a test case, viewing the full event trace, or continuing down the branch you've created by adding another reply:
AI Services
Simulator in AI Services enables users to replay events and use the View trace option to dig into each replay, because there is no conversation associated with an AI Service, you cannot add a response the same way you can in AI Agents and AI Assistants.

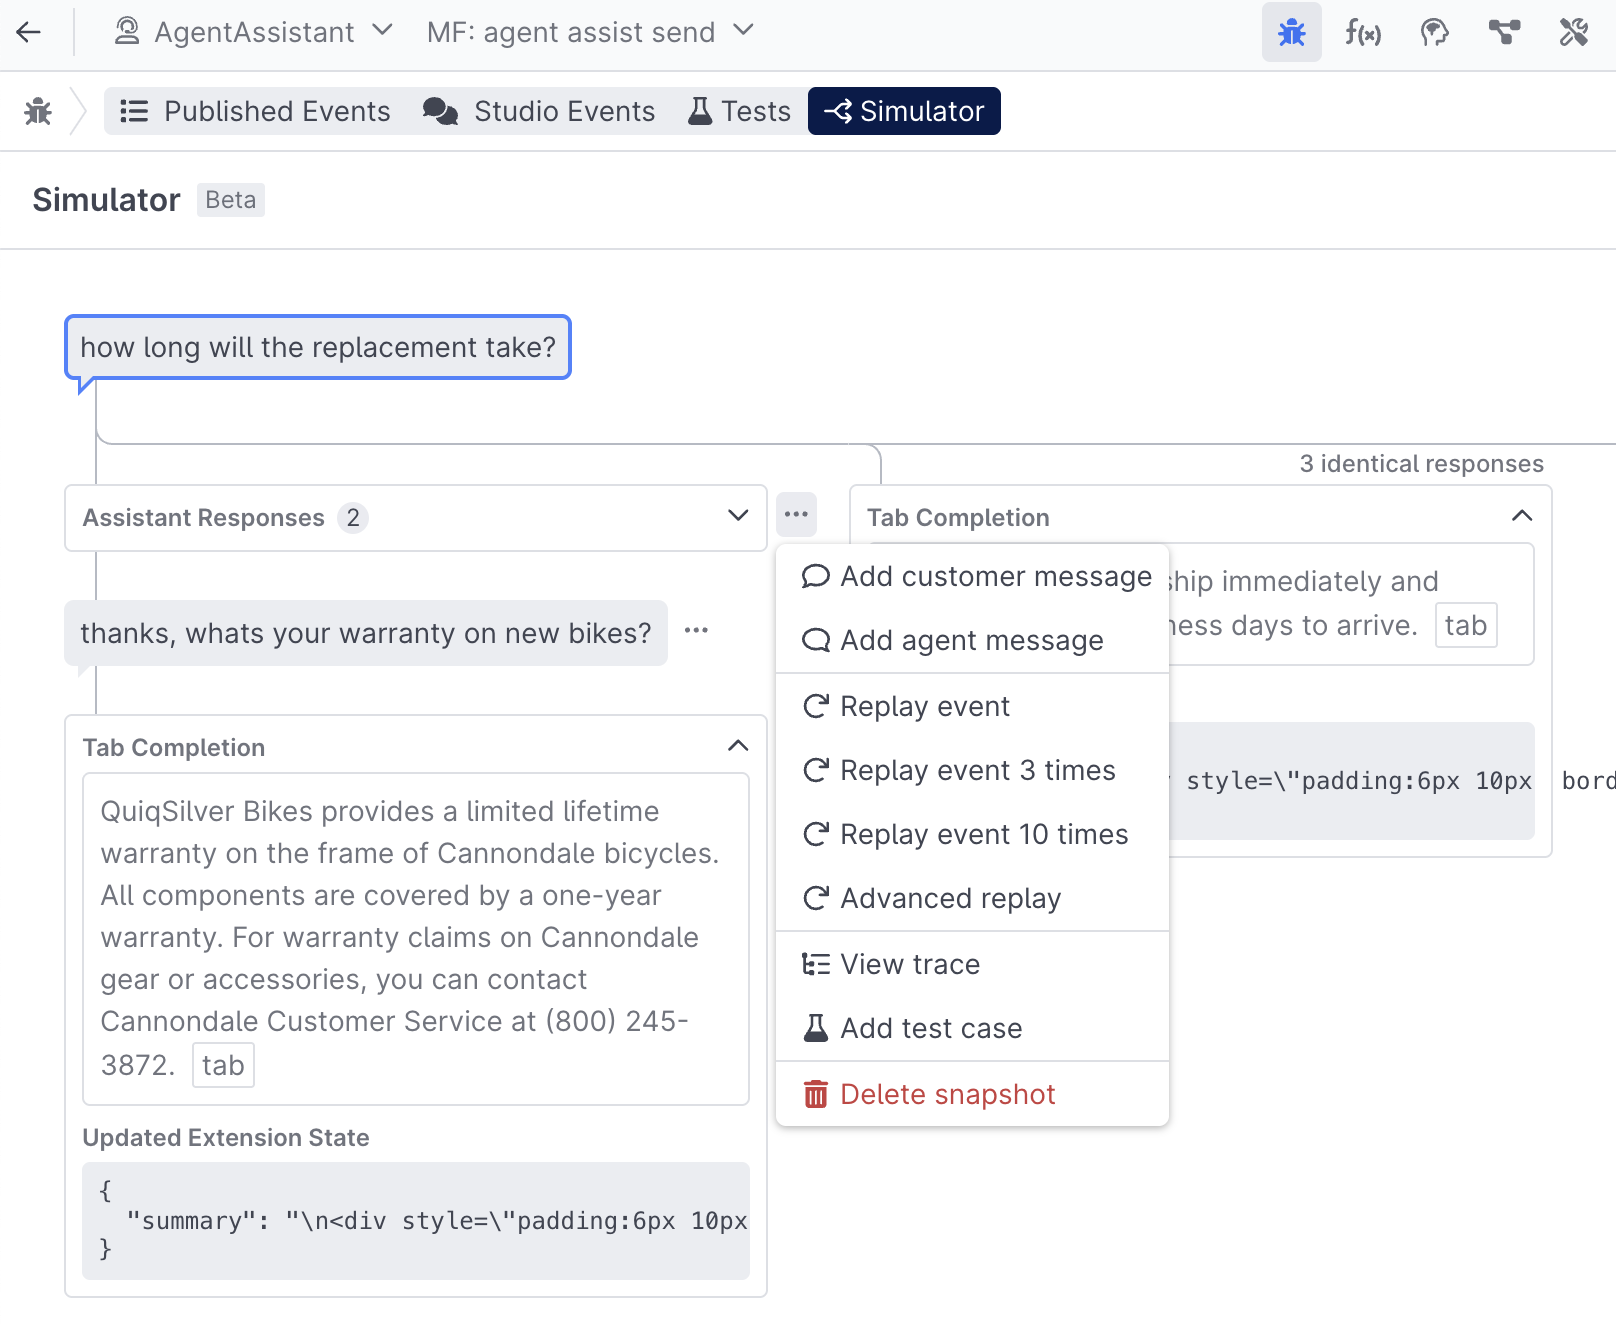
AI Assistants
When using Simulator with AI Assistants, users have' the ability to send in both customer and agent messages:
Tests & Assertions
Tests enable you to make changes to your agent with confidence. This is especially important in the era of prompt engineering where seemingly innocuous changes to prompts can have unintended consequences.
Creating Tests
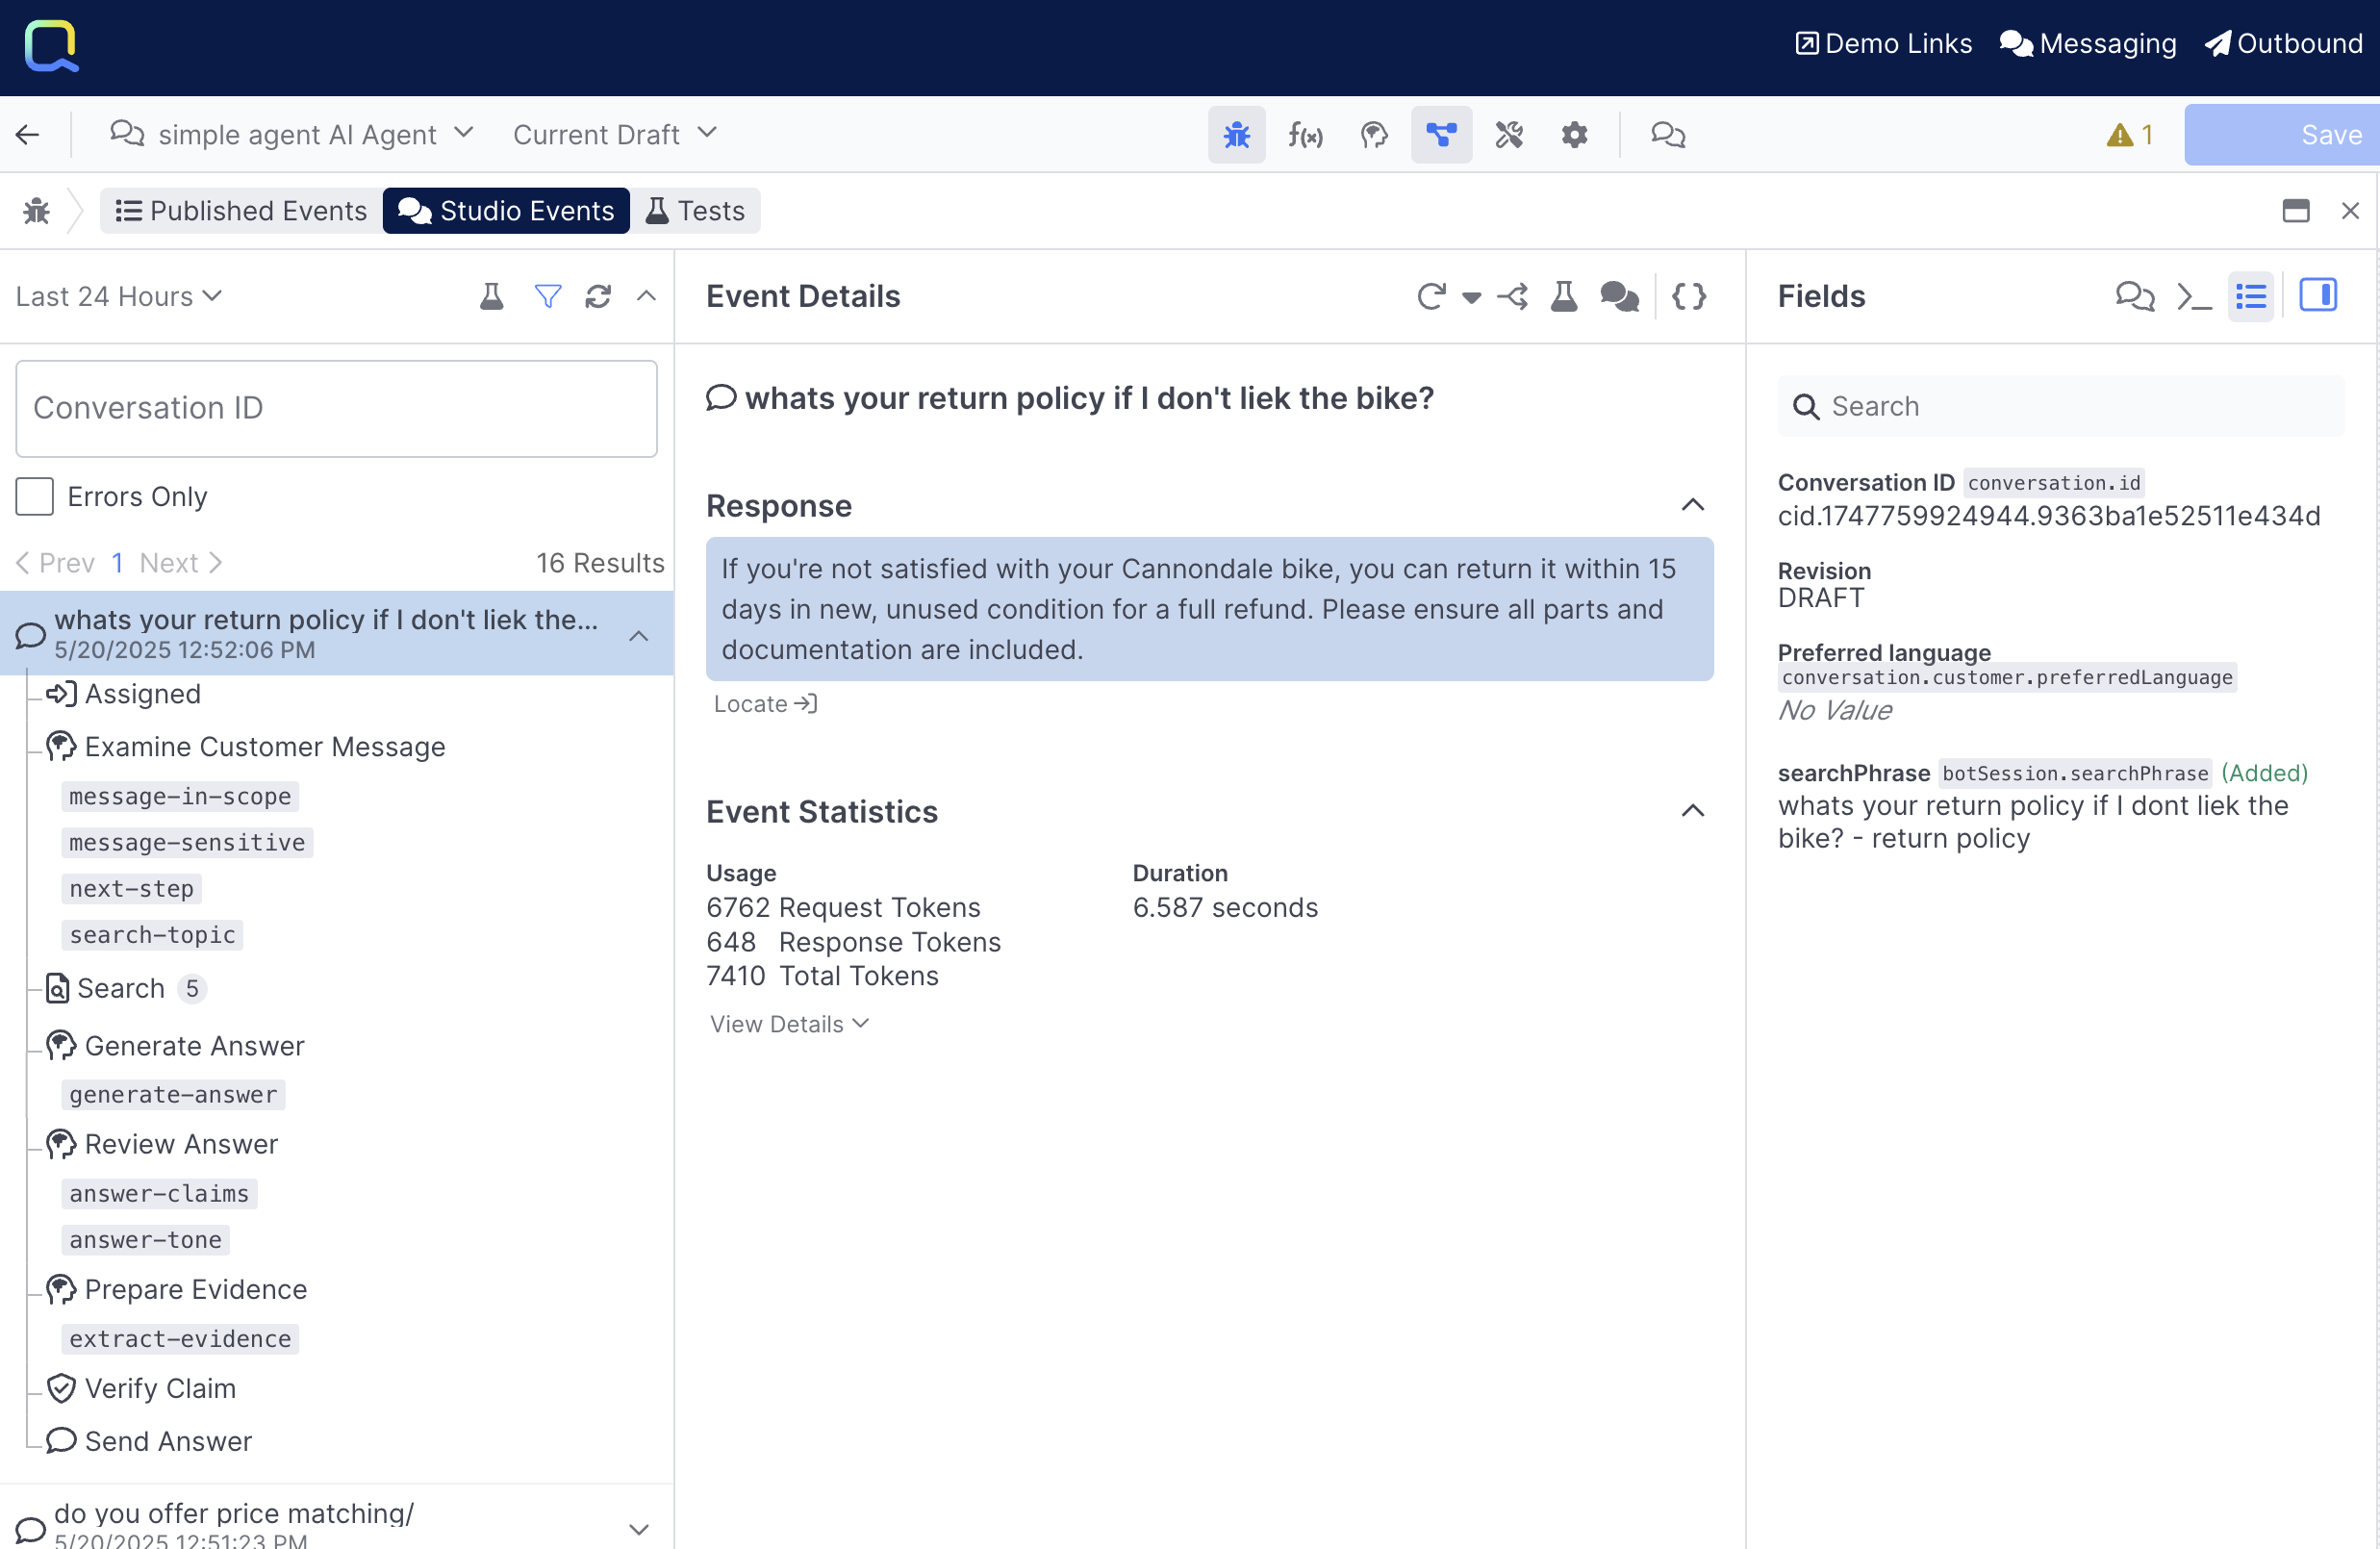
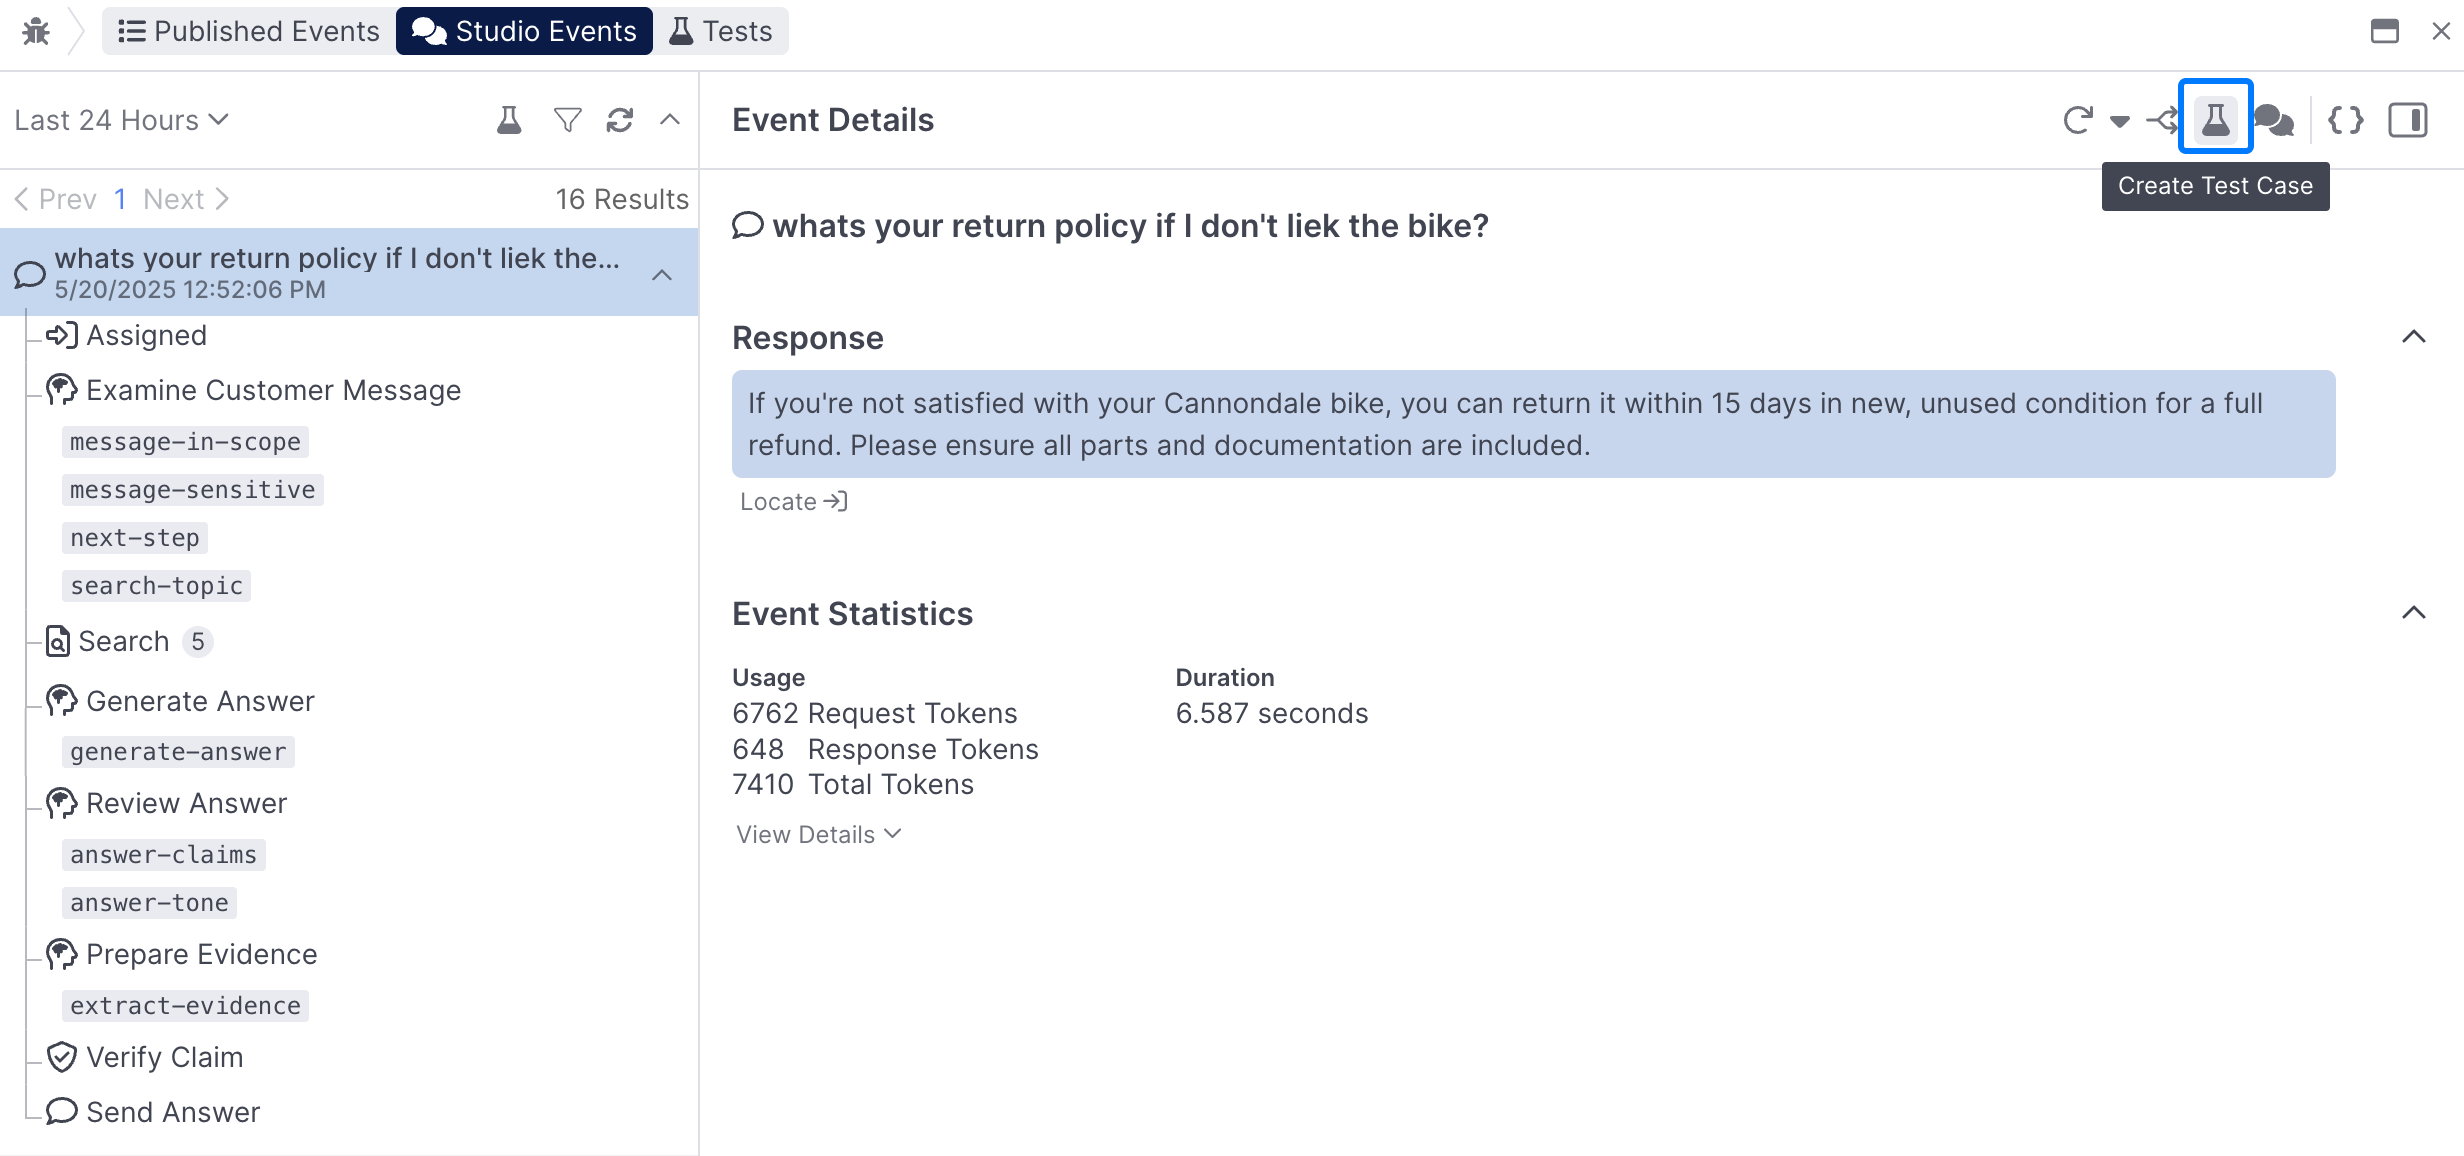
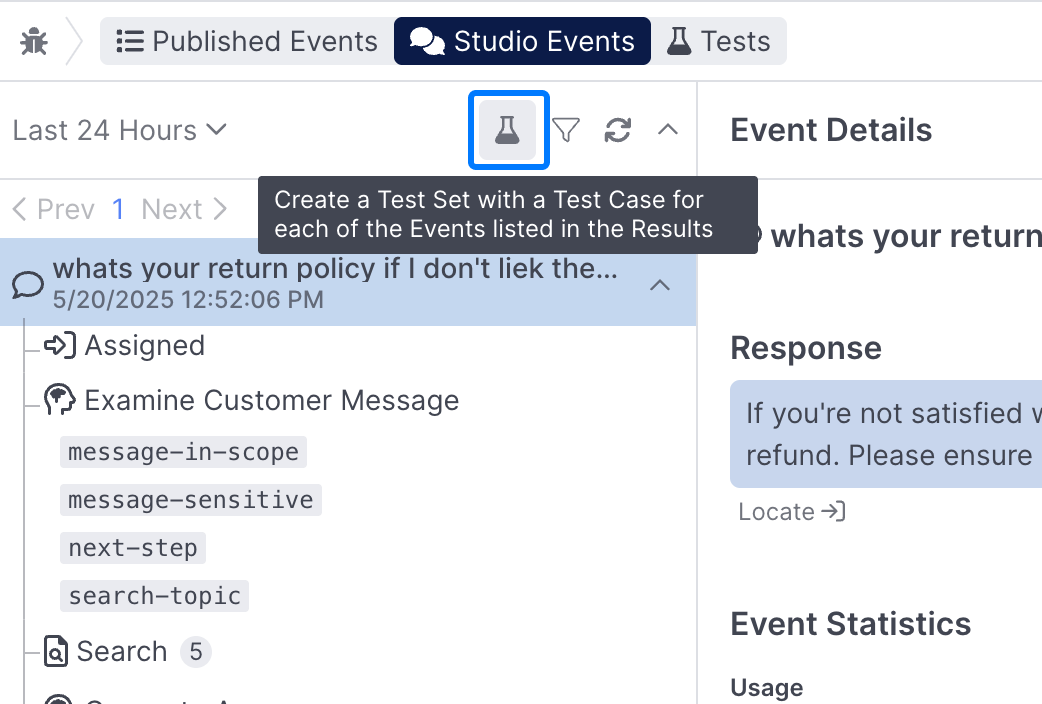
Test cases in AI Studio are created from events. You do so by finding an event you wish to promote into a test case and clicking test beaker icon on the right of the workbench:
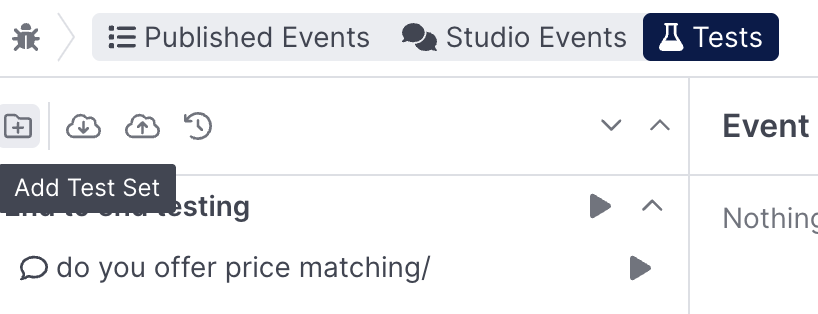
You can create test cases in bulk by using the Test icon in the event list:
This will create a new Test Set that consists of all of the Test Cases currently showing in the list.
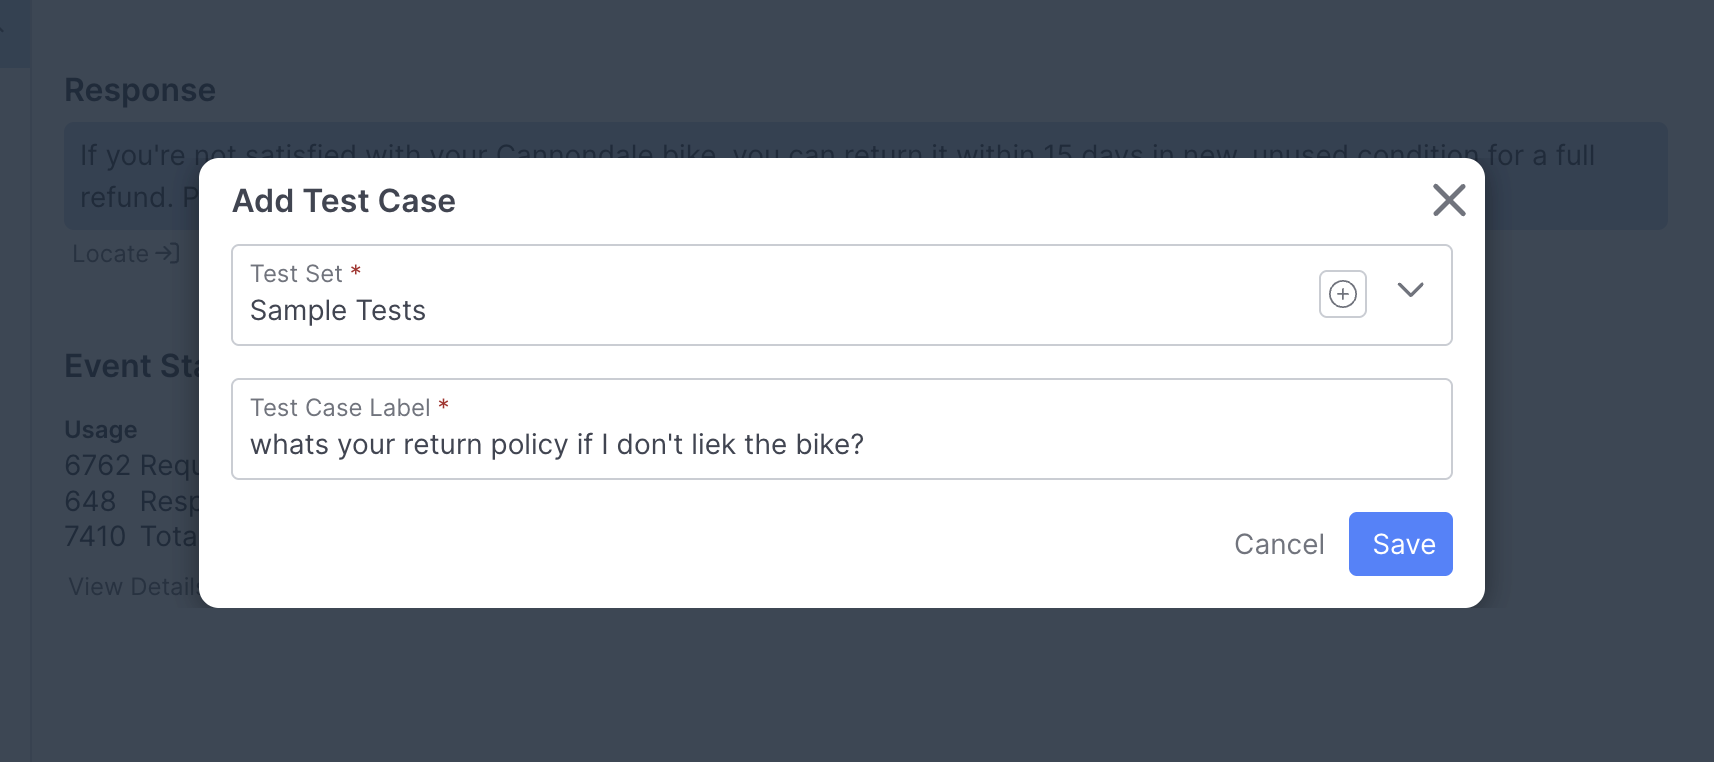
Once you've selected Create Test Case, you can give your Test Case a name, and associated it with a Test Set:
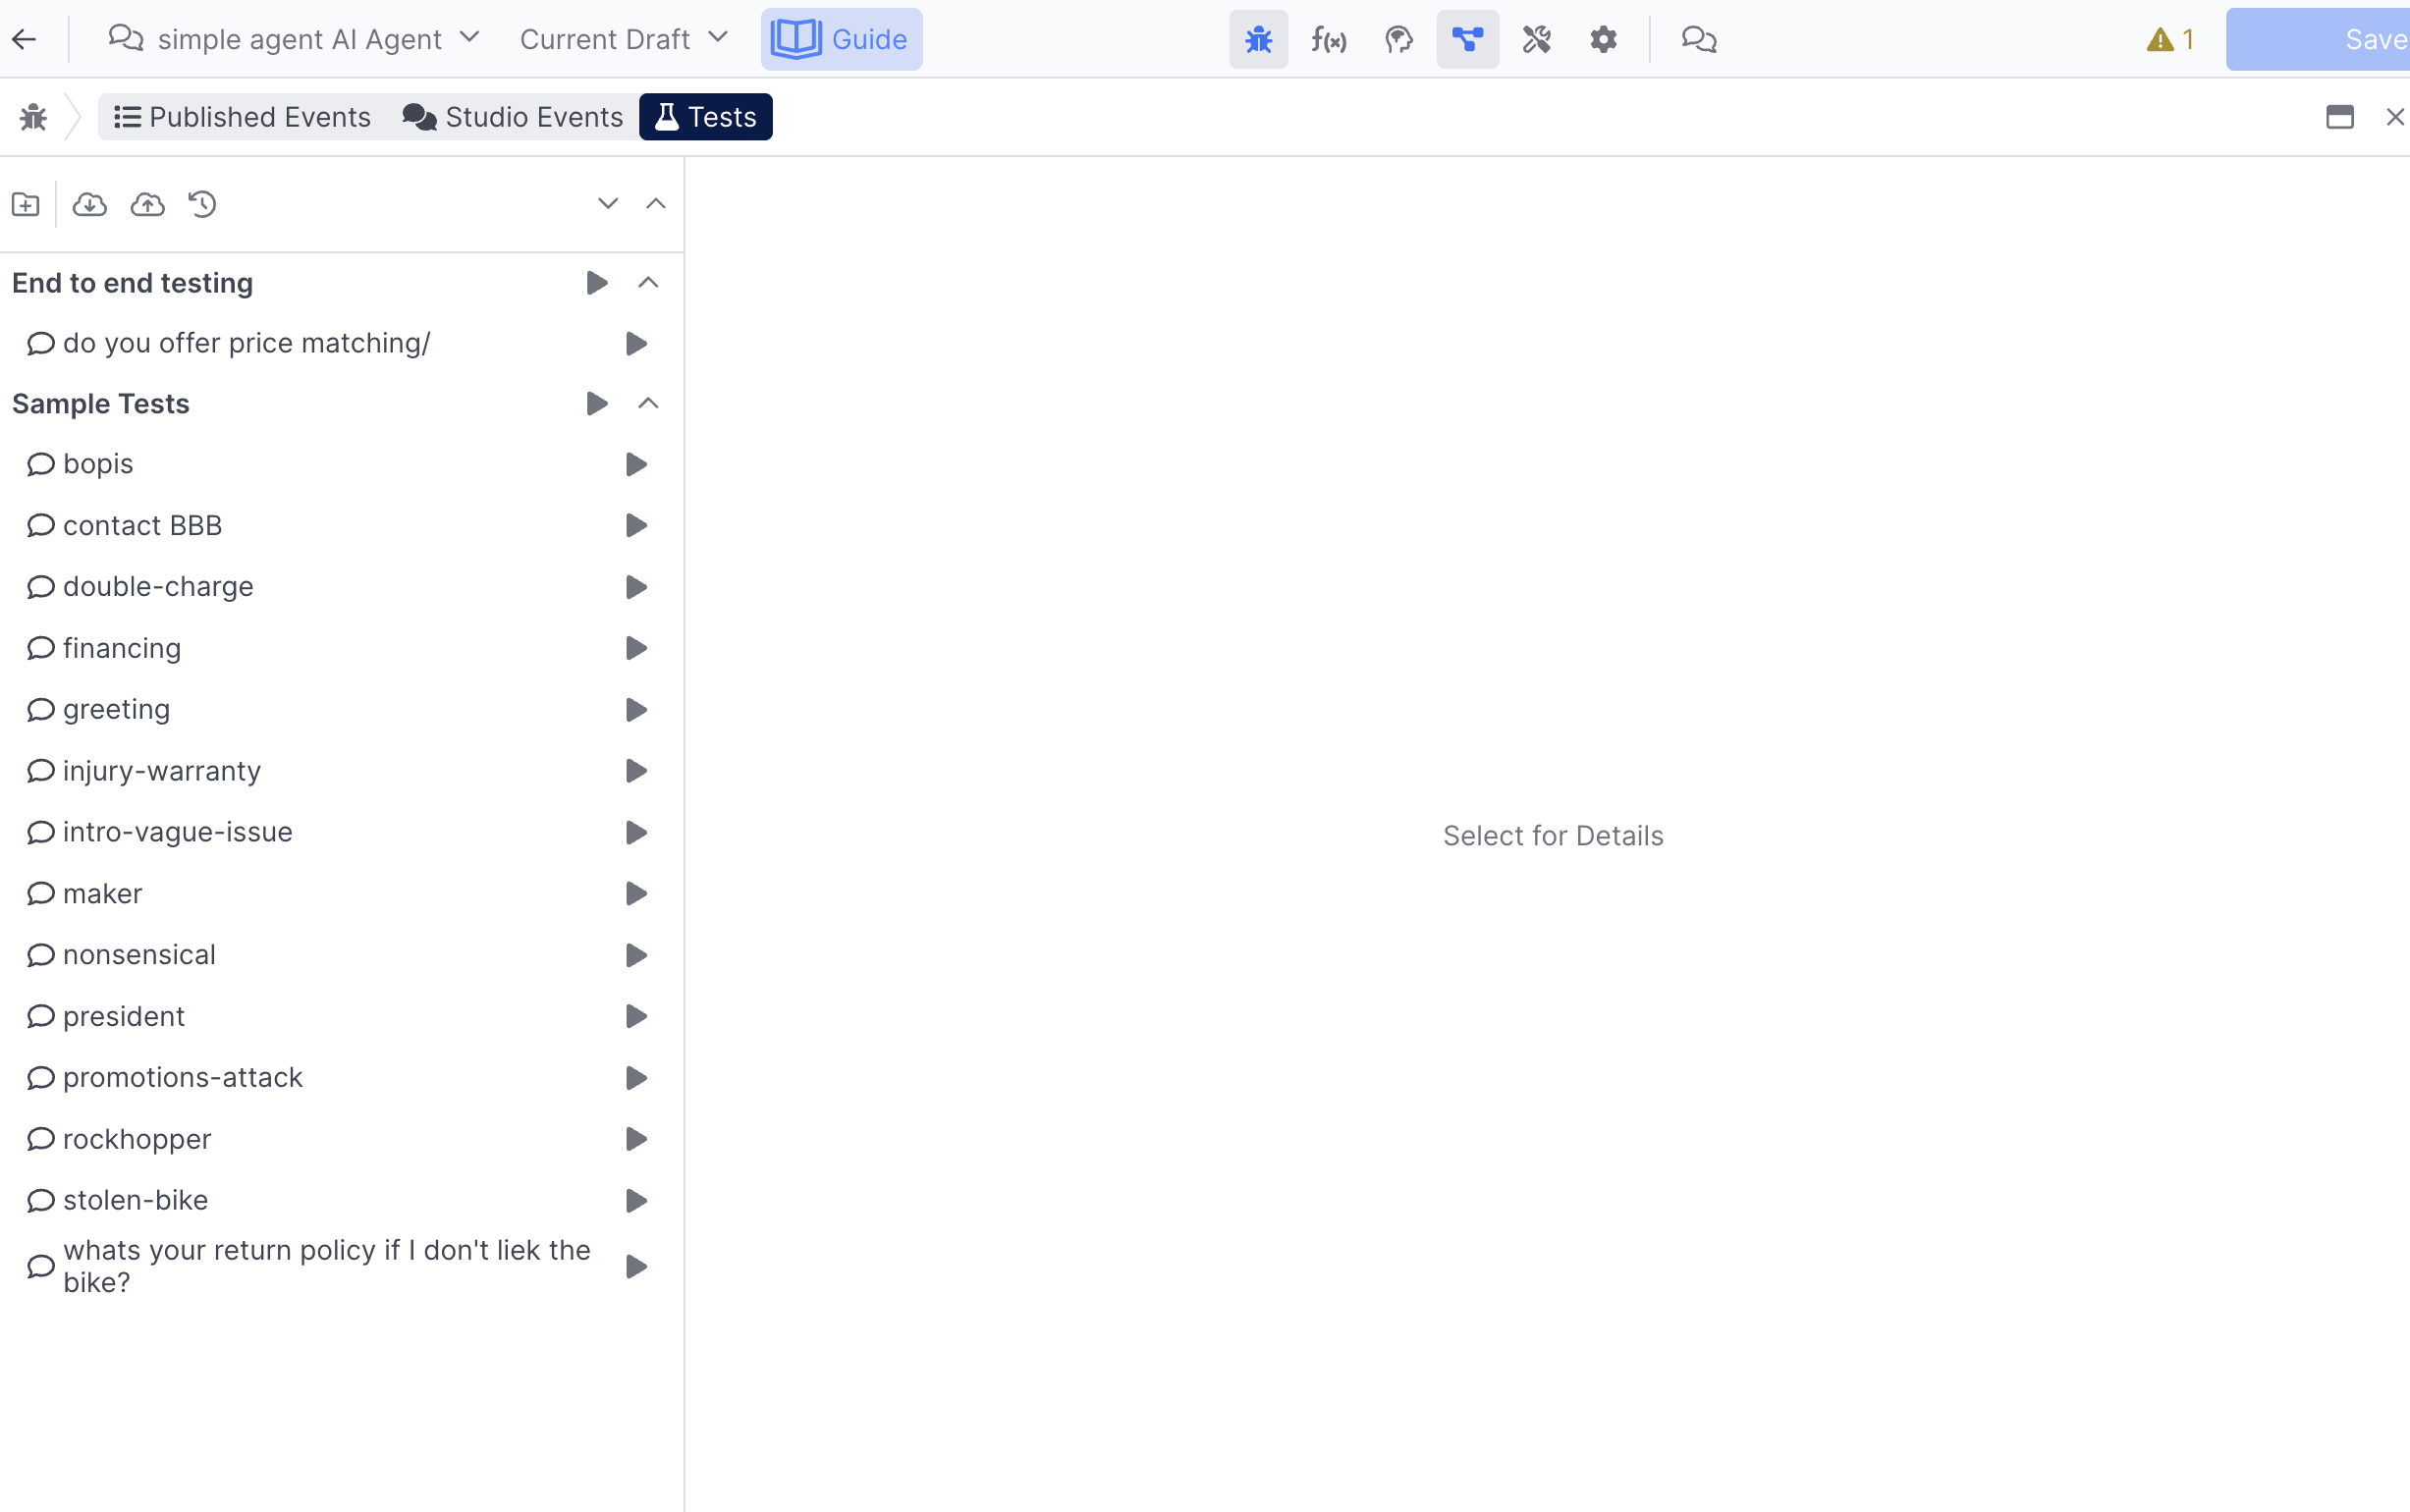
Once you've done that, your newly created test will show up within the Test Set you've added it to:
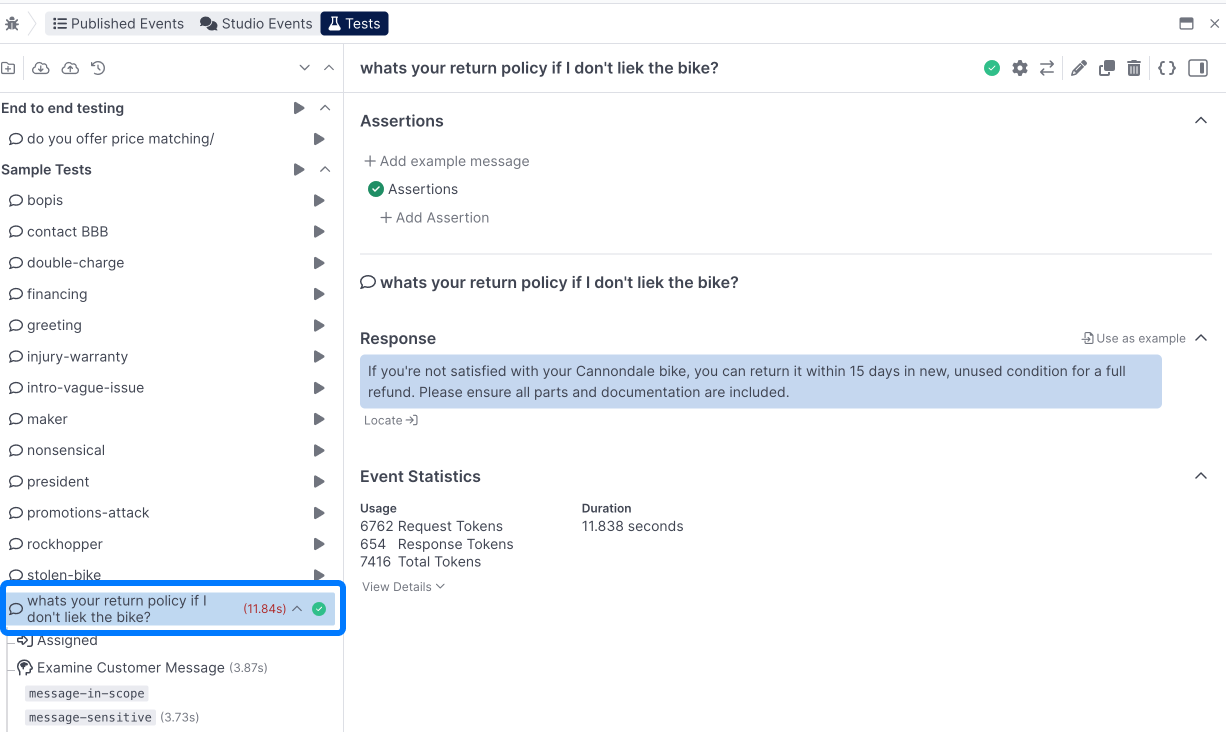
Once you click the Run test button, you'll have successfully executed a test case. We see a trace that mimics what is displayed in Events. But how much do we actually know about our agent's behavior? All this test case verifies is that we don't have any full-blown errors in our flow. In order to verify desirable agent behavior, we need to add assertions.
Adding Assertions
Assertions enable you to define criteria for your test to pass, below we'll cover some common assertions and how to add them.
Use as example
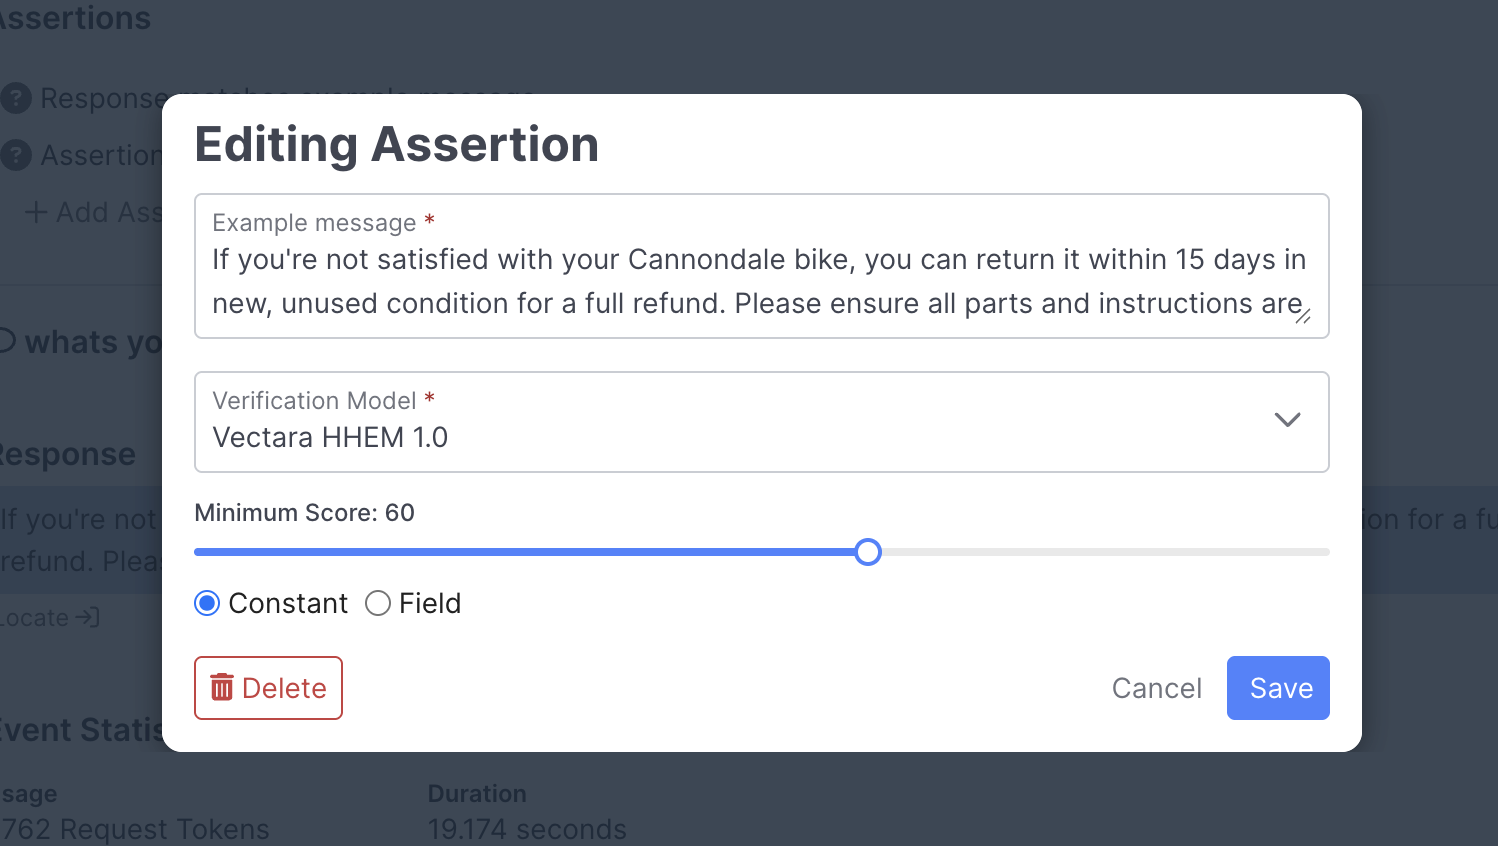
One of the most common assertions to add is whether or not the test matches the original message, you can use the Use as example button next to a test replay response to add it as an assertion:

Once added, you can click on it to modify how close the response needs to be to the example message, with a lower score being less similar and a higher score being more similar:
Add Assertion
The Add Assertion button enables you to define assertion manually:
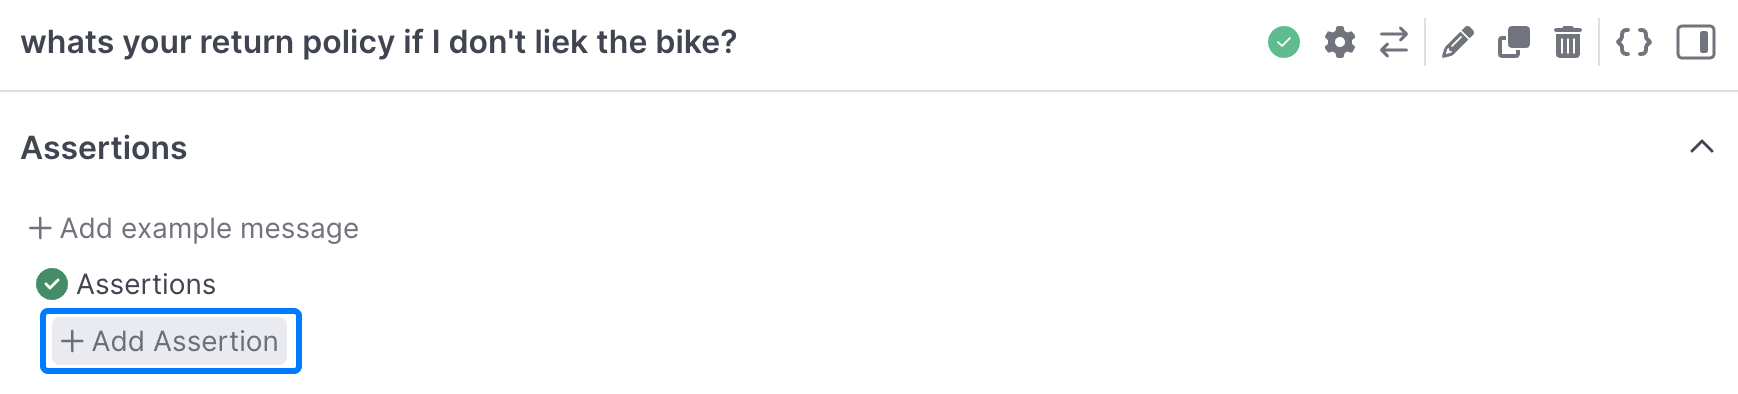
This will open up the condition editor, where you can define whatever criteria you'd like for your assertion:
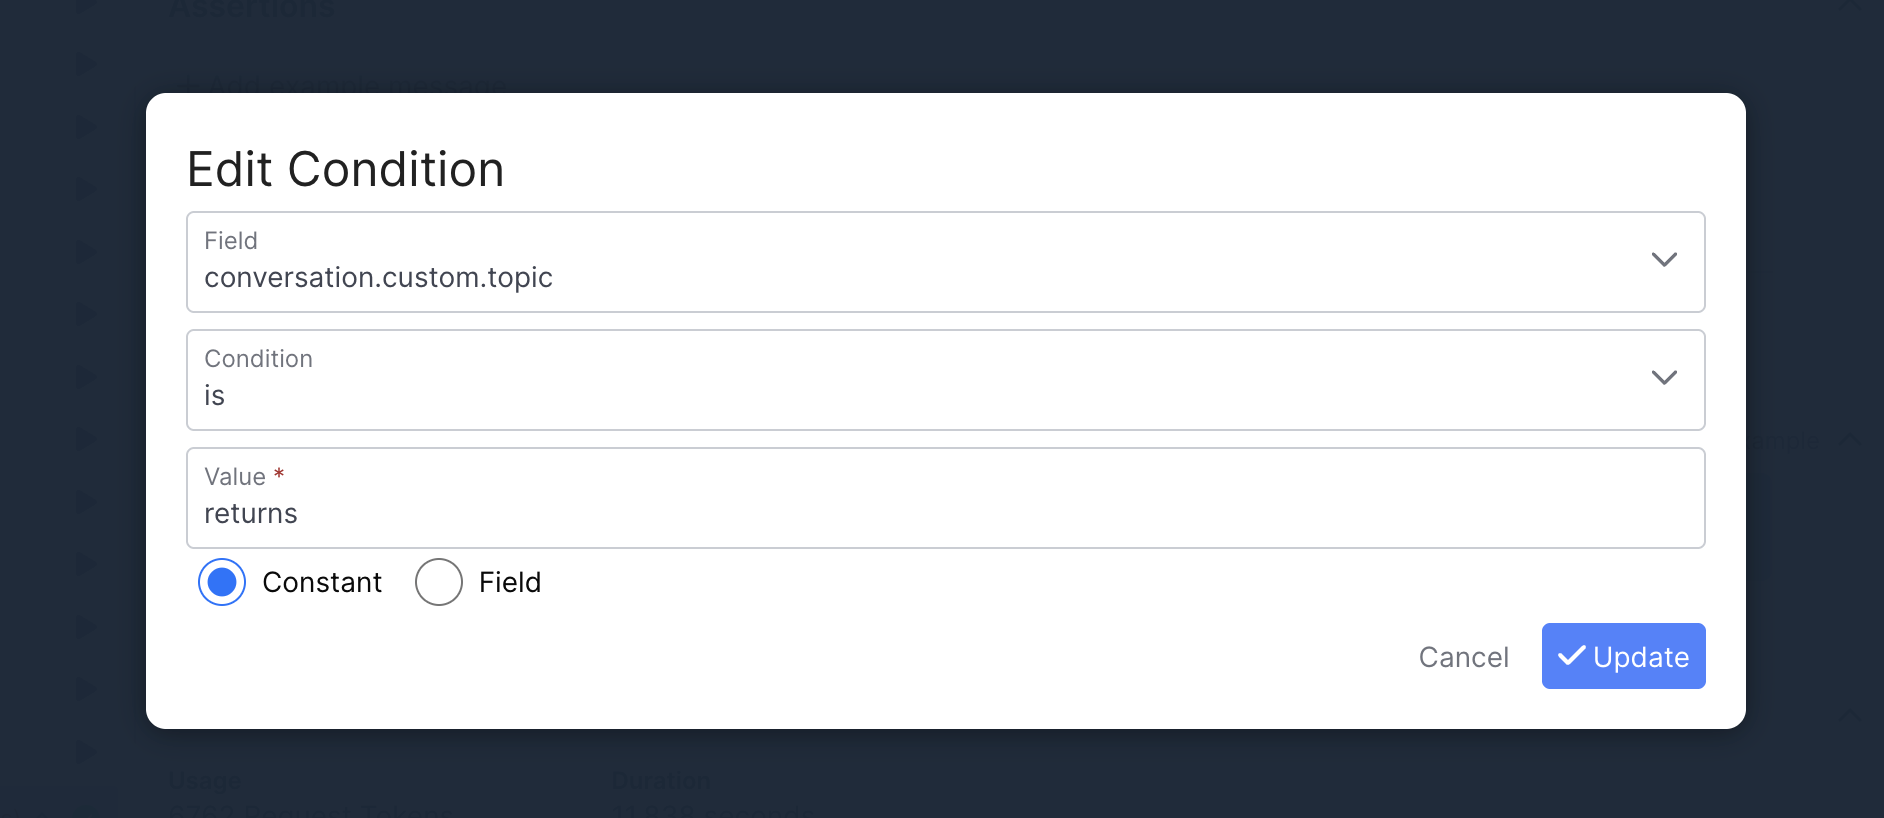
A sample assertion, that's checking that the topic is classified as returns.
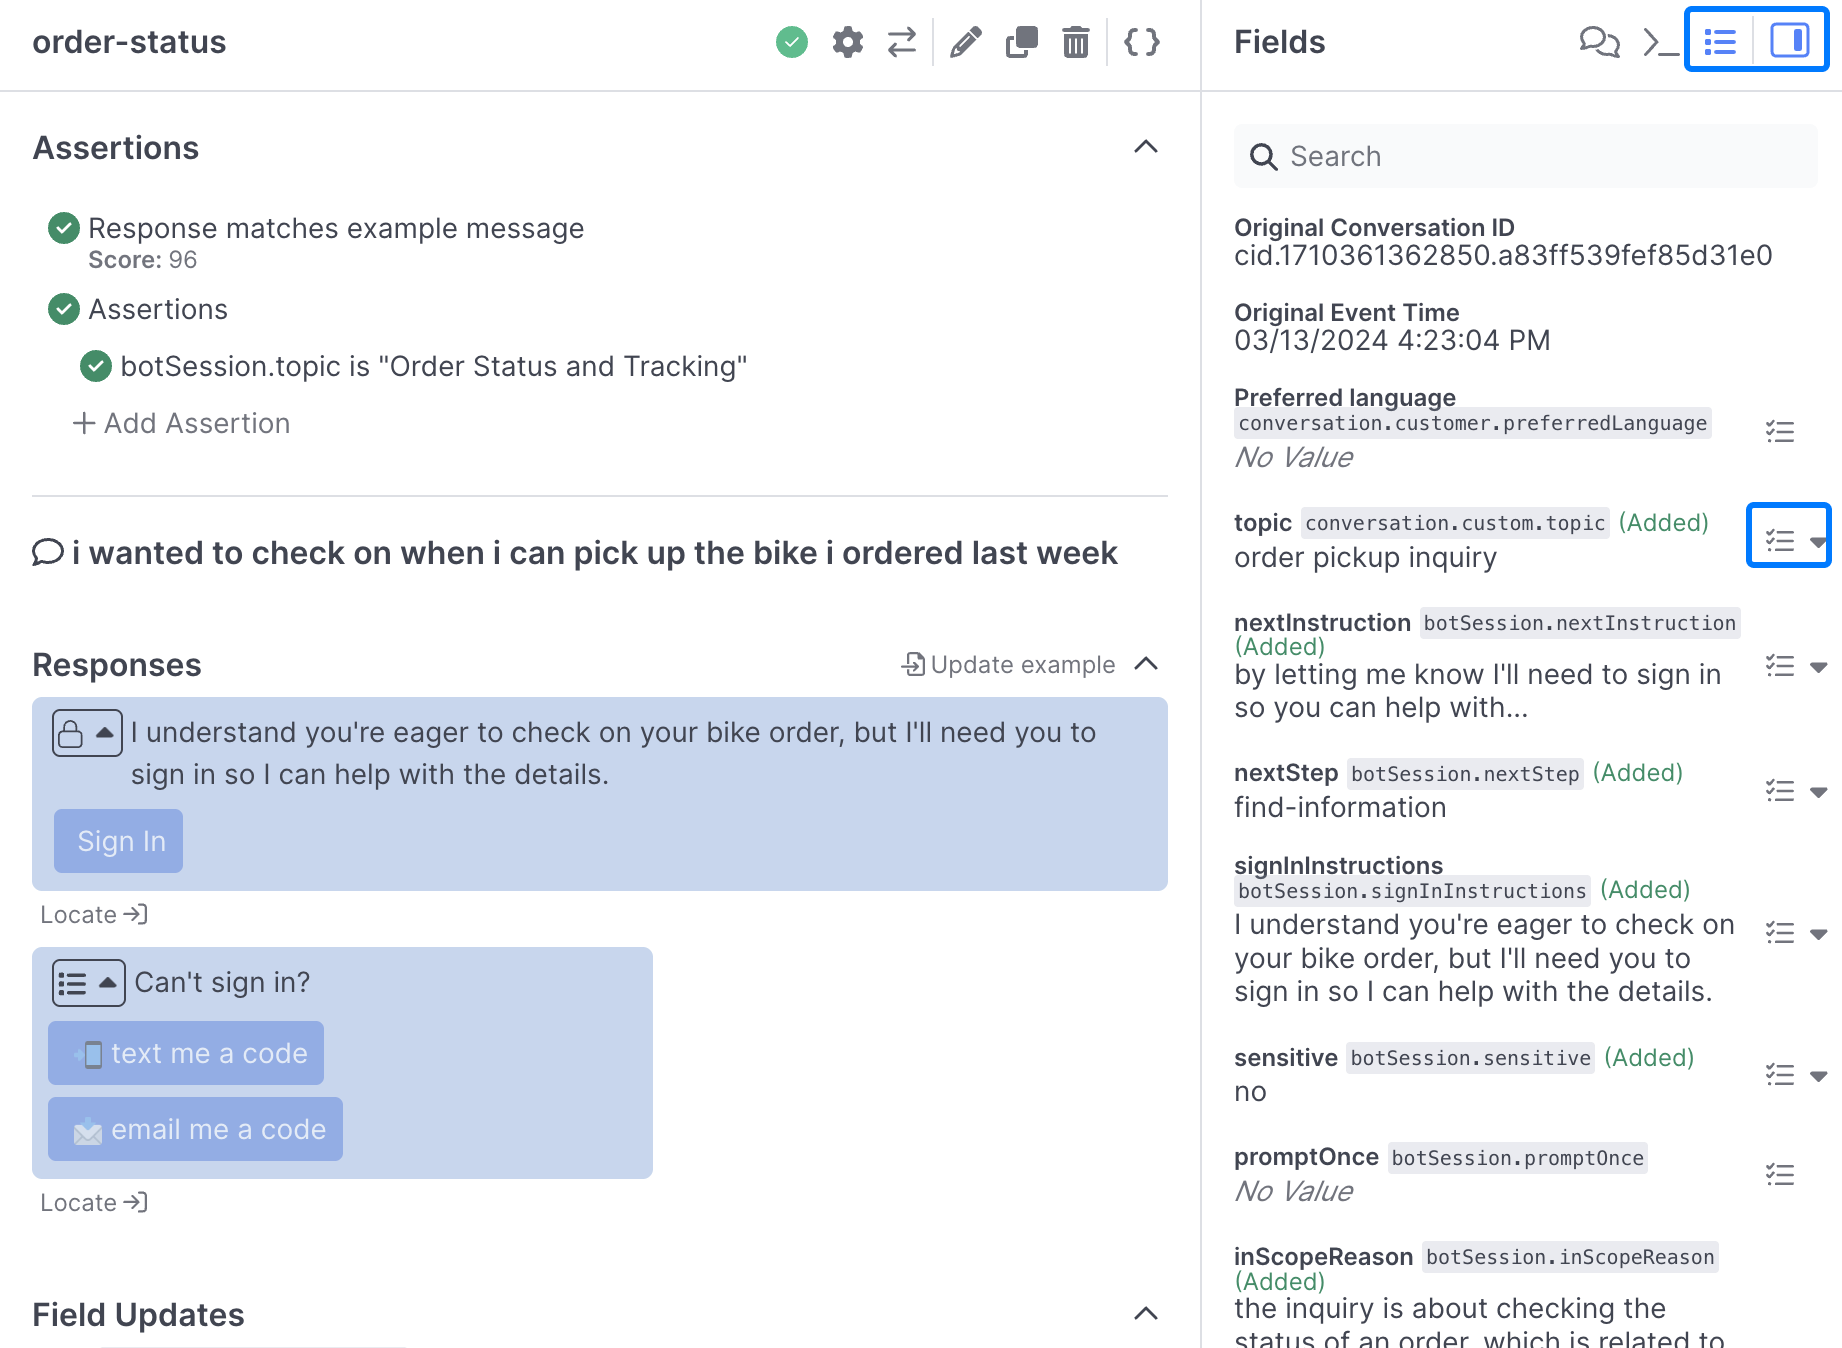
Via the Inspector panel
When reviewing a Test, you can open up the inspector panel and easily add Field values from the fields section. This is a great quick way to add in classification or other checks to your assertions without having to add them manually:
Managing Tests
Tests cases are organized into Test Sets. You can run tests individually or run all tests in a set using the Play button next to each test and test set:
Adding Test Sets
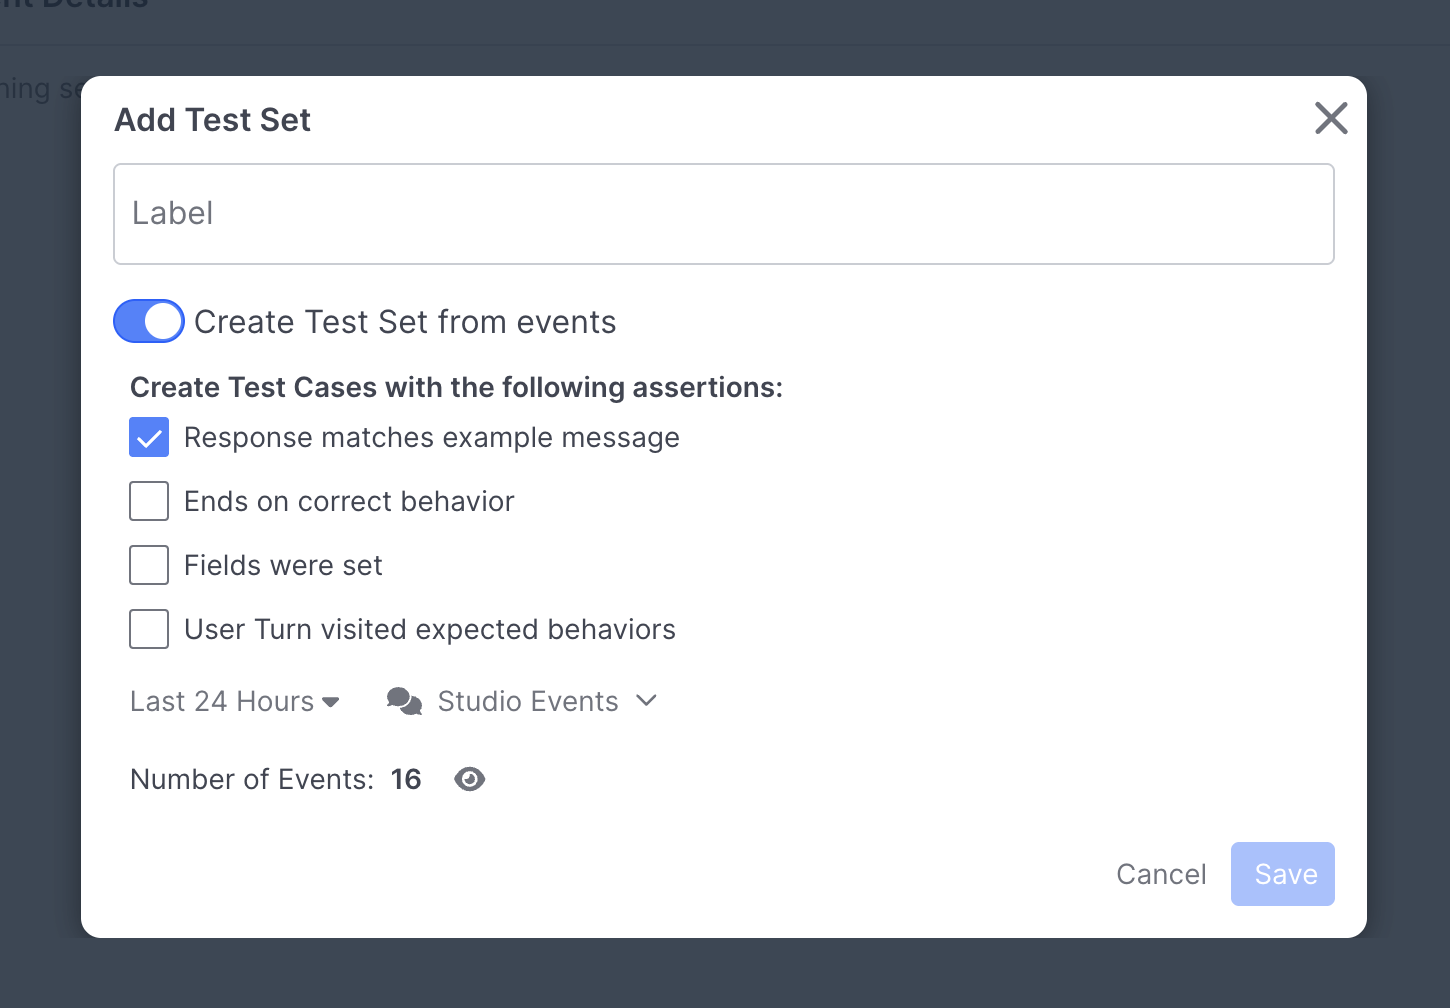
The Add Test Set button enables you to create a new Test Set:
Bulk Test Set CreationThe Create Test Set from events toggle enables you to create tests within your Test Set with assertions already applied:
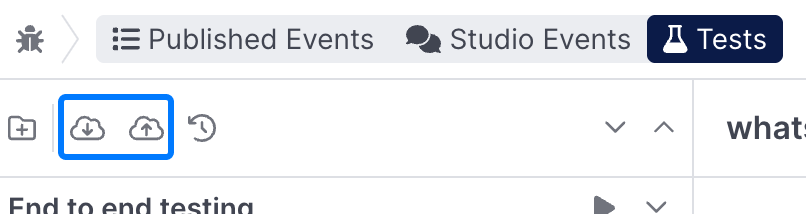
Importing and Exporting Test Sets
you can import and export Test Sets using the export and import buttons:
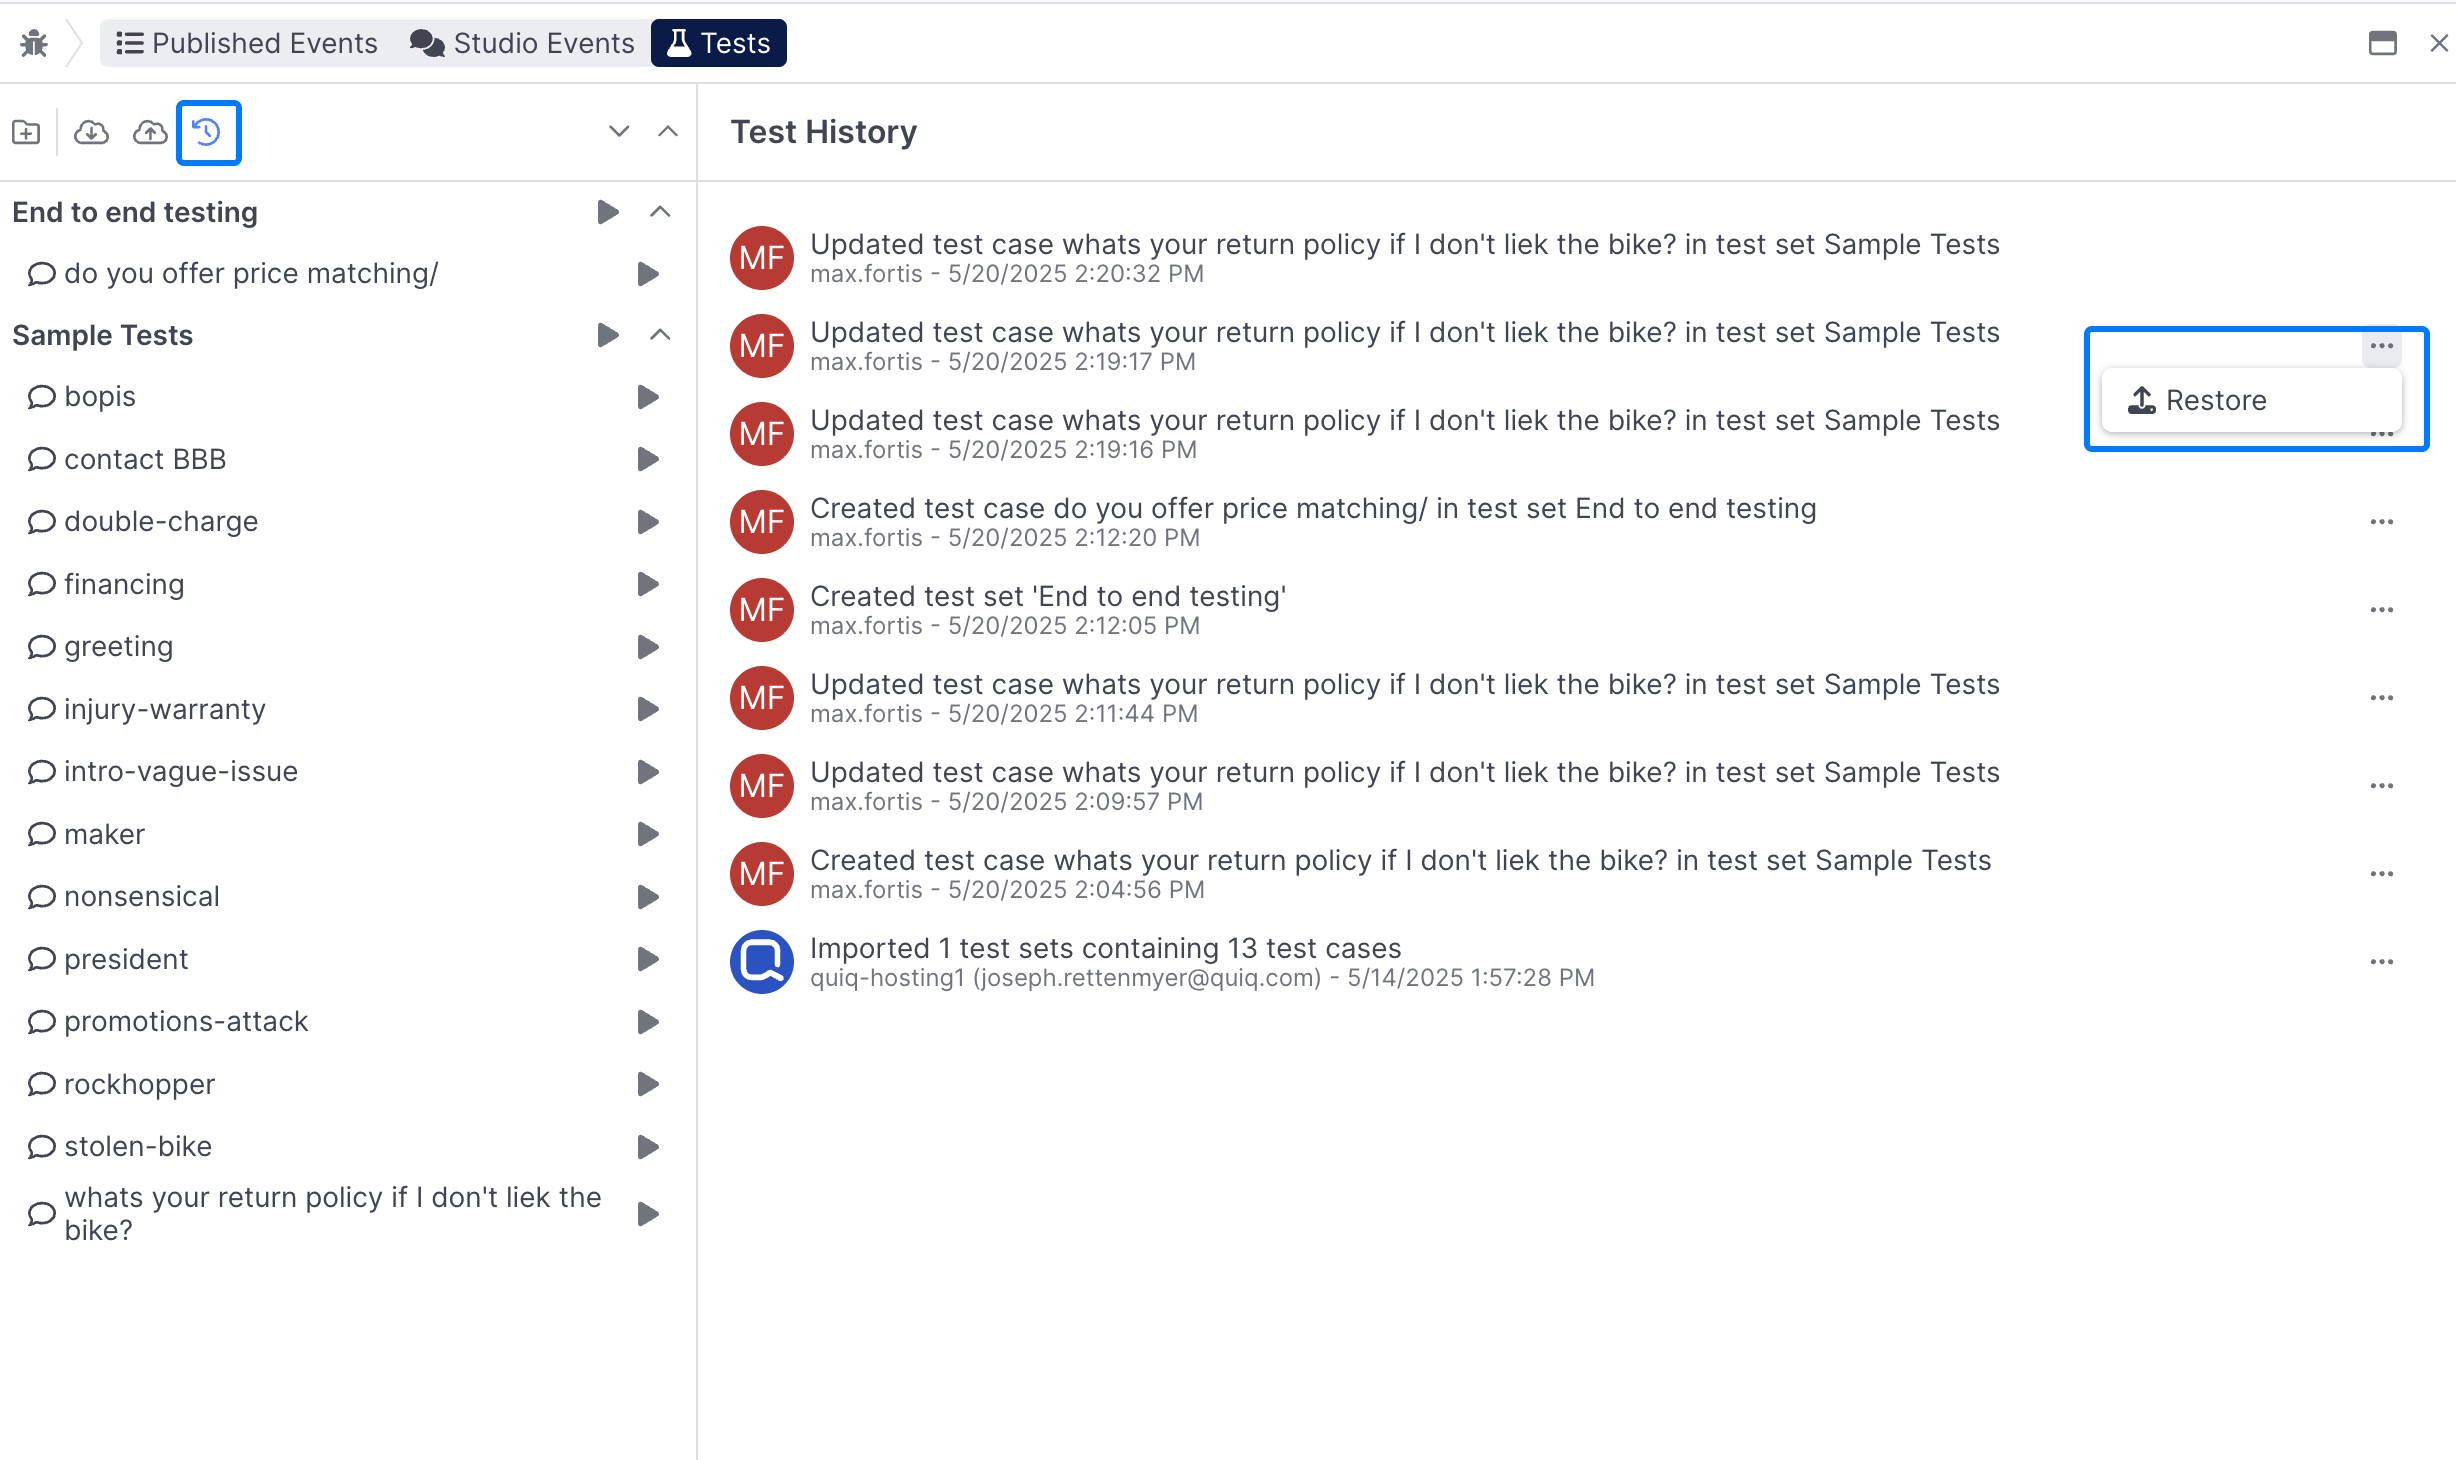
Viewing Test Set History
If you want to see what changed with your Test Sets, you can use the View History button, this provides a view of previous changes, and the ability to restore all Tests back to a previous version:
When to use Tests
You might choose to create a test case in either of the following scenarios:
- You're happy with the agent's behavior and want to establish a regression test to make sure it always works that way
- An event occurred that triggered an error or undesirable behavior such as a mis-classification that will require further prompt engineering
In the first case, you simply create the test case and begin adding assertions. In the second case, you create the test case and proceed to fix any problems and verify your fixes by repeatedly running the test case, which is very similar to event replay.
Other noteworthy features:
- There's a button for copying test cases and changing the last customer message. This can sometimes be an easier way to build up a test set
- In addition to tests that execute the entire flow and assert against the final state (user turn tests), it's also possible to create test cases directly against prompt behaviors. This can be desirable if your flow takes a while to execute and you only wish to test or develop a specific prompt node. To create a Prompt test, select a prompt behavior in the event navigation tree and then click the test beaker and select 'Add Prompt Test Case'