Agent Basics
Creating an Agent
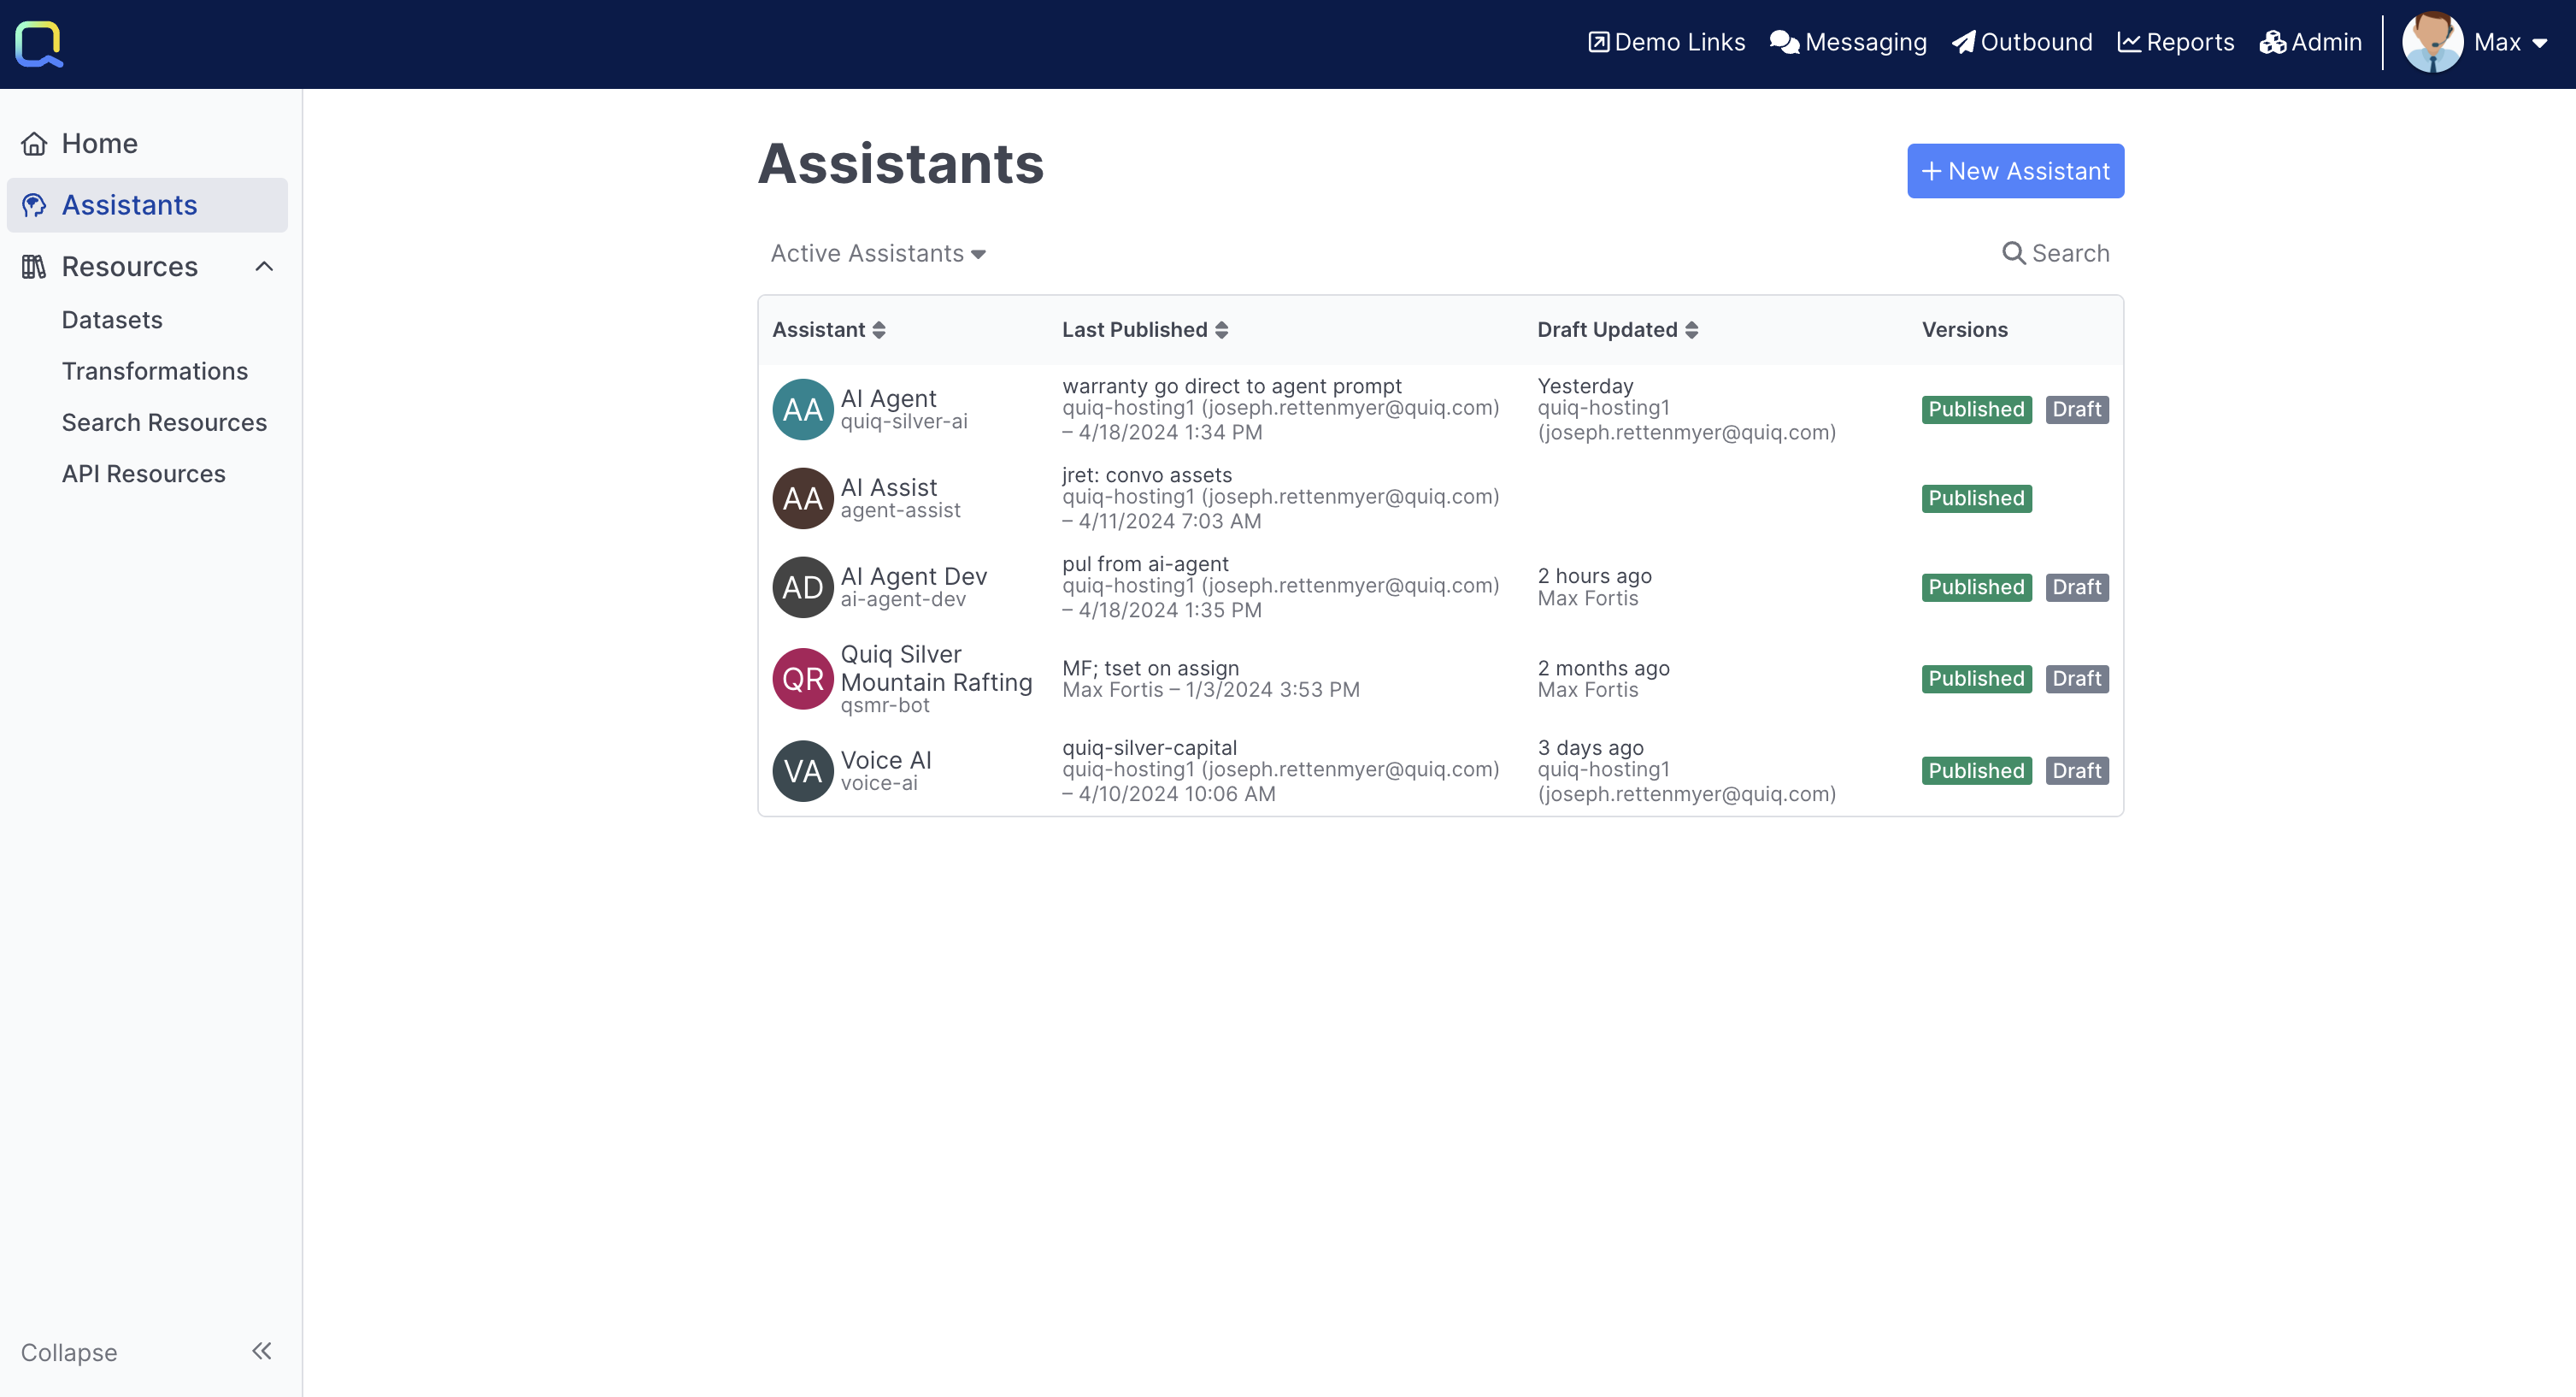
The first step in designing an Agent within AI Studio is to create a new one using the New Agent button in Agents:
After creating the Agent provide it with a name:
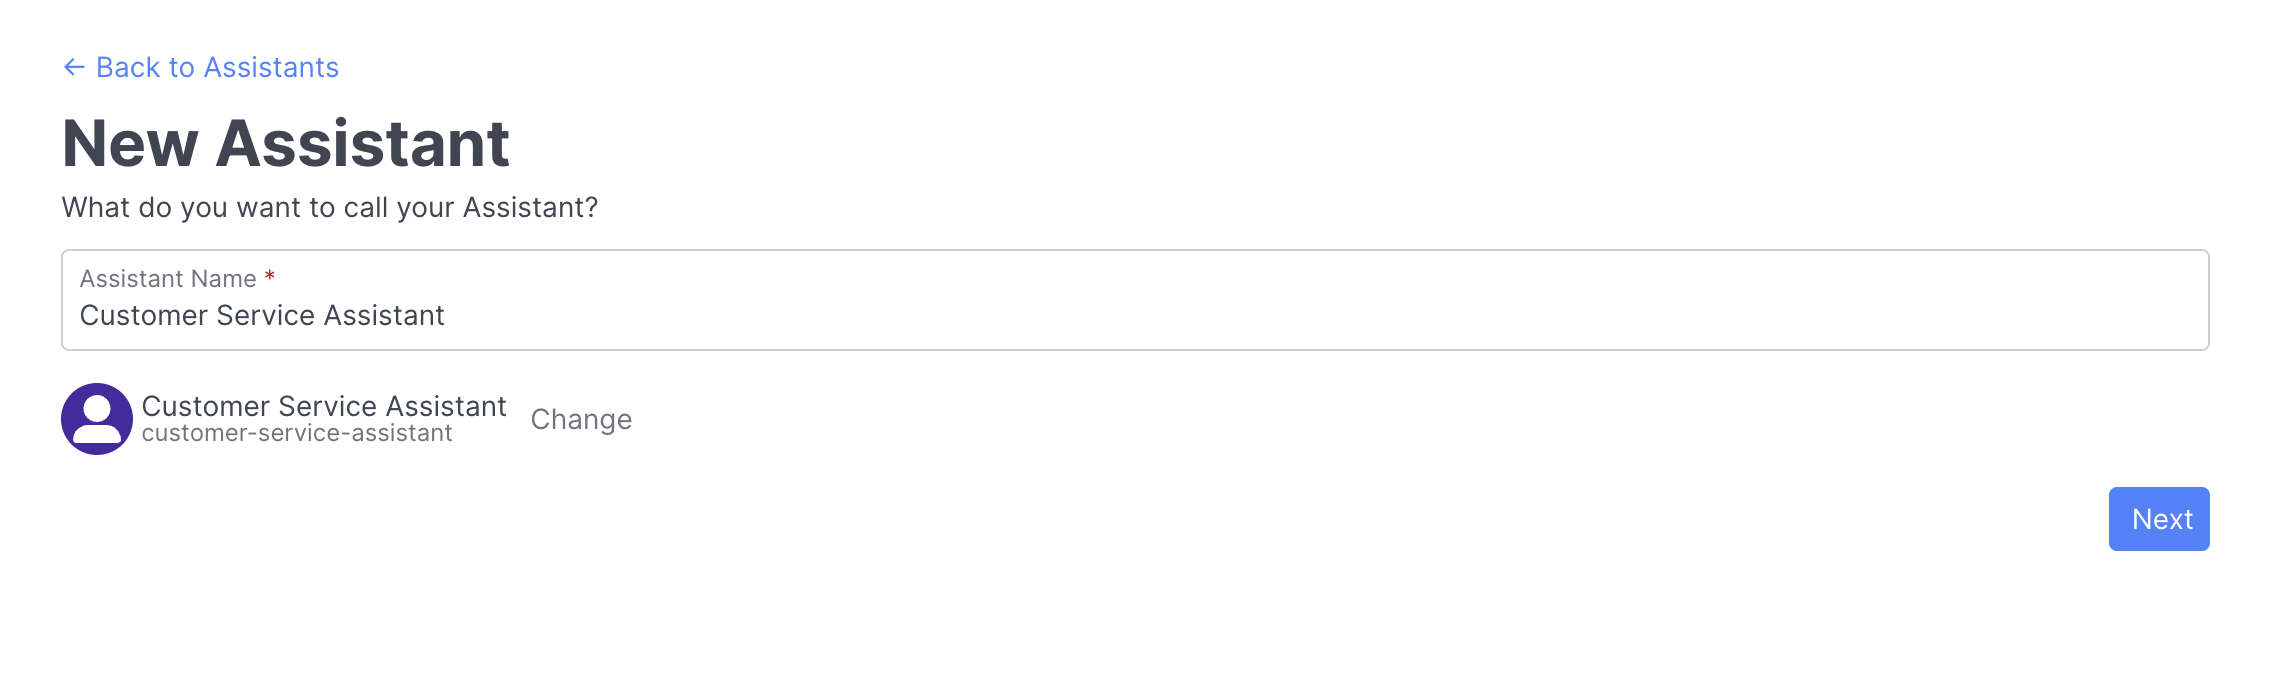
You can override the default agent Id by using the Change button next to the agent preview
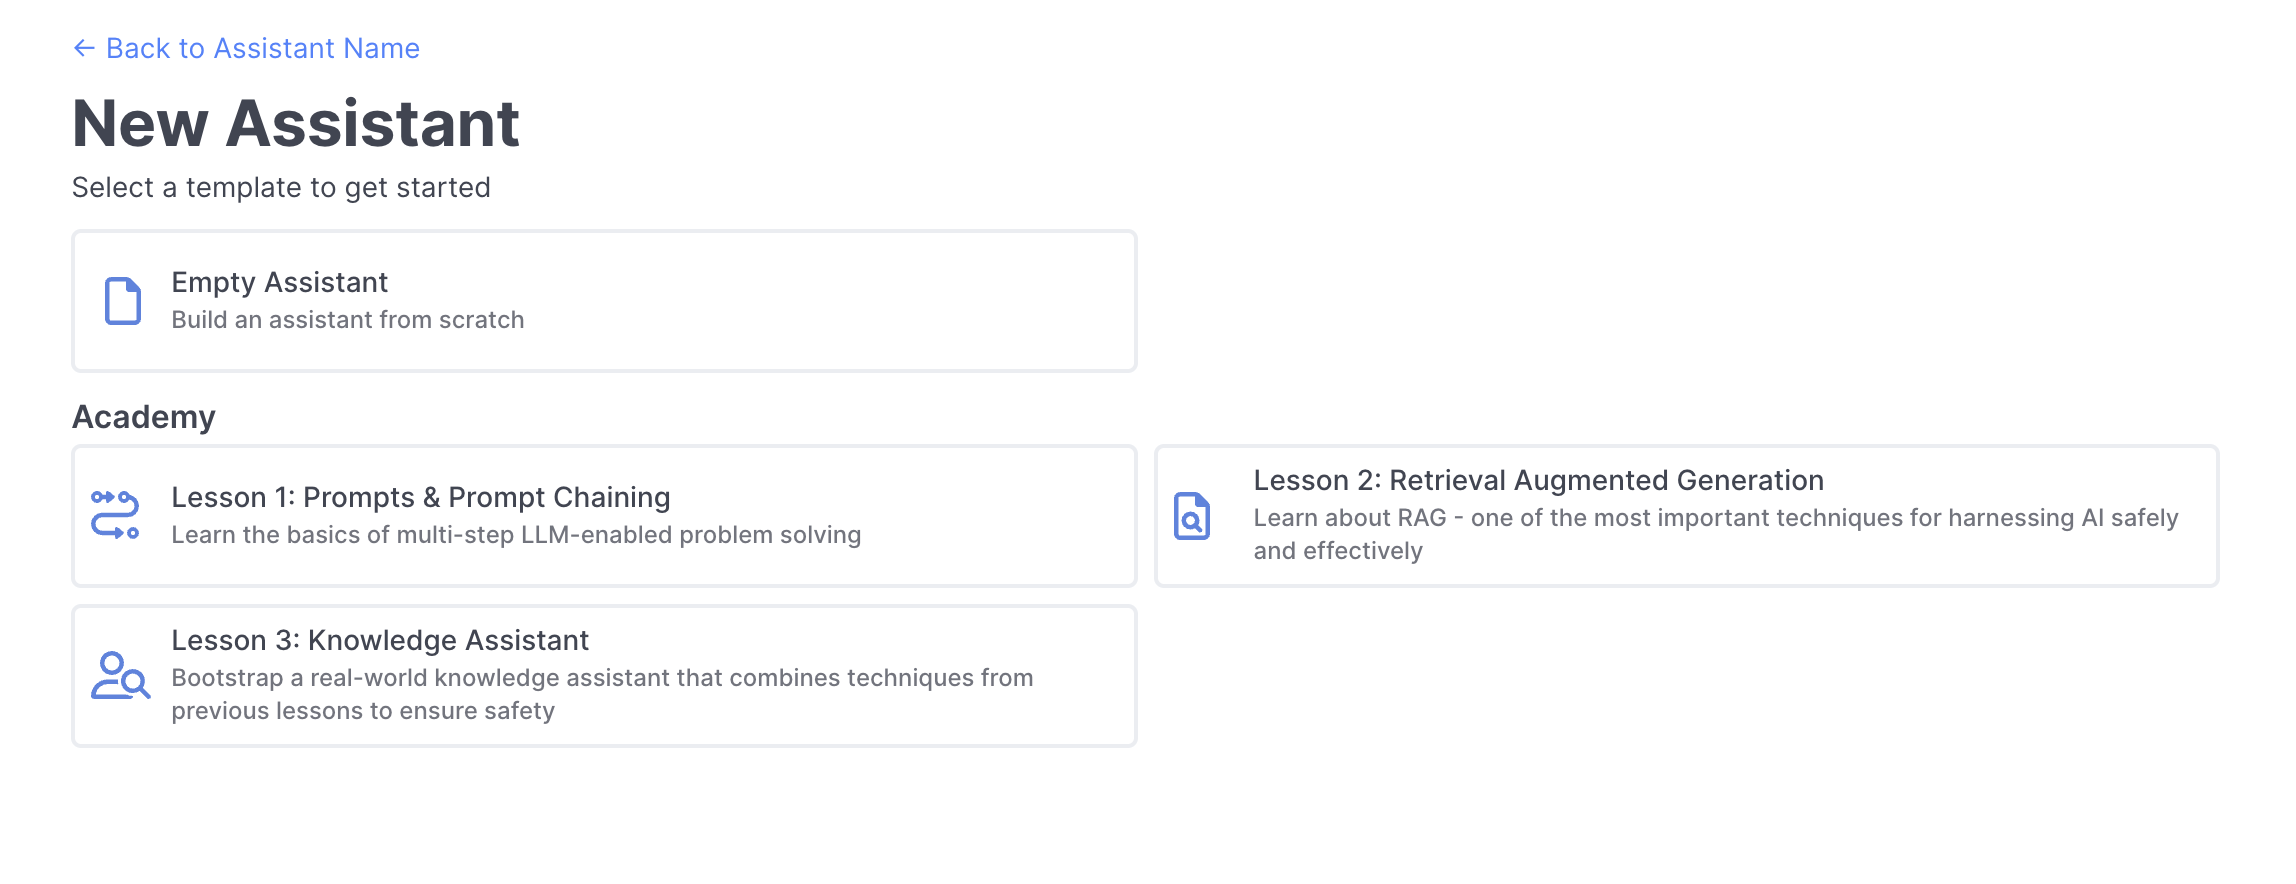
Next, you'll need to select whether you'd like to create your agent from scratch or from a template, you can read more about templates here:
Once created, you'll be dropped into the Flow Editorfor your newly created agent.
Agent Detail
Click into an agent will bring you to the agent detail page:
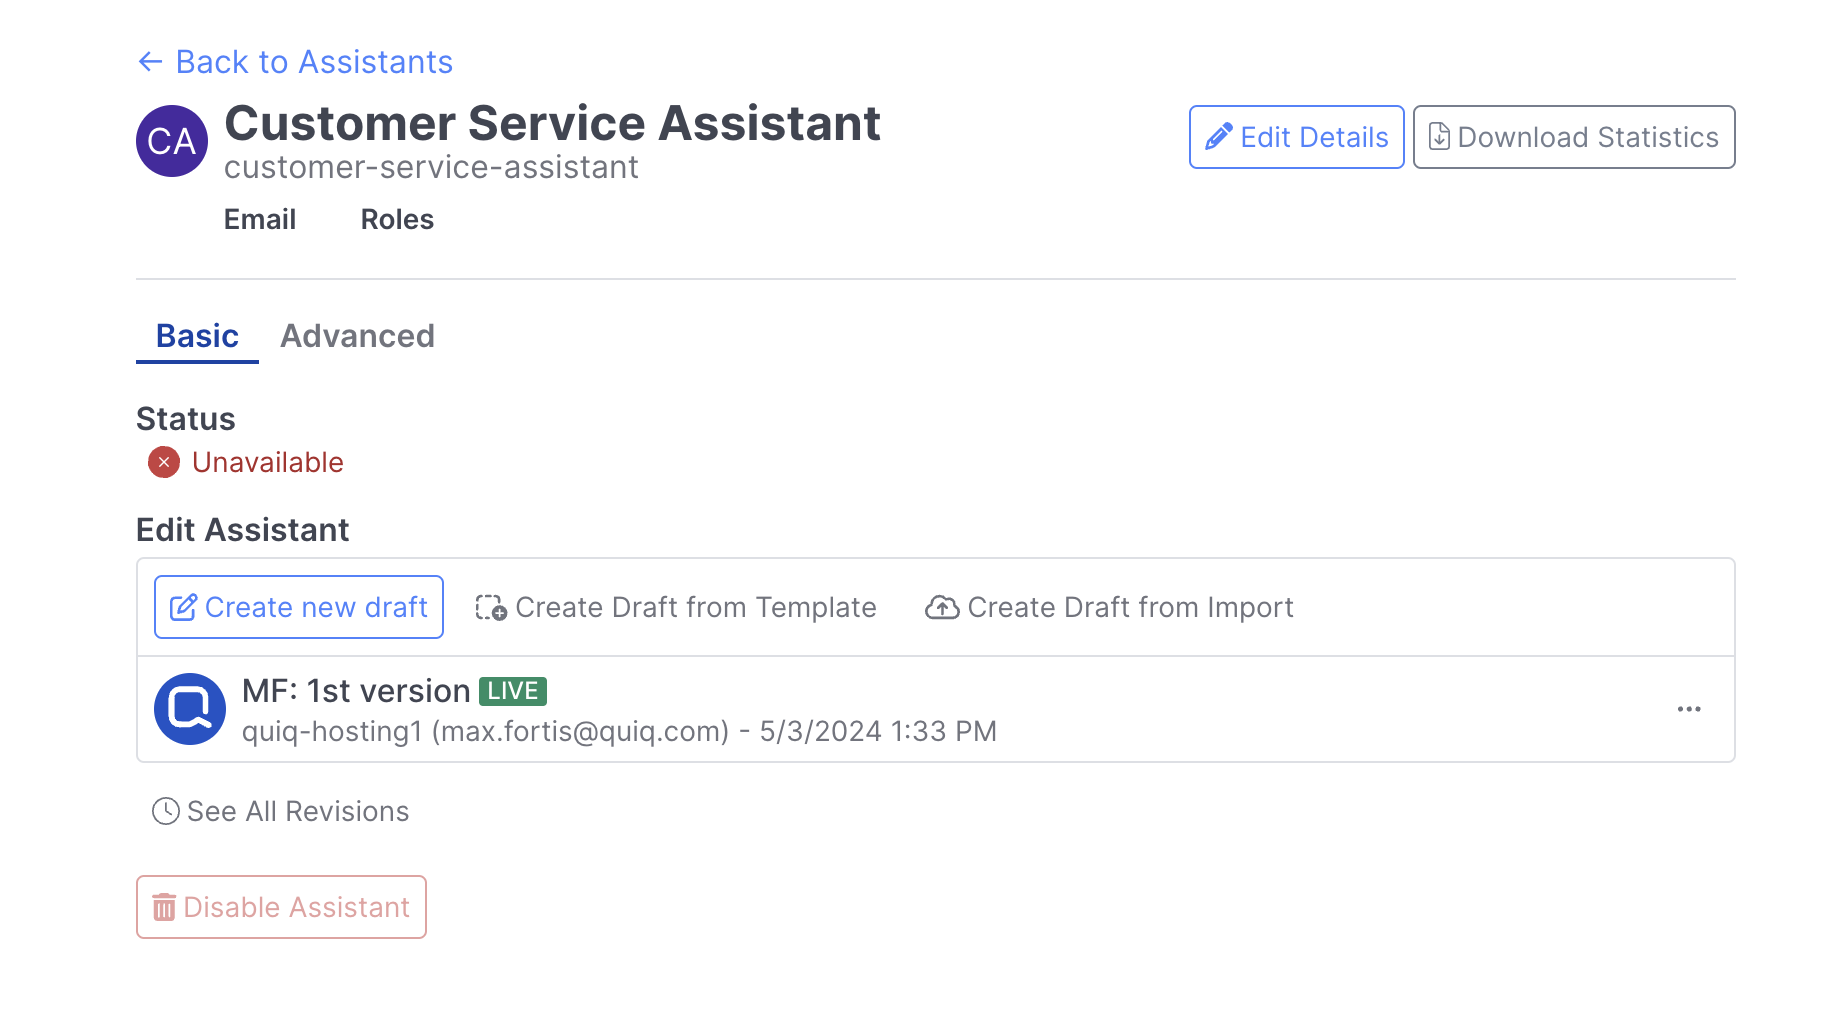
From here, you can modify your agent status, view your agent revision history, download agent statistics, and more.
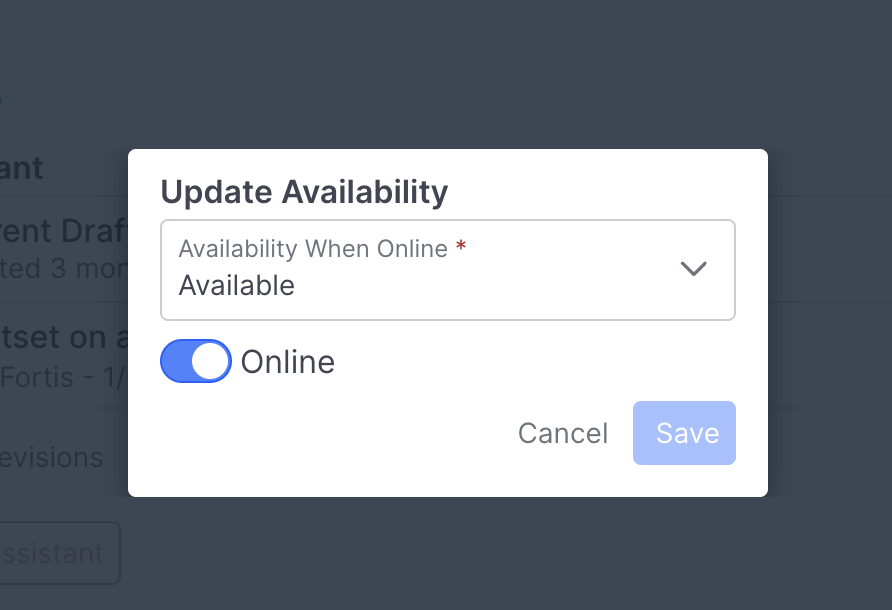
Status
The status of your agent determines whether or not it's able to receive conversations and respond to users on the channels it's available on. You can modify your agent status by selecting it's current availability and updating as necessarily:
Versioning
Each agent has it's revision history that can be access via the See All Revision button:
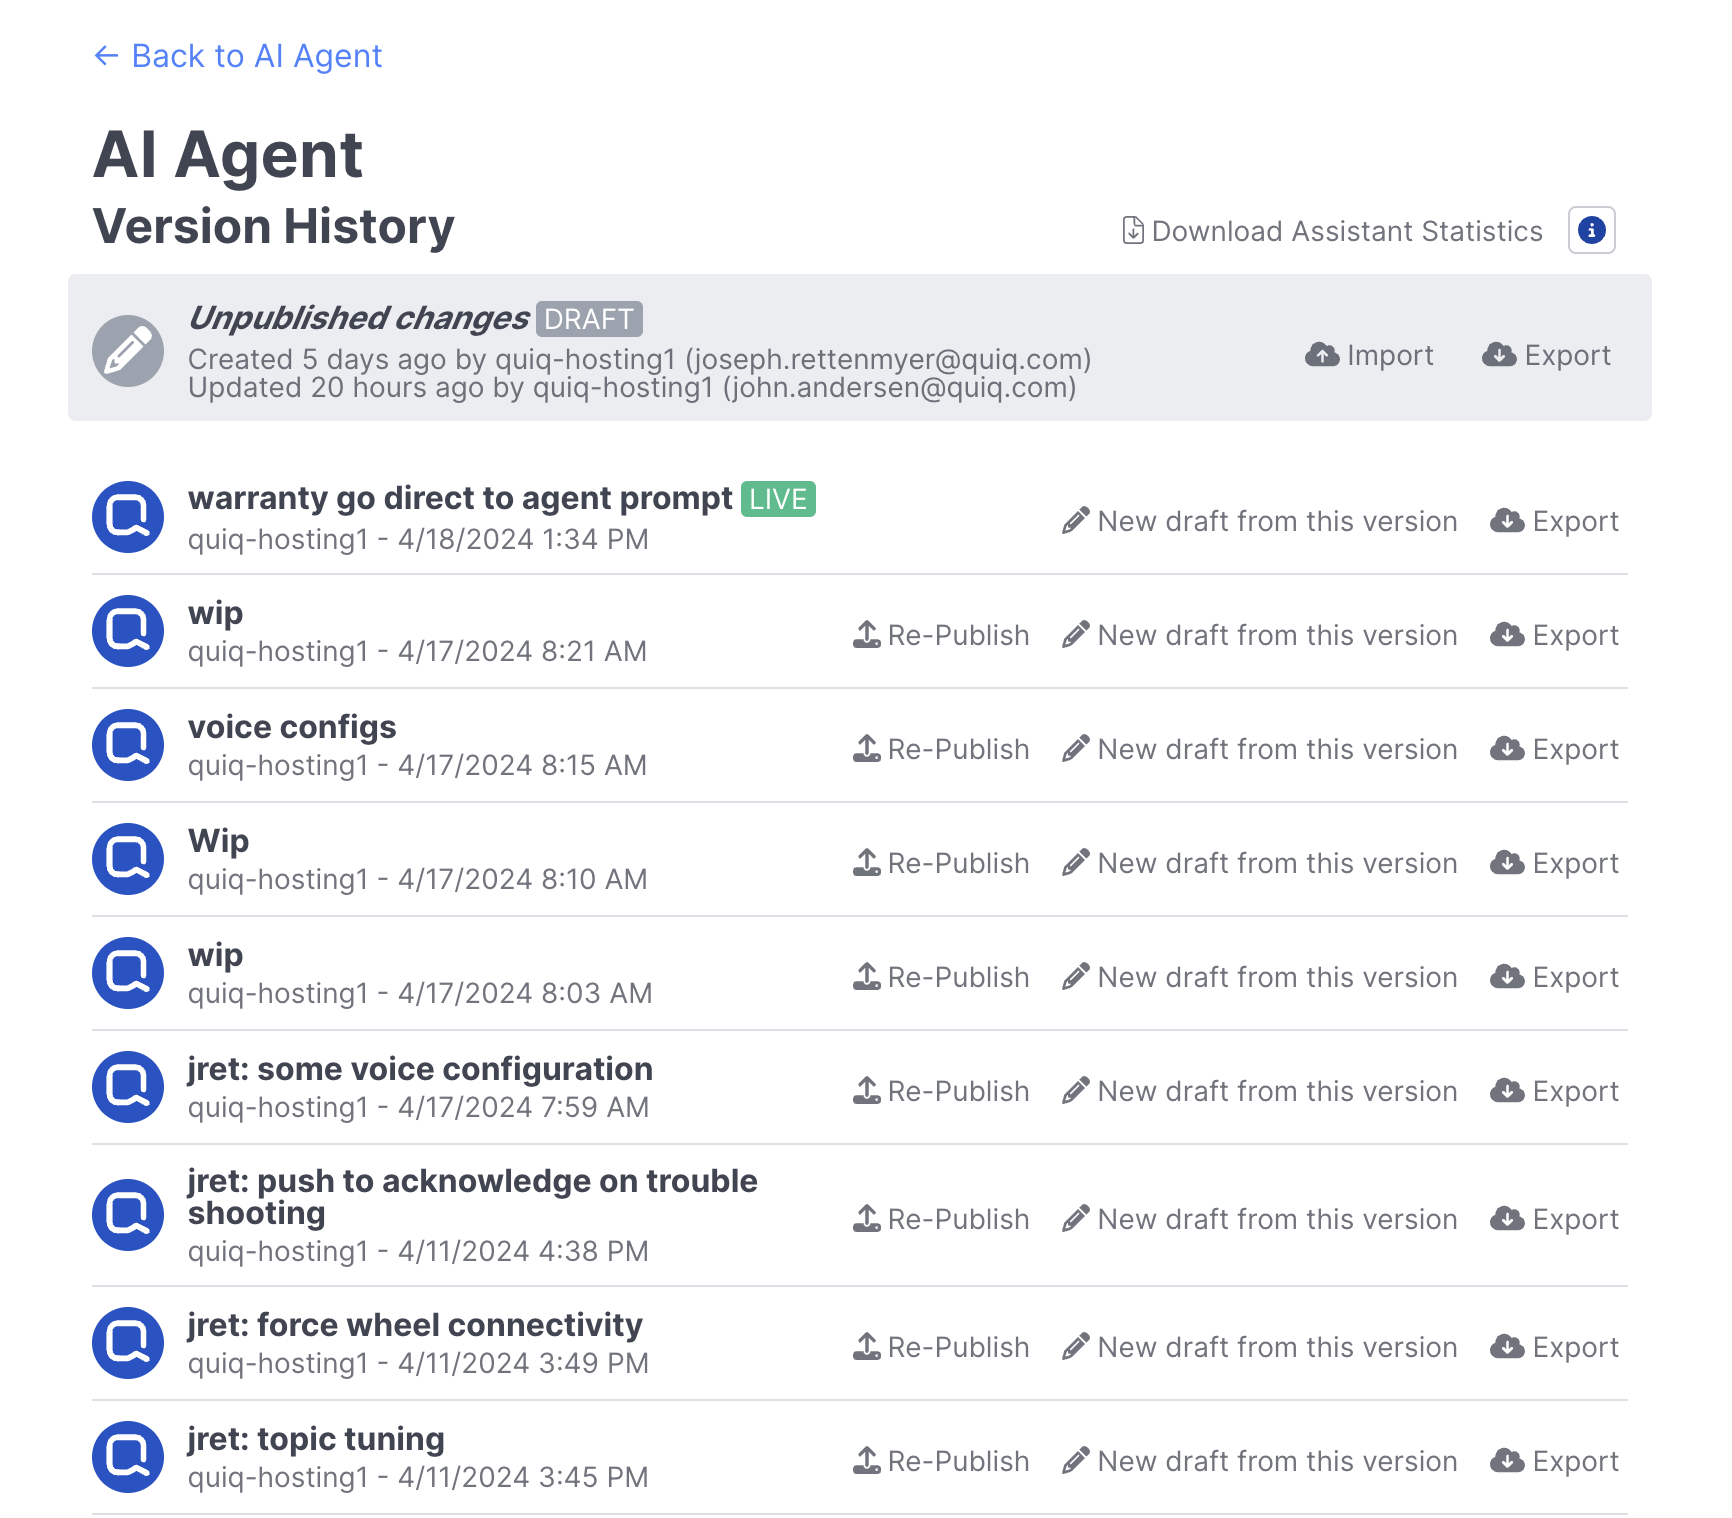
This allows you to track changes over time and easily revert back to previous versions of your agent, or create a new draft from a previous version.
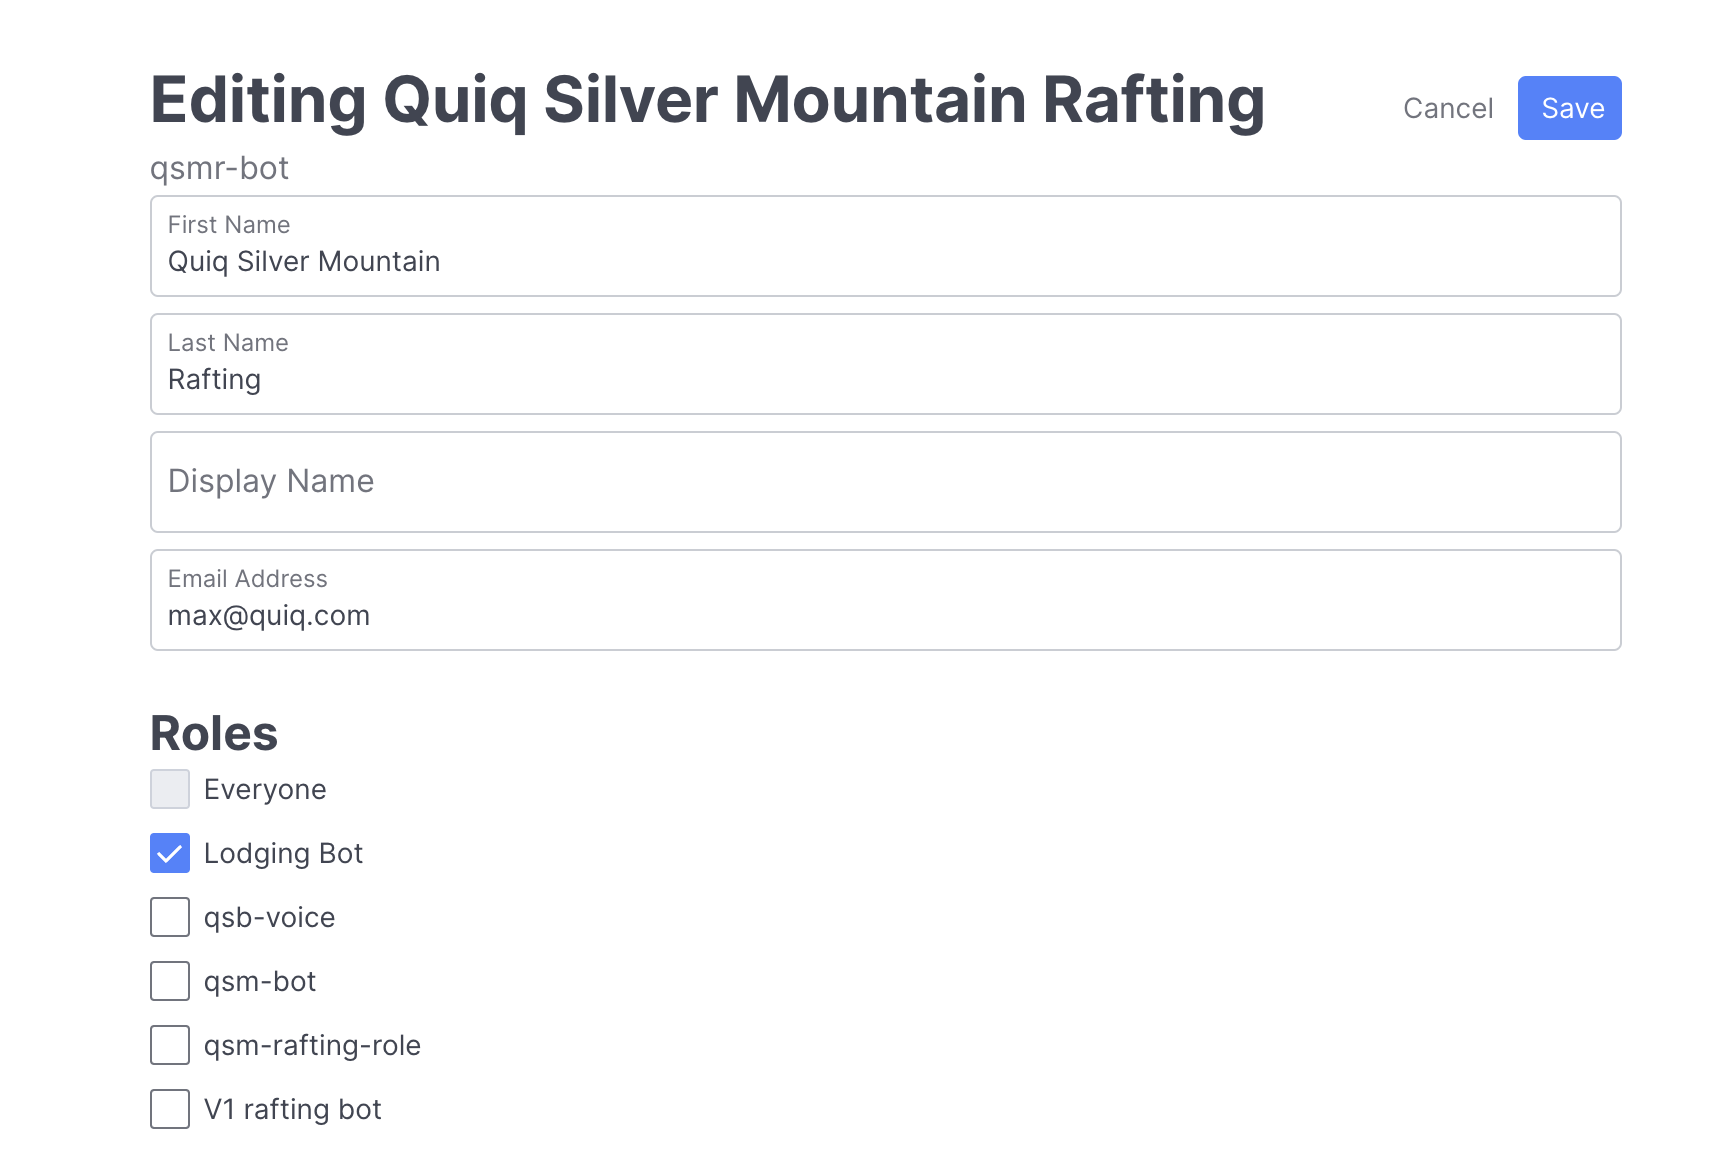
Edit Details
You can use the Edit Details button to modify your agent's name, email and role:
Publishing
Active Conversations & VersionsWhen a conversation is assigned to your agent, it will be associated with whichever revision is currently live and will stay with that revision of the agent until the agent reassigns or closes the conversation. This insures that your agent never has downtime.
Reviewing
The Review button enables you to compare changes between the version of an agent your looking at, and the previous version:
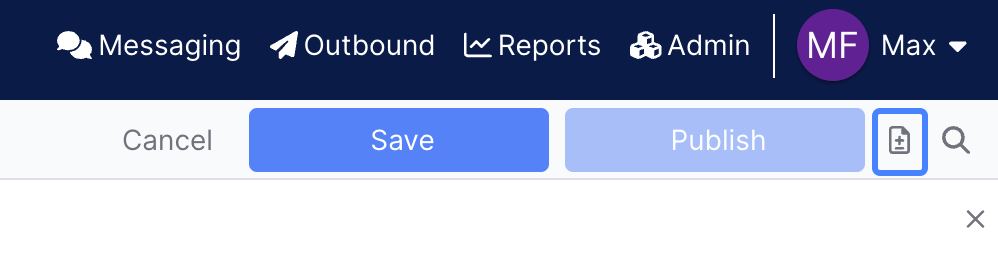
Changes between versions can be viewed either side by side, or line by line using the Output Format option.
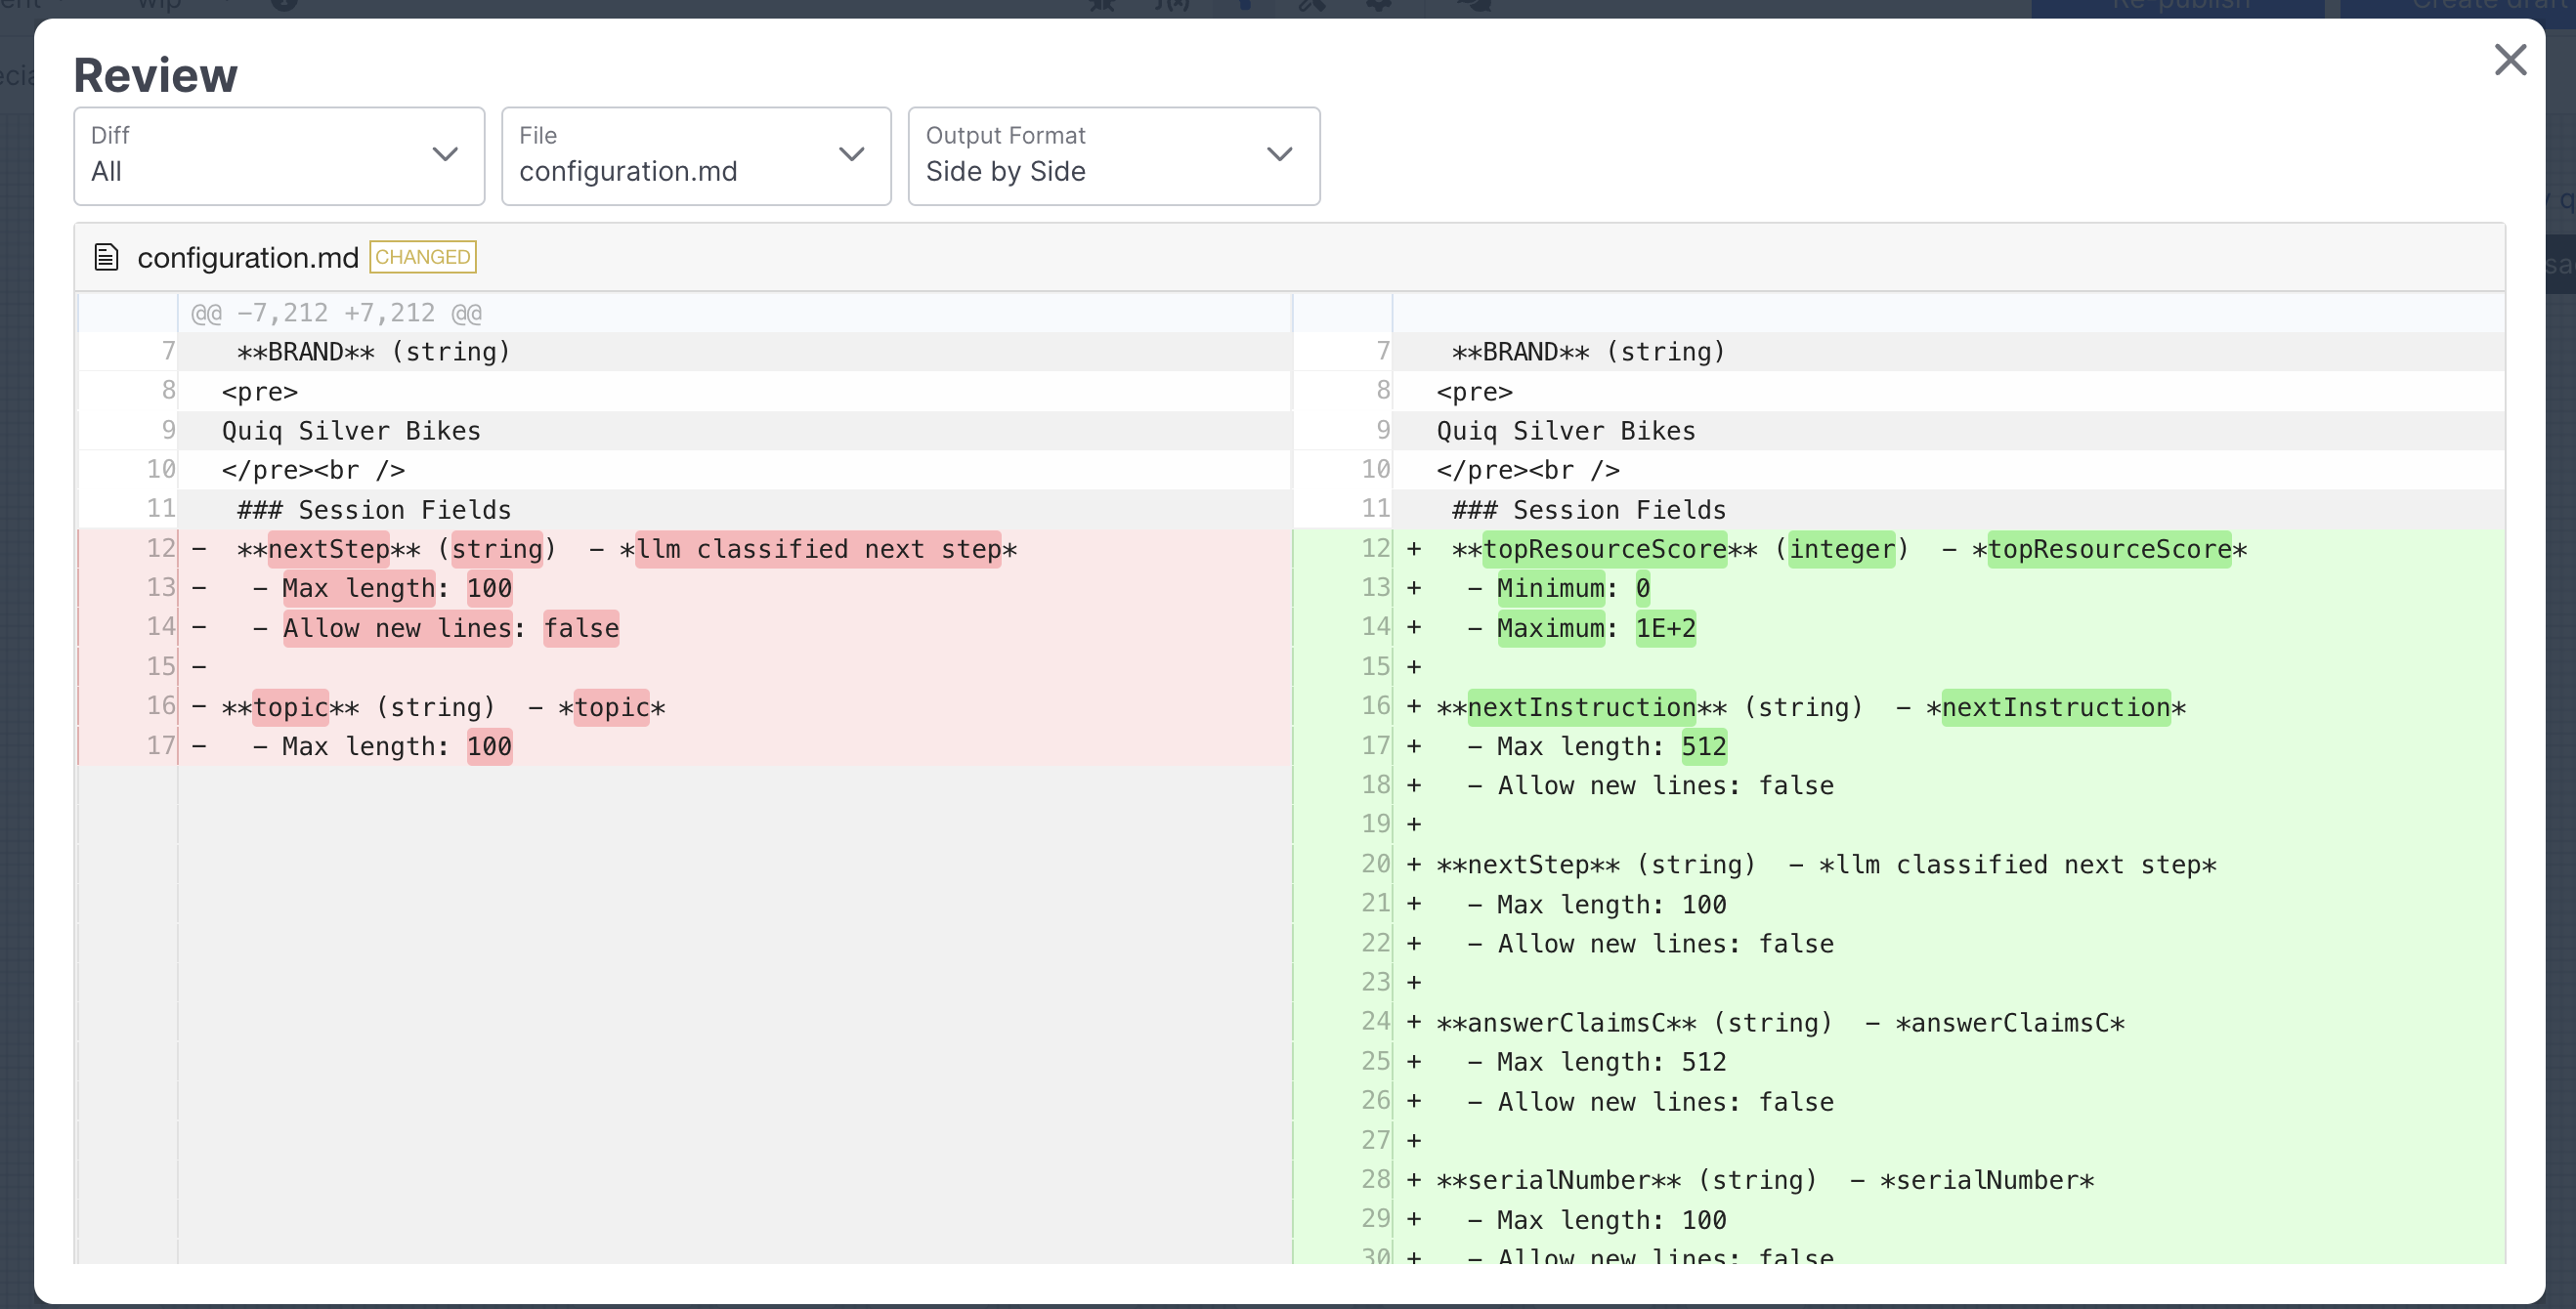
Any of the Panels (Flow, Configuration, Function, etc) that have changed since the previous version will show up under File . You also have the ability to view the raw output of all differences:
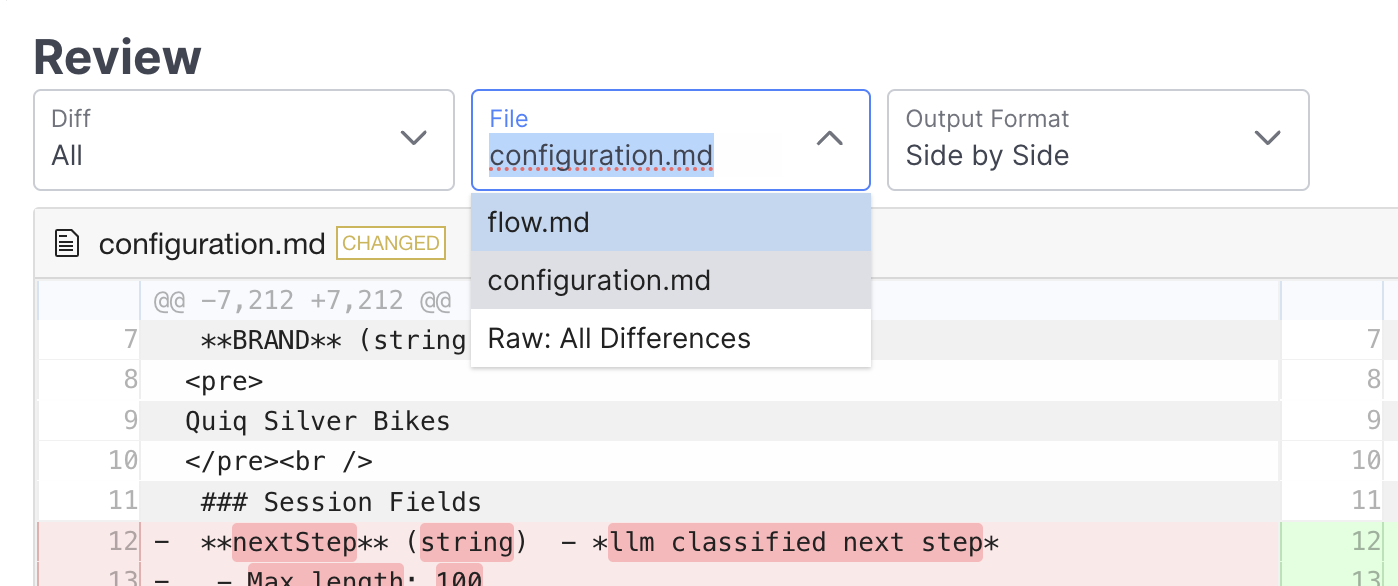
Additionally, you can use Diff to view changes between versions, or view changes since your last save, which can be helpful when working in an active draft & checking what you've done since you last saved:
The review button can be found both within an agent, and when viewing revisions, enabling you to compare changes between previous versions of your agent.
Exporting and Importing
You can export any version of an agent. The downloaded agent definition file can then be imported, either to another agent, or into another tenant to migrate changes made in a staging tenant to production.
Export
An Export button is displayed for each version on the Version History page, as well as on the Agent Details page in the More menu. Both the current Draft and Live versions, as well as previously published versions, can be exported:
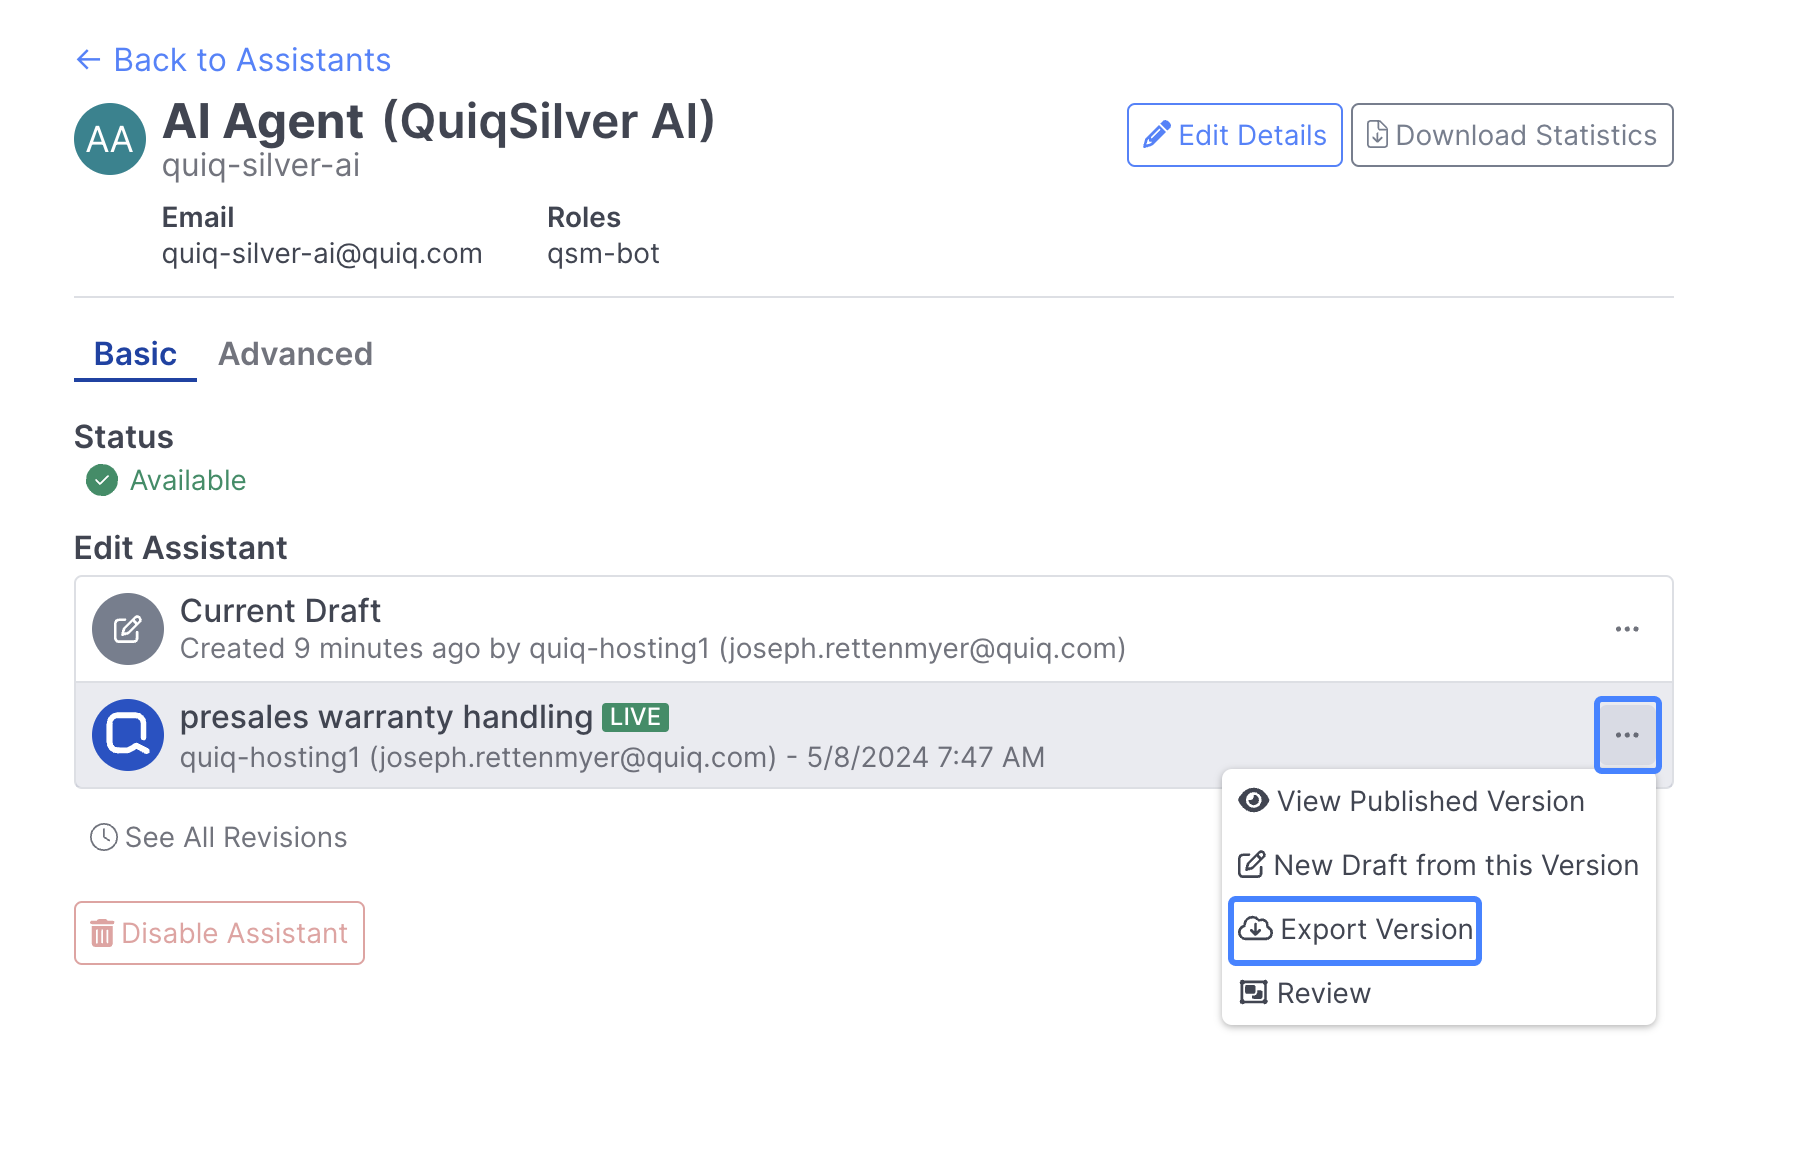
Selecting the Export button will download a .json file locally containing the agent definition. The file name is in the format QUIQBOT_botuser_YYYYMMDDHHMISS.json, where botuser is the agent username and the date/time is the time the file was downloaded.
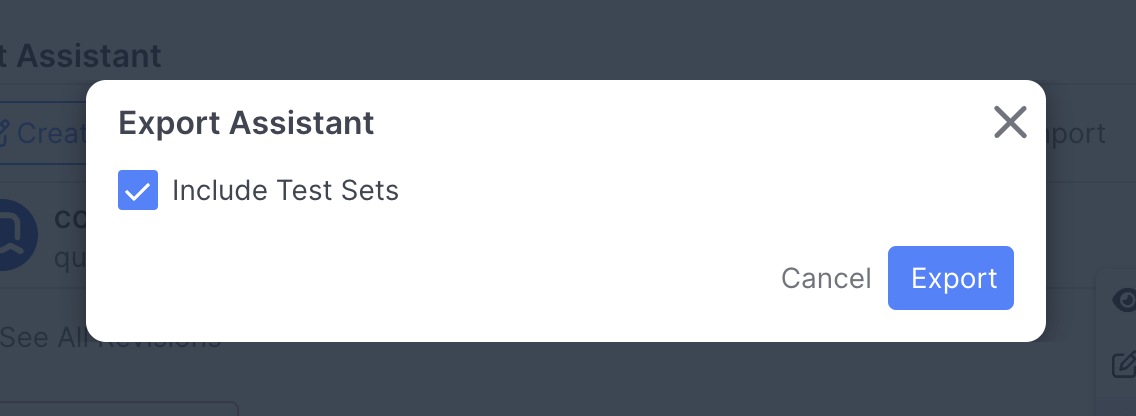
When exporting an agent, you, you have the option to include Test Sets associated with the agent.
Do not edit this file. If this file is edited in any way, you will not be able to import it.
Import
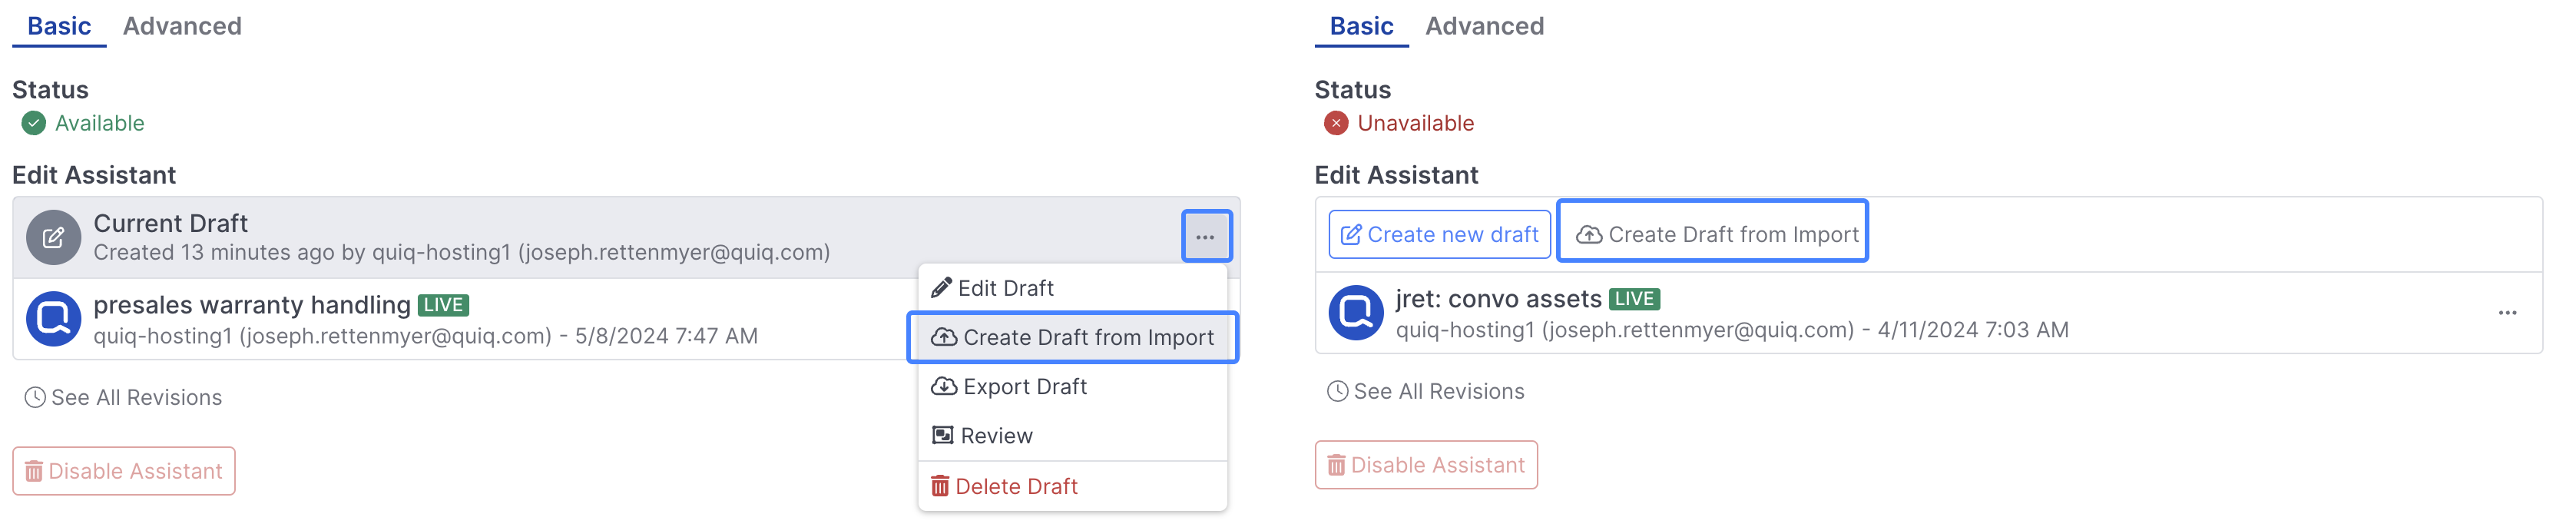
A previously exported Quiq agent definition can then be imported into a Quiq agent to the Draft version. If a Draft version already exists, an Import button is available which will overwrite the existing draft with the definition in the export file. If no Draft version currently exists, then a Import Into Draft button exists which will create a new draft version with the definition from the export file:
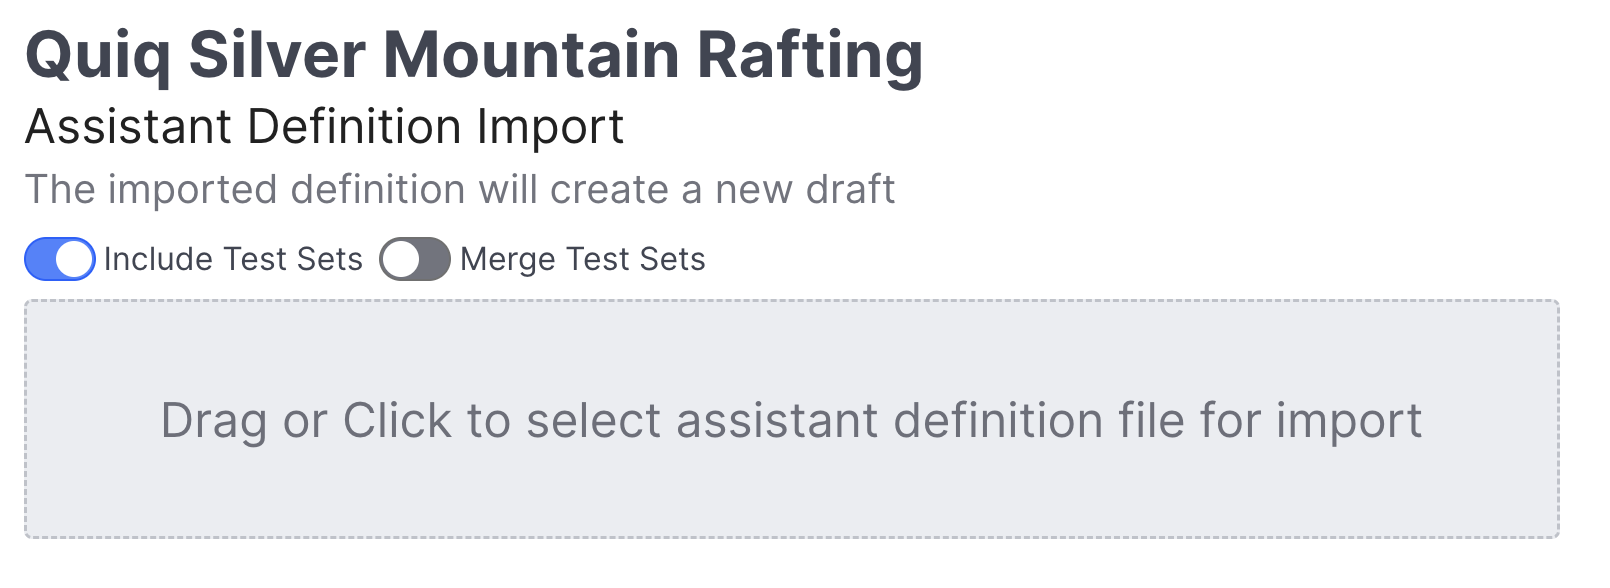
After selecting the Import button, you will be prompted for the agent definition file to import. You can drag a file into the box, or click and select one from the file manager.
When importing, you have the option to decide whether or not you'd like to include Test Sets, and whether or not you'd like to Merge Test Sets:
If importing into a different tenant than that the agent was exported from, if the custom fields referenced in the export bot definition are not exactly the same between the tenants, you may also get a message stating that the references to the custom fields need to be removed, and the Bot exported again before it can be imported.
Dependencies
After selecting a valid agent export .json file, depending on the behaviors that are configured in the exported agent definition, you may need to reset some dependencies. Dependencies are references to objects (things like Contact Points, Queues, Agents, etc). Some dependencies may exist in the exporting tenant, but not the importing tenant.

There are 3 types of dependencies: Required (red), Warning (yellow) and Optional (gray).
-
Required dependencies must be set to continue. You will be required to map a dependency when you have a Decision Condition that references an object that doesn’t exist on the importing tenant.
-
Warning dependencies may be reset, but you are able to continue without setting them. If you do not set warning dependencies, after import you will have validation errors on the agent that need to be manually corrected.
-
Optional dependencies are indicating that the object referenced in some behavior does exist on the importing tenant, but you can change the reference to something else if desired.
After selecting the Finish Import button, you are taken to the Flow Panel and the draft version of the agent contains the definition from the export file.
Things to note:
-
Exported assets are only available for 5 days after export. When agent export file containing assets is imported into a different tenant (that does not contain those assets) after the 5-day expiration window, the import will succeed but the assets will be missing. A pop-up notification in AI Astudio will alert the Admin if this occurs.
-
If the exported agent definition file has behaviors that contain Decision Conditions on a custom field, and that custom field is missing or incompatible on the importing tenant, the Bot cannot be imported.
-
If the exported agent definition file has behaviors that contain Set Field or Increment Field Actions on a custom field, and that custom field is missing or incompatible on the importing tenant, the agent can be imported. However there will be validation errors that will need to be manually corrected.
Search
When working in a project, there is a persistent Search option that enables you to search for and navigate to a wide range of content across the Flow Editor, Function Editor, and Prompt Editor panels.
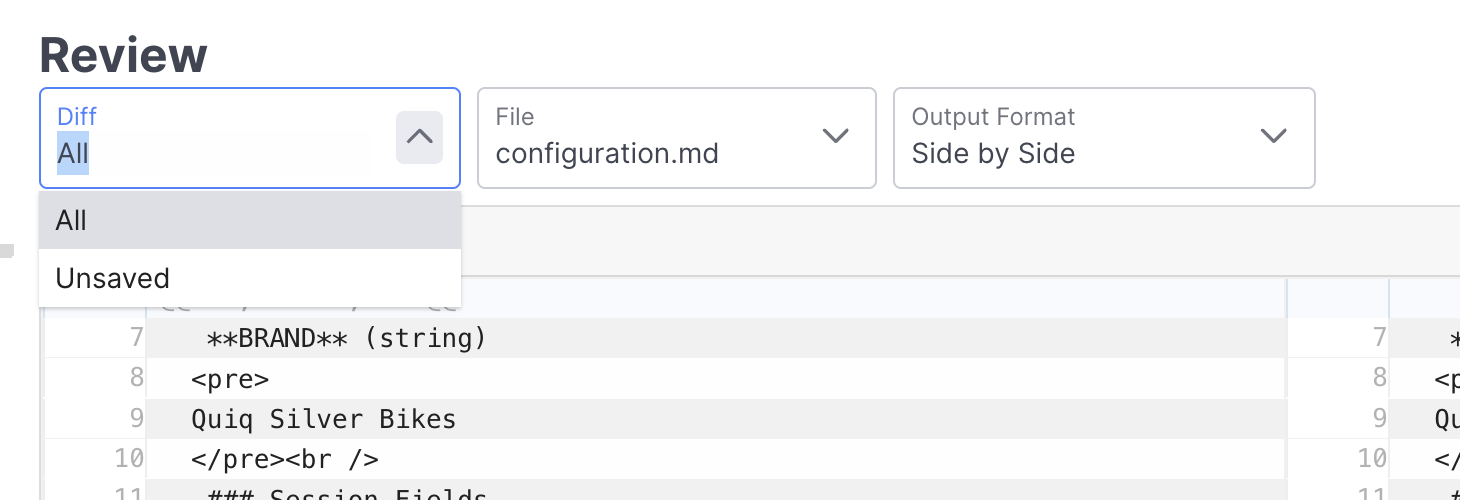
Search can be accessed via the Search button at the top of a project when editing or reviewing, or by using the keyboard shortcut Ctrl + Spacebar.
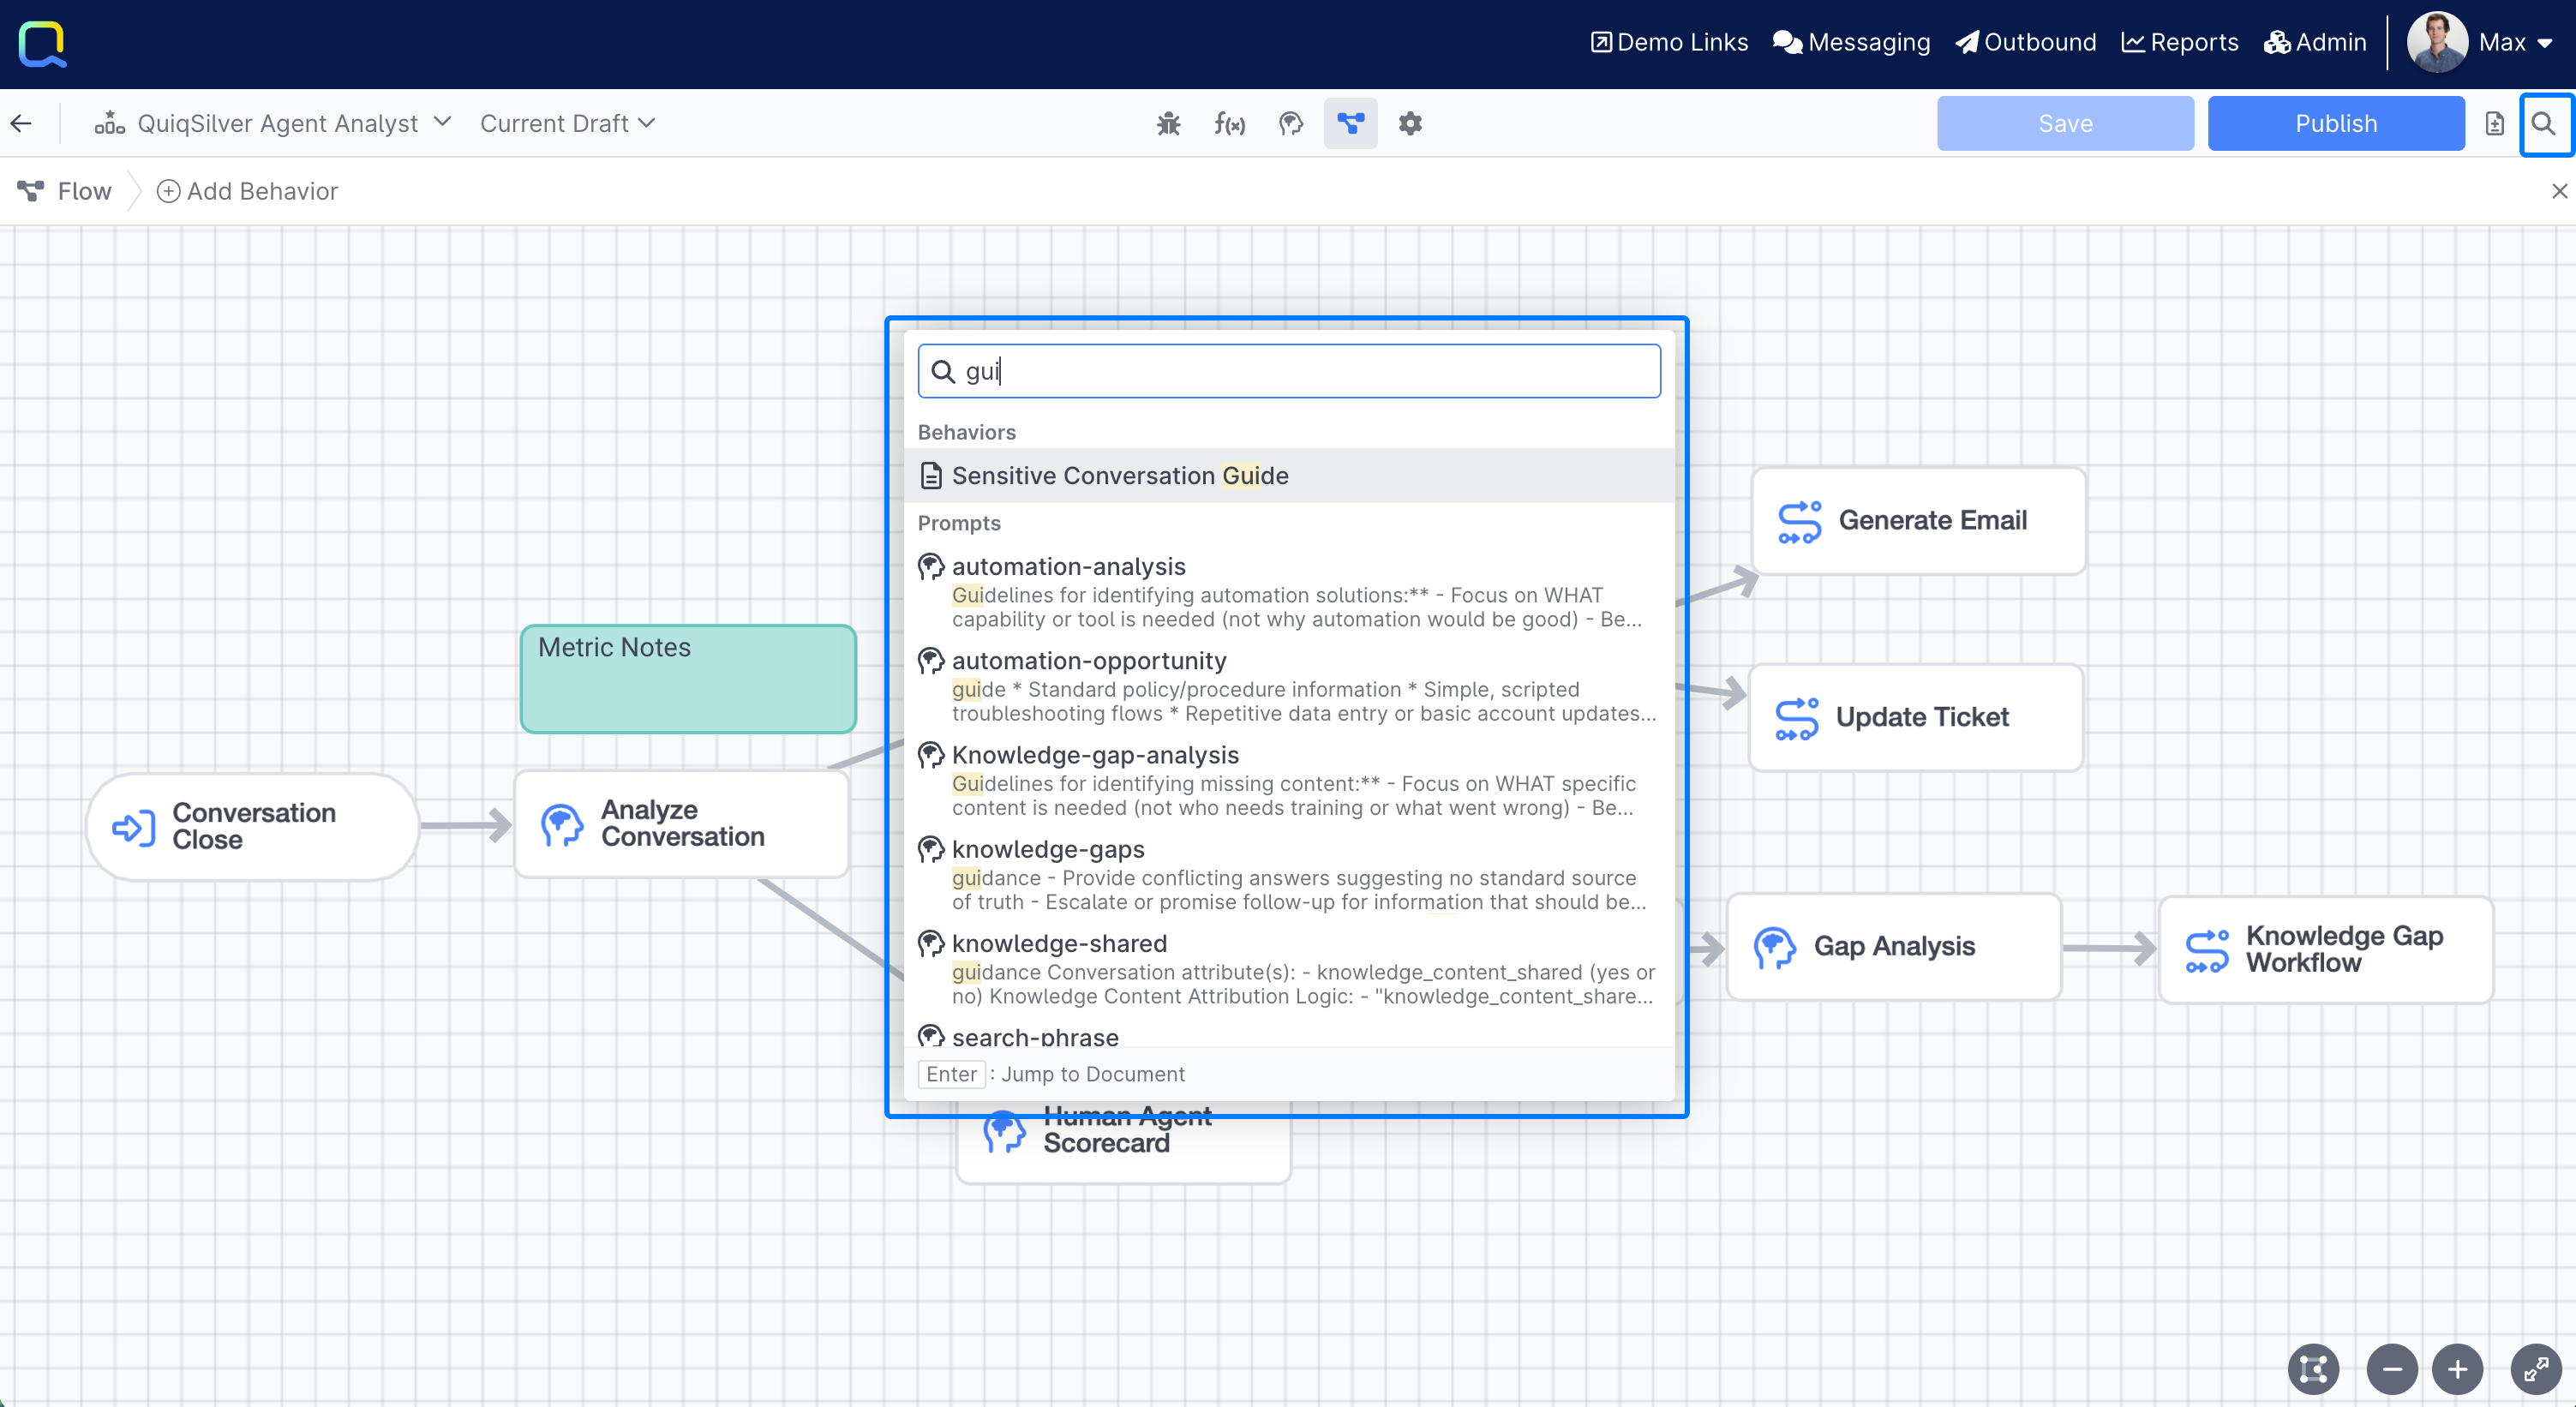
What you can search for
Results are organized into clearly labeled categories, with a count of matches shown next to each. Matching text is highlighted in results.
- Behaviors & Special Events: Labels in the Flow Editor panel
- Prompts: Prompt IDs, categories, instructions, and LLM model names
- Library items: Labels and content used in Prompts or other Library items
- Fields: Fields used in Set Field actions, Conditions, messages, prompts, and more
- Functions: Functions used in Call Function, Call AI Service, Call API, and Prompt Builder/Completion Handler
- Constants: Text and values in messages, actions, conditions, and catalog/outbound templates
- Documents & Notes:Text in the body or label of a Note or Document, and Document Names
- Comments: Text within behavior comments
- Other: API resources, managed credentials, AI service endpoints, and Search resources
Navigating results
Selecting a result jumps directly to that item in the relevant editor. For Fields, Prompts, and Functions, a References count button shows the total number of places that item is used — click it to see the full list. A search is available within the references list to narrow results further.
Keyboard hints at the bottom of the popup show which keystroke applies — typically Enter to jump to the item and Cmd + Enter to view its references. Press Backspace or click Back to return to the main results list from a references view.
Copying and Pasting Behaviors & Special Events
You can copy one or more behaviors or Special Events from the Flow Graph of an AI Agent, AI Assistant, AI Service, or Conversation Analyst and paste them into a different project.
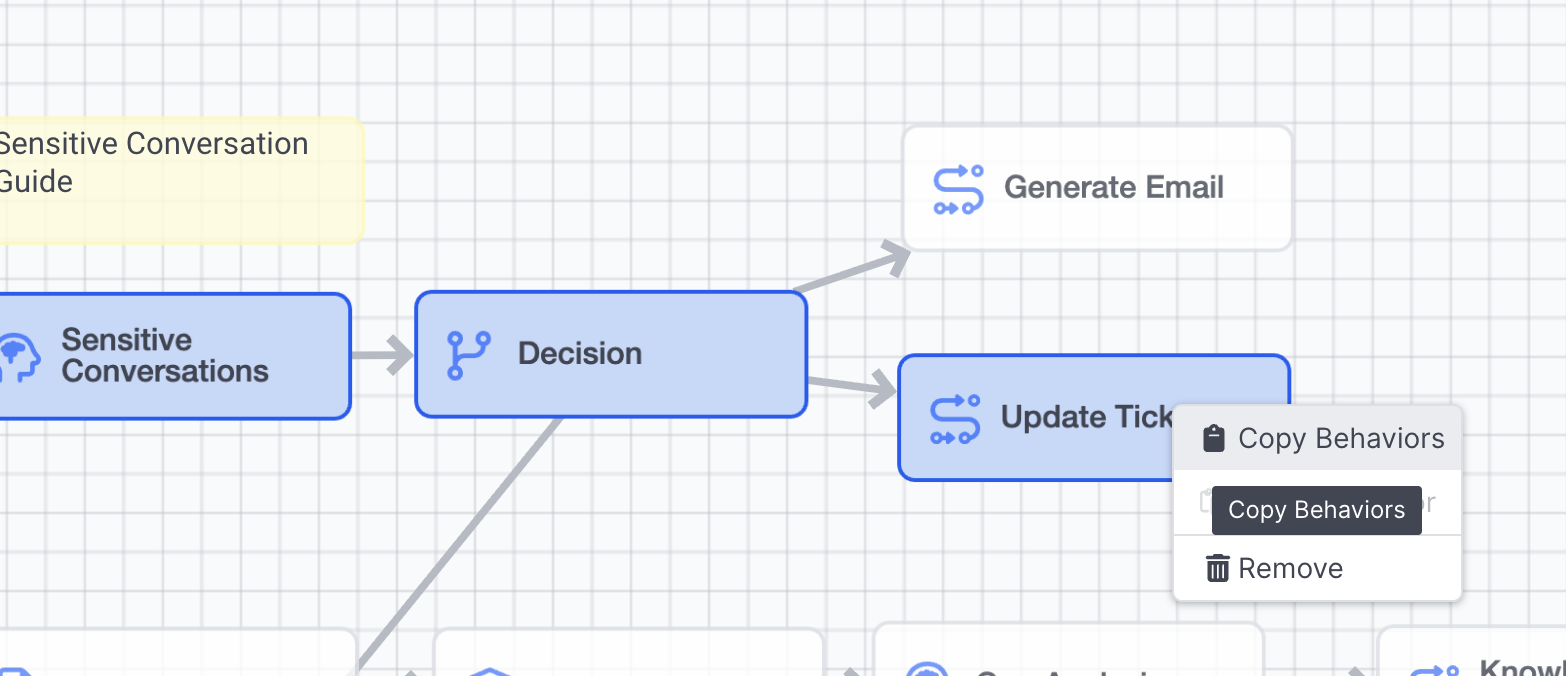
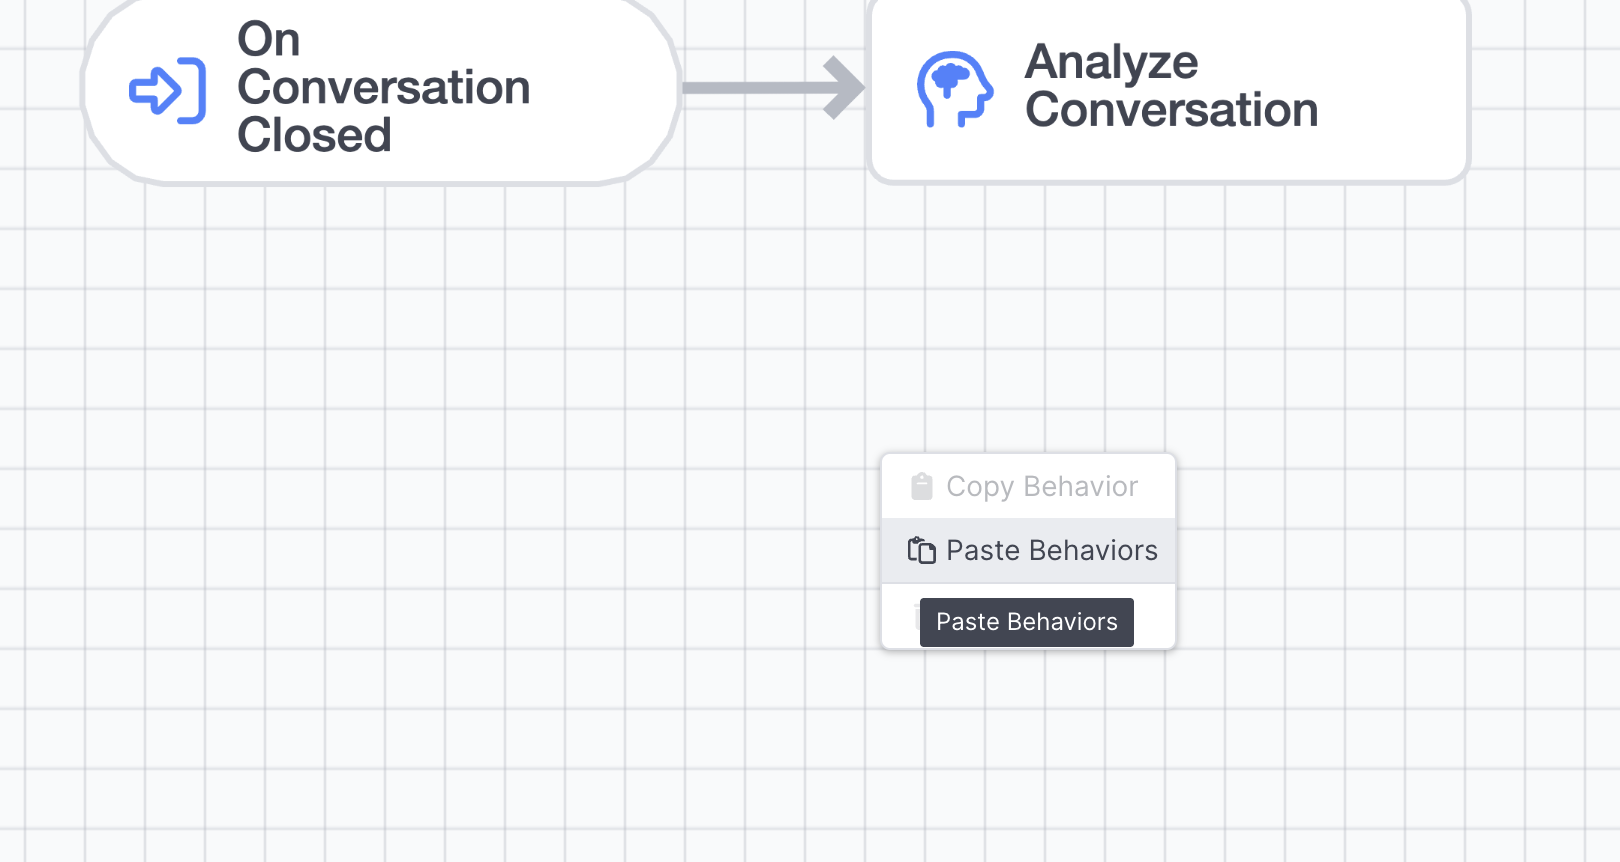
To copy, select the behaviors or Special Events you want to copy and right click to copy. To paste, navigate to the target project's Flow Graph and right click to paste
What to expect
When pasting into another project:
- Relative positions are preserved when multiple nodes are copied, provided there is sufficient space in the target Flow Graph.
- References to fields, configs, functions, and similar are retained. Any that are invalid in the target project are flagged as validation errors.
- Prompt behaviors: the Prompts on those nodes are created with all applicable setup. The corresponding Functions are not copied, but references to them are retained.
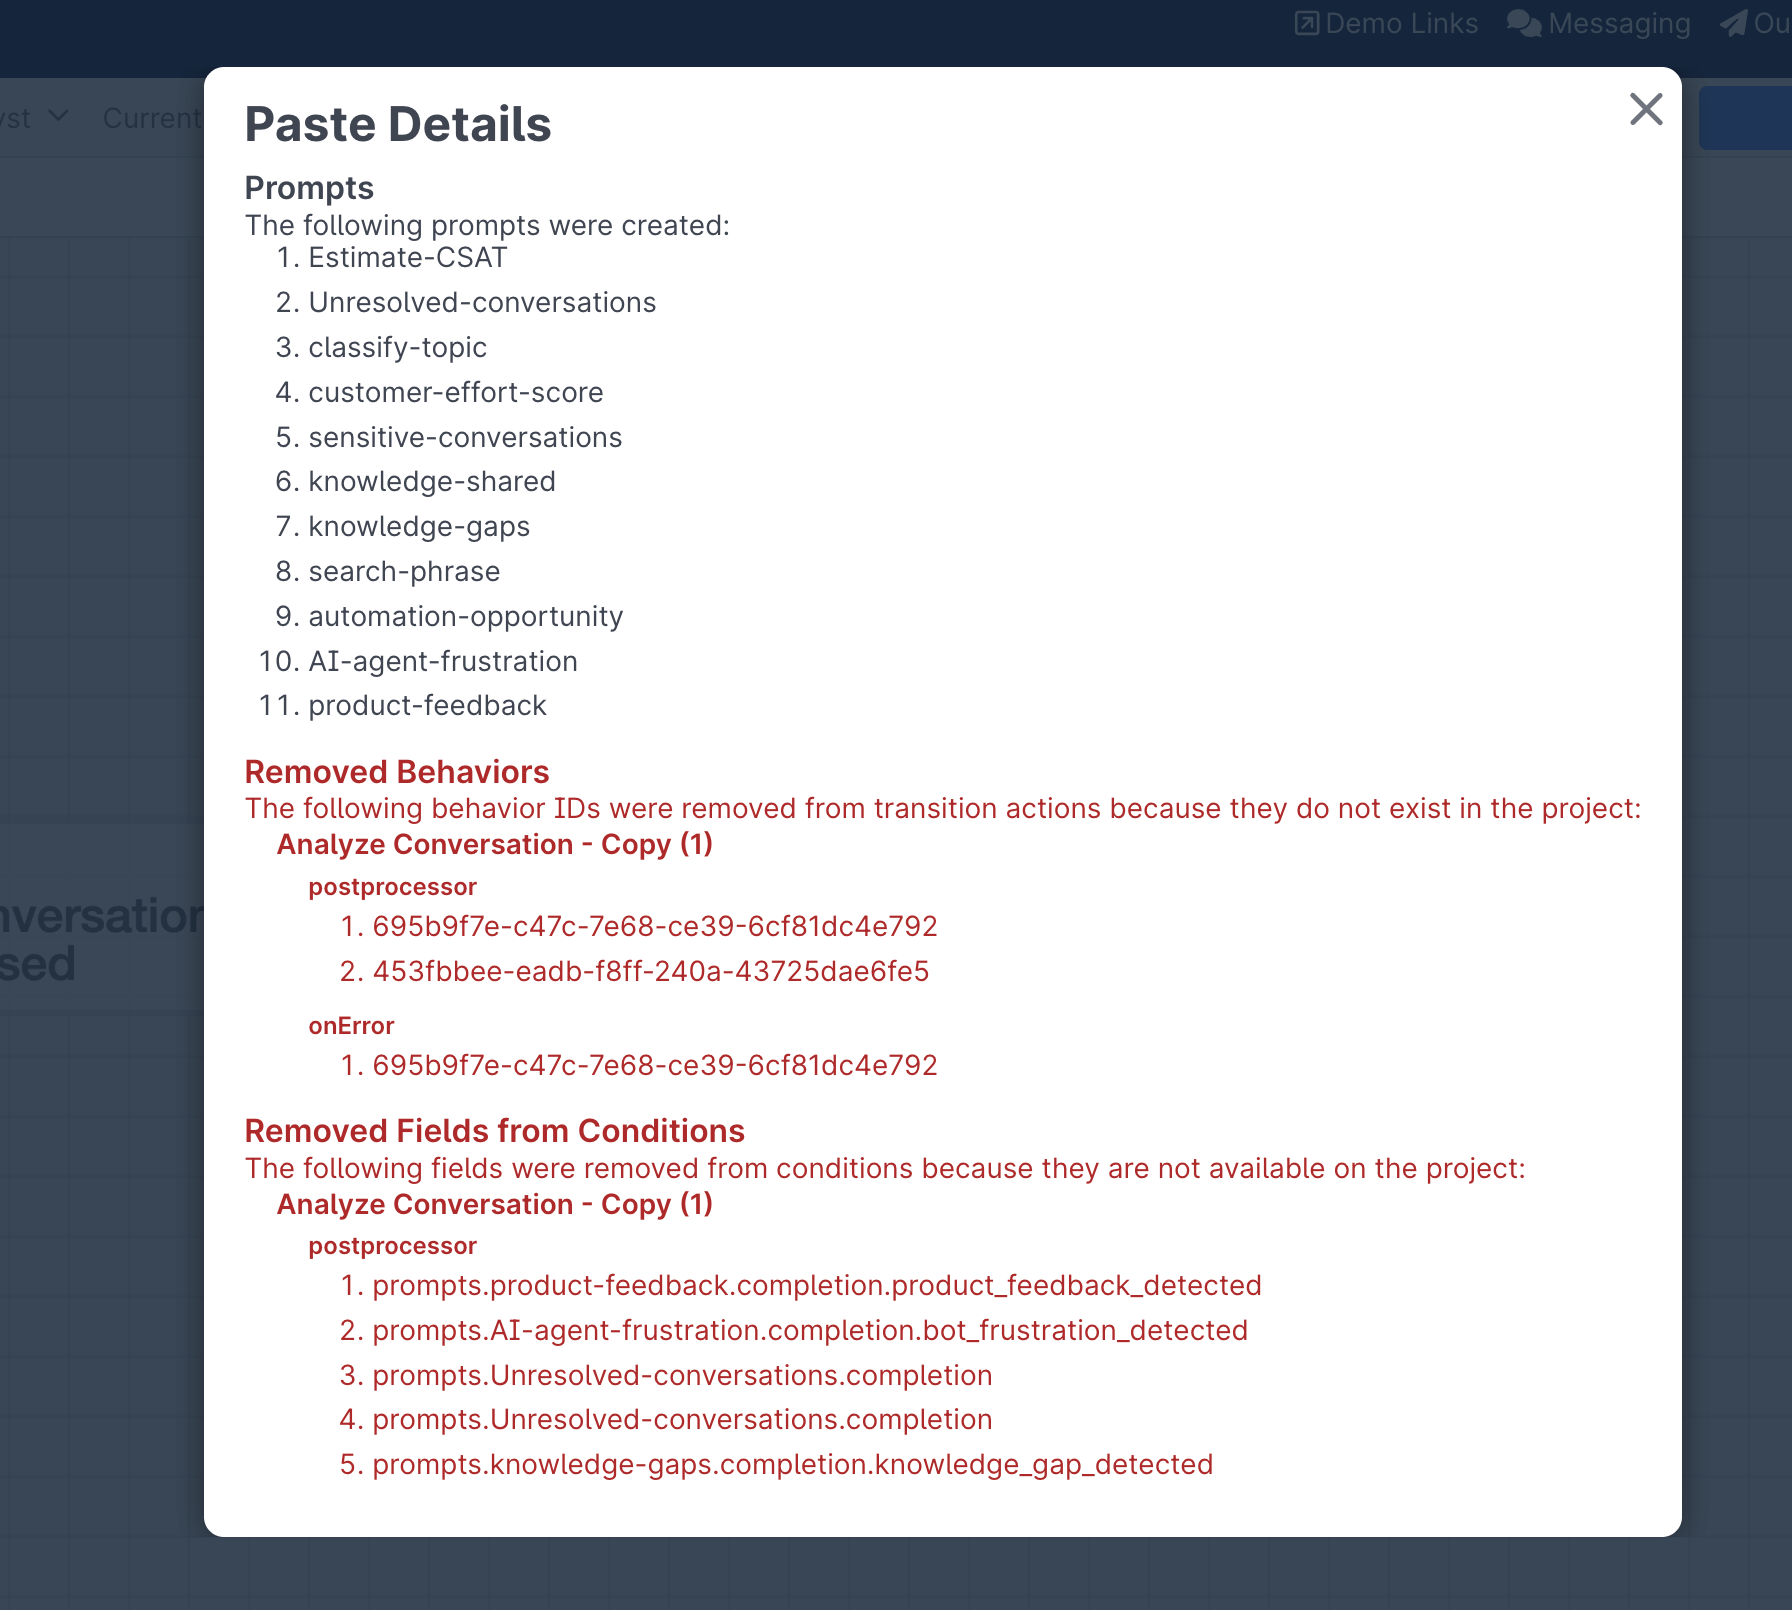
Paste Details
When a behavior or action is not valid for the target project, it will not be copied over. When pasting Prompt behaviors, any Prompts created during the paste are listed for review. In either case, a Paste Details button appears at the bottom of the Flow Graph, to the left of the Hide Connections button:
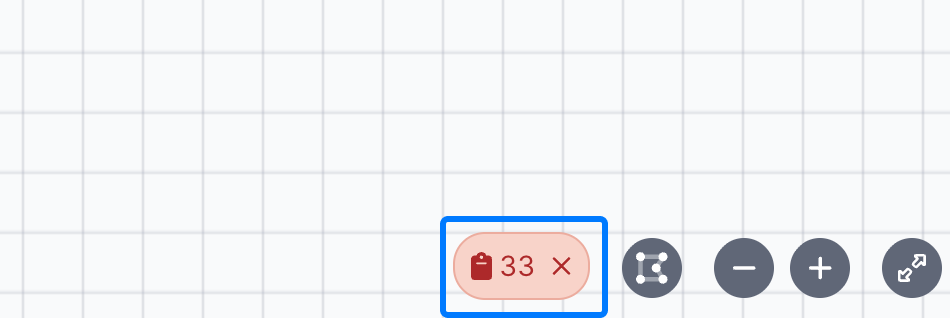
Clicking on Paste Details will open up a view to see what new Prompts were created, as well as what elements were not carried over: